


.
40.
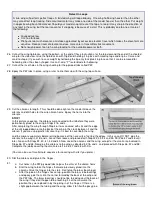
Carve the blocks roughly to shape so that the contour of the fuselage bottom block is carried on to the wing.
41.
a. Glue the blocks to the wing and fine sand the shape as shown.
b. Fill any small remaining gaps with Sig Epoxolite or a mixture of Sig Kwik-Set glue and micro-balloons or talcum
powder.
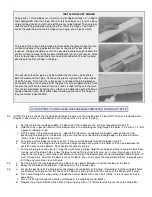
42.
a. Cut a cavity in the wing for the servo. Size will depend on the servo and/or mount. Look ahead in the book for further
ideas on the requirements for this hole.
b. Cut strips of 2" fiberglass tape for both sides of the wing center joint.
43. We use regular Sig Epoxy Glue (not Kwik-Set Glue) for applying the fiberglass tape, since it is thinner and easier to spread
out smoothly. It will be even easier to spread if you warm the mixing container by setting it in hot water for a few minutes to
raise the temperature of the glue. But work quickly, for the glue will set up much faster than normally when warmed.
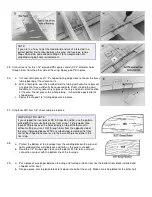
a. Coat the wing center with glue.
b. Lay the tape on top of the glue.
c. Holding one end of the tape so it won't slip, "squeegee" the glue through the tape, with a small paddle made from a
scrap of balsa. Scrape over the tape several times with the squeegee paddle to smooth the tape and remove excess
glue.
44. Glue hardwood mounts for the servo into the cavity. Coat the entire inside of the cavity with epoxy glue to prevent the
foam from being damaged by fuel or dope.
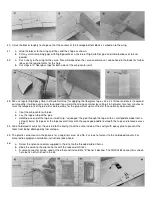
45.
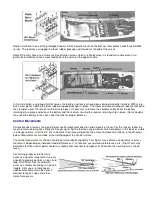
The plastic servo mount in the photo is for a Logictrol servo. Use No. 2 screws to fasten it to the hardwood mounts. For
more radio equipment installation instructions look ahead.
46.
a. Screw the nylon connectors supplied in the kit onto the threaded aileron horns.
b. Hook the servo to the aileron horns with the rods and HC links.
c. A servo connector can be used at the other end instead of a "Z" bend, if desired. The SIGSH184 connector is shown
here but is not furnished in the kit.


