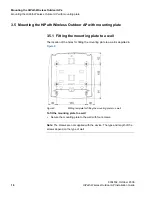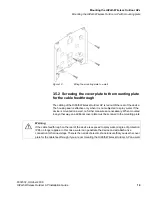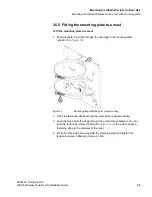
OutdoorAP_Description.fm
Mounting the HiPath Wireless Outdoor APs
Attaching cables
9034532, October 2009
HiPath Wireless Outdoor AP Installation Guide
15
The available options are as follows:
•
The cables are inserted from above (Position A in
Figure 5
). The housing of
the HiPath Wireless Outdoor AP has an opening at the top for this purpose.
•
The cables are inserted from below (Position B in
Figure 5
). There is an
opening at the bottom for this purpose.
•
Cables inserted through a wall behind the HiPath Wireless Outdoor AP
(Position C in
Figure 5
). You will need to mount the HiPath Wireless Outdoor
AP so that the opening in the wall is located above the lower edge of the
device.
3.3.2 Grounding terminal
The chassis ground connector is located on the rear of the device (M4 thread).
Connect the ground cable before you mount the HiPath Wireless Outdoor AP on
the wall or on the optional mounting plate. Once the Wireless AP is mounted, the
connector is no longer accessible.
Place the supplied toothed washer directly on the rear of the device before
screwing on the ground cable. Only then you can be sure that there is ideal
contact with the screwed-on cable.
Figure 6
Chassis ground connector
Warning
To operate the Outdoor Wireless safely, the chassis ground connector must have a suitable cable
connected to it. Do not use the HiPath Wireless Outdoor AP without a connected ground cable.


