66
8.
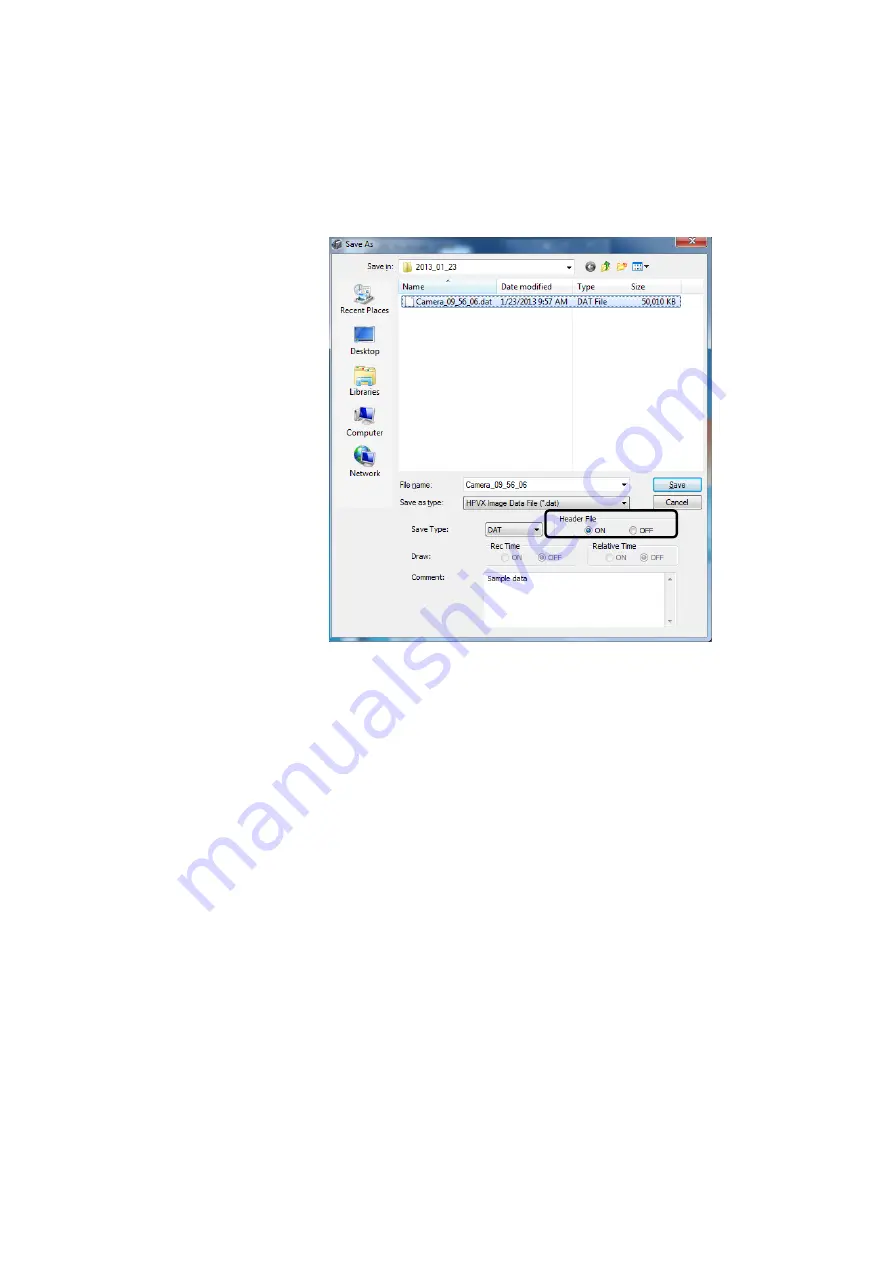
Click [Save].
When overwriting a file, the original DAT file is updated.
If the file name is changed, the DAT file is created in the current directory using the
new file name.
To not save the file, click [Cancel].
Fig. 5-29 Window for Saving Files 1 (SAVE)
■
Other Formats
1.
Display the image that is to be saved with comments in the Viewer window.
Load the applicable image data, as described in 5.6.1 Image File Operations.
2.
Click [SAVE] from the file operation list icon to display the window for saving
files.
3.
Since the converted image file is named based on the name of the DAT file
being converted, change the file name as required.
4.
Select the file format from BMP, JPEG, AVI(8-bit), AVI(24-bit), TIFF or TIFF (16-
bit) in [Save Type].
To specify including the date/time or relative time information in the lower right
corner of images, as shown in Fig. 5-31, select [ON] for [Rec Time] and [Relative
Time] settings in the window for saving files (Fig. 5-30) or [OFF] to not display the
information.
5.
Specify the destination for saving the file.


