background image

15

General Operation

2

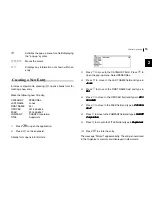
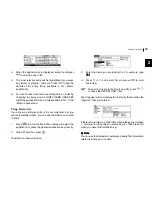
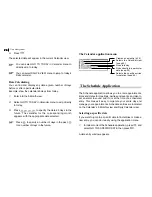
Activities the pop-up menu for a field displaying

the “pop-up” symbol.


Moves the cursor.


Displays any information not shown within an

entry.

Creating a New Entry

In Index or View mode, pressing 

 opens a blank form for

creating a new entry.

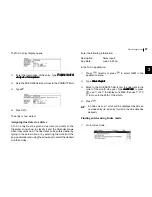
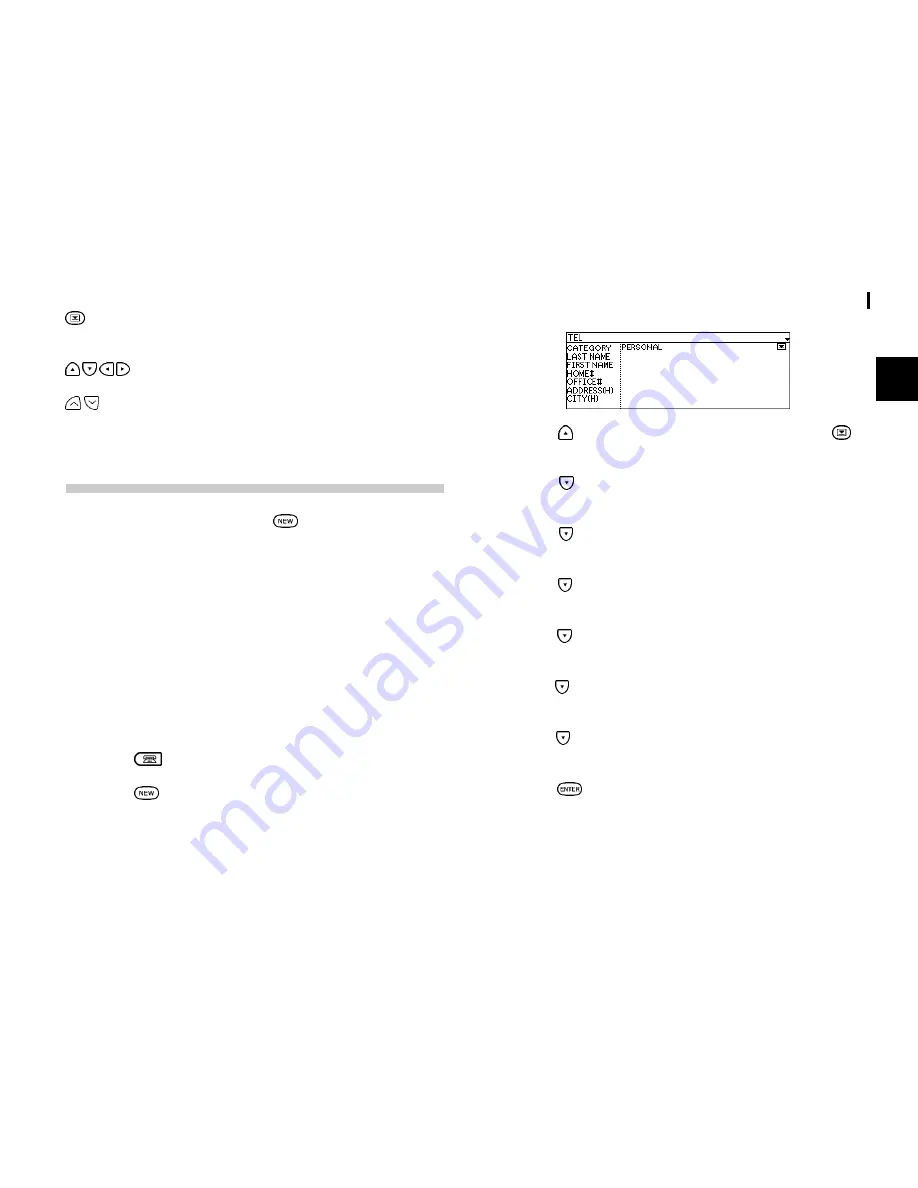
Make the following new Tel entry:

CATEGORY

PERSONAL

LAST NAME

Jones

FIRST NAME

Pat

OFFICE#

201-555-6546

FAX#

201-555-6547

COMPANY

SHARP Corporation

TITLE

Supervisor

1.

Press 

 to open the application.

2.

Press 

 on the keyboard.

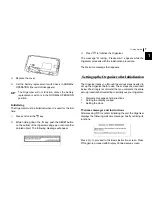
A blank form opens in Edit mode.

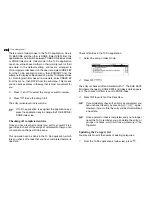
3.

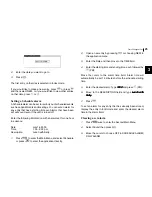
Press   to move to the CATEGORY field . Press 

 to

open the pop-up menu. Select PERSONAL.

4.

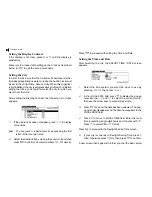
Press   to move to the LAST NAME field and type in

Jones

Jones

Jones

Jones

Jones

.

5.

Press   to move to the FIRST NAME field and type in

P

PP

PPat

at

at

at

at

.

6.

Press   to move to the OFFICE# field and type in 

201-

201-

201-

201-

201-

555-6546

555-6546

555-6546

555-6546

555-6546

.

7.

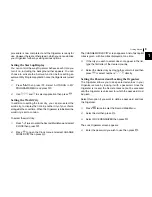
Press   to move to the FAX# field and type in 

201-555-

201-555-

201-555-

201-555-

201-555-

6547

6547

6547

6547

6547

.

8.

Press   to move to the COMPANY field and type in 

SHARP

SHARP

SHARP

SHARP

SHARP

Corporation

Corporation

Corporation

Corporation

Corporation

.

9.

Press   to move to the TITLE field and type in 

Supervisor

Supervisor

Supervisor

Supervisor

Supervisor

.

10.

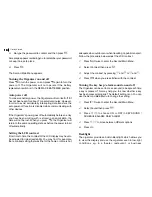
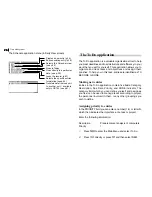
Press 

 to store the entry.

The message “Stored!” appears briefly. The entry is now stored

in the Organizer’s memory and displayed in View mode.

Содержание OZ730 Operation

Страница 1: ...erence will not occur in a particular installation If this equipment does cause harmful interference to radio or television reception which can be determined by turning the equipment off and on the user is encouraged to try to correct the interference by one or more of the following measures Reorient or relocate the receiving antenna Increase the separation between the equipment and receiver Conne...

Страница 2: ...n examples shown in this manual The screen examples shown in this manual may not exactly match those of the product may not exactly match those of the product may not exactly match those of the product may not exactly match those of the product may not exactly match those of the product For example although the field name is reversed on the product s screen the field name on the relevant screen in...

Страница 3: ... Calendar Application The Schedule Application The To Do Application The Birthday Ann Anniversary Application Chapter 4 Chapter 4 Chapter 4 Chapter 4 Chapter 4 Creating Y Creating Y Creating Y Creating Y Creating Your Own Database our Own Database our Own Database our Own Database our Own Database 31 32 31 32 31 32 31 32 31 32 The Tel Application Chapter 5 Chapter 5 Chapter 5 Chapter 5 Chapter 5 M...

Страница 4: ...use the Add on How to use the Add on How to use the Add on How to use the Add on How to use the Add on 61 62 61 62 61 62 61 62 61 62 Installing My Programs application Setting a My Programs application to Autorun Appendices Appendices Appendices Appendices Appendices 63 67 63 67 63 67 63 67 63 67 A Resetting the Organizer All reset operation B Battery Replacement General guidelines Replacing the o...

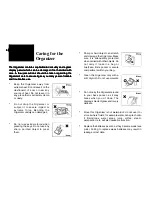
Страница 5: ...years of reliable Organizer s care to ensure it gives you many years of reliable and trouble free use and trouble free use and trouble free use and trouble free use and trouble free use Keep the Organizer away from extreme heat Do not leave it on the dashboard of a car or near any source of heat Do not leave it in any place that is extremely damp or dusty Do not drop the Organizer or subject it to...

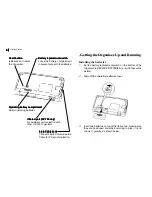
Страница 6: ...stration of the parts of the Organizer and basic explanation of its key features from the keyboard to the display and its of its key features from the keyboard to the display and its of its key features from the keyboard to the display and its of its key features from the keyboard to the display and its of its key features from the keyboard to the display and its symbols symbols symbols symbols sy...

Страница 7: ... replacement switch Battery replacement switch Battery replacement switch Battery replacement switch Battery replacement switch Locks the battery compartment to prevent access to the batteries Operating battery compartment Operating battery compartment Operating battery compartment Operating battery compartment Operating battery compartment Holds operating batteries Infrared port OZ Infrared port ...

Страница 8: ...lease wait appears while the Organizer proceeds with the initialization procedure The Welcome message then appears Setting up the Organizer after Initialization The Organizer takes you through the various steps needed to set up the Organizer before use These steps are described below We strongly recommend that you complete the entire set up procedure before starting to actually use your Organizer ...

Страница 9: ...t letter of that country name 2 Select the desired city by moving the cursor to it and then press to confirm Or select numbers directly Press to proceed with setting the Time and Date Setting the Time and Date After selecting the city the ADJUST TIME DATE screen appears 1 Select the time system you want the clock to use by pressing or then press or 2 In the LOCAL DATE field press to display the po...

Страница 10: ...rld city 1 Press twice to enter the Second Main Menu and select CLOCK then press 2 Press to open the Clock menu and select CHANGE WORLD CITY then press The CHANGE WORLD CITY screen appears A list of six capital cities is given with five cities displayed at one time 3 If the city you wish to select does not appear in the list type the first letter of the desired country 4 Select the desired city by...

Страница 11: ...ically Setting the LCD contrast From time to time the contrast of the LCD display may have to be adjusted for ideal readability You may find for example that a contrast setting that was fine for the home or office is not adequate when outdoors or when travelling on public tansport Follow the procedure below adjust the LCD contrast 1 Press twice to enter the Second Main Menu 2 Select Contrast then ...

Страница 12: ...tart an application select the application in the Main Menus or press the Application keys on the left of the screen Main Tel Schedule Memo My Programs When working in one application you can switch to another application simply by pressing that application key Main Tel Schedule Memo My Programs only Data being processed in the first application will be kept even if the entry is not complete Menu ...

Страница 13: ...after pressing There is no need to hold down while you press the desired key Special symbols and characters such as and can also be entered by using For a full explanation see P 48 Display Symbols The following symbols appear at the top right hand corner of the screen to indicate various operating conditions has been pressed In caps lock mode all typed letters will be in upper case Press again to ...

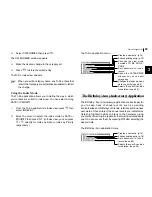
Страница 14: ... application press to enter the Main Menu to select the application or simply press the application key located on the left of the display Press the selected application will appear Any application already being displayed will be hidden whenever a new application is selected You can always return to another application at the exact point where you left off simply by pressing its key again However ...

Страница 15: ...tions Other operations Other operations Creates a new entry for the current application in Edit mode Edits the currently displayed entry Deletes the currently selected entry Displays any previous subsequent entries not shown Displays any information not shown within an entry Switches to Index mode Edit mode Edit mode is used to create a new entry or edit an existing entry Other operations Other op...

Страница 16: ...elect PERSONAL 4 Press to move to the LAST NAME field and type in Jones Jones Jones Jones Jones 5 Press to move to the FIRST NAME field and type in P P P P Pat at at at at 6 Press to move to the OFFICE field and type in 201 201 201 201 201 555 6546 555 6546 555 6546 555 6546 555 6546 7 Press to move to the FAX field and type in 201 555 201 555 201 555 201 555 201 555 6547 6547 6547 6547 6547 8 Pre...

Страница 17: ... boxes The number of fields in each application varies as do the types of fields The different types of field include text fields a date field time fields and pop up fields You can type any character into a text field The size of a text field is limited only by the size of the entry Text fields adjust their size automatically to accommodate the number of lines entered Only a date can be entered in...

Страница 18: ...per case letters functions like a Caps lock key on a typewriter or computer Once pressed the symbol will appear at the upper right corner of the display Any letters typed while the Organizer is in CAPS mode will appear in upper case To switch back to lower case mode simply press again To enter lower case letters while in CAPS mode hold down while pressing a letter key Numbers Numbers Numbers Numbe...

Страница 19: ...ted text with whatever is currently in the clipboard For a full explanation of the cut copy paste functions see p 47 Scrolling the Display If there is more information than can be displayed at one time or will appear at the top right hand corner of the screen Press or to scroll the information one line at a time Finding Specific Entries in Your Organizer There are a number of ways that you can loc...

Страница 20: ...h command to find it 1 Press to enter the Main Menu Screen to select the application or press the desired application key directly 2 Press and then press The Search window will open 3 Enter the name you are looking for For example type P P P P Pat at at at at 4 Press or and select Tel and press to start searching To search only secret entries see p 58 press to check the SECRET ONLY item The Organi...

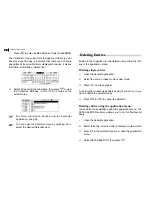
Страница 21: ...elect the desired Calendar view Deleting Entries Entries in the Organizer can be deleted using either the key or the application menu Deleting single entries 1 Open the desired application 2 Select the entry in Index mode or view mode 3 Press on the keyboard A confirmation message appears asking if you are sure you want to delete the selected entry 4 Press or to cancel the deletion Deleting entrie...

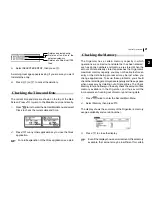
Страница 22: ...1 Press twice to enter the Second Main Menu 2 Select Memory then press The display shows the summary of the Organizer s memory usage availability and version number 3 Press to close the display Even if the display shows a small amount of free memory available that amount may be insufficient for certain Deletes a selected entry Deletes all entries in the selected category Deletes all entries in all...

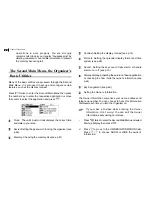
Страница 23: ... organizer see p 56 Memory Checking the memory size see p 21 Contrast Setting the display contrast see p 10 Formats Setting the calendar display format and time system see p 59 Sound Setting the key sound daily alarm schedule alarm on or off see p 10 Start up display Activating the autorun of basic application or choosing to show hide the owner s information see p 55 Key Assignment see p 60 Settin...

Страница 24: ...nagement features of these applications work for you on a daily basis features of these applications work for you on a daily basis features of these applications work for you on a daily basis features of these applications work for you on a daily basis features of these applications work for you on a daily basis The Calendar Application The Calendar represents the Organizer s most central utility ...

Страница 25: ...er of days in the past for a number of days in the future The Schedule Application The Schedule application allows you to enter appointments times and dates for meetings parties and events and also to set an alarm to sound prior to or at the time of a scheduled entry This makes it easy to organize your entire day and manage your appointments Schedule entries are indicated on the Calendar s 3 Month...

Страница 26: ...in Menu and select Schedule or press to enter the application directly 2 Open a new entry by pressing or choosing NEW in the application menu 3 Enter the Date and then move to the TIME field 4 Enter the starting time and ending time each followed by PM Move the cursor to the alarm time field Alarm time will automatically be set 15 minutes before the schedule starting time 5 Enter the desired alarm...

Страница 27: ... define yourself and assign as you like can be used to manage tasks according to project the personnel involved in them or any other groupings you wish to define Assigning priority to entries In the PRIORITY field you can enter a number 1 5 or letter N which then indicates the importance of a task or project Enter the following information Description Prepare market analysis of computers Priority ...

Страница 28: ...ered either by typing in the actual date or by selecting the date from the pop up calendar and using the arrow keys to select the desired month and day Enter the following information Description Sales report Due Date June 20 2000 In the To Do application 1 Press directly or press to select NEW in the application menu 2 Type Sales Report Sales Report Sales Report Sales Report Sales Report 3 Move t...

Страница 29: ...pplication key to change the TO BE DONE DONE Index view Checking off completed entries Once you have reached a target you set for yourself it is a good idea to check off the entry as completed so that you can concentrate on things still to be done This operation can be done in the To Do application which lets you check off a task that you have completed before its due date Check off entries in the...

Страница 30: ... TheBirthday Ann Anniversary Application The Birthday Ann Anniversary application makes it easy for you to keep track of annual events such as wedding anniversaries and birthdays of friends relatives and business associates Once entered the annual events are indicated by dates highlighted in white on black on the Calendar giving you plenty of warning to prepare for them well in advance every year ...

Страница 31: ...Time Management 30 30 30 30 30 ...

Страница 32: ...s business contacts business contacts business contacts The Tel Application The Tel application stores the names telephone numbers and addresses of business clients companies personal friends and so on To make a new Tel entry see page 15 Updating the Category list You may wish to edit the names of existing categories 1 From the TEL application s index view press 2 Select CATEGORIES then press The ...

Страница 33: ... The Tel application menu Creates a new entry see p 15 Edits an existing entry see p 16 Sets password to lock a record see p 56 Opens the CATEGORY window so you can edit or select category Selects the INDEX ITEMS according to the Home number or Office number Selects the FIELD ORDER assigned to PERSONAL or BUSINESS category Selects the INDEX BY to change the index according to the FIRST NAME or LAS...

Страница 34: ...e device The Memo Application The Organizer s Memo application provides you with a simple yet powerful means of recording information from meeting notes to memorandums and letters Before reading this chapter be sure you have read Editing Techniques in Chapter 2 More advanced editing features are used in this chapter Be sure you have a good understanding of the Organizer s basic editing procedures ...

Страница 35: ... ways alphabetically according to their title and by date of entry You can choose whether to display the entries in date order or alphabetical order to make finding the desired entry as easy as possible If the alphabetical order is selected type in a title is good idea for quick access to the data Creates a new entry p 15 Edits an existing entry p 16 Sets password to lock a record see p 56 Changes...

Страница 36: ...very useful information you need to enjoy full use of these very useful information you need to enjoy full use of these very useful information you need to enjoy full use of these very useful information you need to enjoy full use of these very useful applications applications applications applications applications The Calc Calculator Application The Organizer provides a 12 digit calculator which ...

Страница 37: ...by 0 Calculation examples Conversion function The Organizer can be used to perform conversions between different currencies and units of length area volume mass temperature and energy There are 4 conversion index groups The first index group comprises 8 currency conversion screens in which you can set and edit the exchange rates yourself The other 3 index groups have preset conversion factors so c...

Страница 38: ... a conversion erforming a conversion erforming a conversion erforming a conversion erforming a conversion For example you want to find out how many liters there are in 10 gallons 1 Press to enter the Main Menu and select Conversion then press Press again to see conversion lists 2 Press and or and to move through seven conversion groups until you find the Volume units conversion 3 Select gal l and ...

Страница 39: ...cities or any region around the world The Clock is used as the reference time by the Calendar Schedule and To Do applications In addition to these features daylight saving time DST can be enabled for any city you designate and for those countries that use an annual Daylight Saving Time adjustment As an aid to international business and travel the Organizer is set to display the time in any other c...

Страница 40: ... showing the new Local city The time is automatically adjusted Certain countries will be abbreviated as follows Federal Republic of Germany GERMANY F R Papua New Guinea PAPUA N GUINEA Czech Republic CZECH REP Republic of Trinidad and Tobago TRINID TOB Dominican Republic DOMINICAN REP French Polynesia FR POLYNESIA United Arab Emirates U A EMIRATES United States of America USA Country and city names...

Страница 41: ... as well as the Local city if you choose Clock in the Second Main Menu The Organizer also shows you the time difference between the current World city and the Local city When you first use the Organizer the default World city is London T T T T To change the W o change the W o change the W o change the W o change the World city orld city orld city orld city orld city 1 Press to open the Clock menu ...

Страница 42: ...abling DST Enabling and disabling DST Enabling and disabling DST Once DST is assigned to a city it remains in effect until it is de assigned Once a year cities using DST will switch back to regular time Rather than having to de assign DST for each city separately you can simply disable the Organizer s DST feature itself which then applies to all cities within the Organizer When these cities switch...

Страница 43: ...ds To unset an alarm select SET DAILY ALARM from the Clock Menu select the alarm you want to turn off and press Disabling all alarms Once you have set an alarm it will sound at the appropriate time whether the Organizer is turned on or off There may be times when you do not want to hear any of the set alarms You can disable all Daily alarms sound easily 1 Press twice and select Sound then press 2 ...

Страница 44: ...EXPENSE REPORT option allows expenses In addition the EXPENSE REPORT option allows expenses In addition the EXPENSE REPORT option allows expenses In addition the EXPENSE REPORT option allows expenses In addition the EXPENSE REPORT option allows you to see the total expenses for a single day or for a certain you to see the total expenses for a single day or for a certain you to see the total expens...

Страница 45: ...n of records in the EXPENSE REPORT mode Daily or Period expense summaries for entire records or for each payment type can be obtained Records marked as secret are not included in summaries if the SECRET function is on If an inappropriate date is entered for example an ending date which is earlier than the starting date no calculation will be made so be sure to enter the correct dates Select EXPENS...

Страница 46: ...ly 14 to Aug 14 2000 1 Press to enter the Main Menu and select Expense then press 2 Press to open the Expense menu 3 Select EXPENSE REPORT then press A blank form is displayed 4 Select ALL 5 Press to move to the Period field Enter the From and To date Type in 07142000 07142000 07142000 07142000 07142000 and 08142000 08142000 08142000 08142000 08142000 respectively 6 Move to the Payment Type field ...

Страница 47: ...3 Select CATEGORIES or PAYMENT TYPE and then press 4 Make any changes as you like 5 Press to save the changes or to cancel the changes Creates a new entry see p 43 Edits an existing entry see p 16 Sets password to lock a record Selects the Expense Report function see above Opens the CATEGORIES window so you can edit the category see above Opens the PAYMENT TYPE window so you can edit the payment t...

Страница 48: ...sk and your own way of working current task and your own way of working current task and your own way of working current task and your own way of working current task and your own way of working In general Schedule T In general Schedule T In general Schedule T In general Schedule T In general Schedule To Do Birthday Ann Expense T o Do Birthday Ann Expense T o Do Birthday Ann Expense T o Do Birthda...

Страница 49: ...o store the entry when you have finished Special Characters The Organizer has a list of symbols such as and These symbols and accented characters can be easily accessed and inserted into an entry Select any of these special characters and insert it at the cursor s current location 1 When entering data or editing an entry in any application in Edit mode position the cursor where you want to insert ...

Страница 50: ... selected again as the default The Organizer automatically displays the ten characters most recently selected from the Symbol menu in its first page making it easy to quickly access characters that you use frequently You can use the following keyboard shortcuts keyboard shortcut Ç ß followed by the desired letter ...

Страница 51: ...Features and Utilities for Added Power 50 50 50 50 50 ...

Страница 52: ...criptions and examples to get you This chapter provides descriptions and examples to get you This chapter provides descriptions and examples to get you up and running quickly with these powerful features up and running quickly with these powerful features up and running quickly with these powerful features up and running quickly with these powerful features up and running quickly with these powerf...

Страница 53: ...n be transferred 1 Turn on both Organizers 2 Open the same application on each Organizer 3 On the receiving Organizer press to open the application menu and select UNIT TO UNIT TRANSFER then press 4 Select GET DATA APPEND then press 5 On the sending Organizer press to open the application menu and select UNIT TO UNIT TRANSFER then press A submenu opens 6 Select SEND ALL IN THIS VIEW All entries in...

Страница 54: ...to activate the PC SYNC PC LINK mode Your Organizer is now ready to transfer data Consult the Day Timer Organizer SHARP Edition HELP file regarding subsequent transfer procedures Press at any time to exit the PC Link mode If you leave the Organizer in PC Link mode more power is consumed from the batteries than usual and the auto power off function does not work To conserve battery power always pre...

Страница 55: ...Data Transfer 54 54 54 54 54 ...

Страница 56: ...rity for its entries and The Organizer offers a level of security for its entries and The Organizer offers a level of security for its entries and The Organizer offers a level of security for its entries and The Organizer offers a level of security for its entries and operations It is to define particular entries within various operations It is to define particular entries within various operation...

Страница 57: ...ng a password you will be prompted to enter that password upon start up The Organizer cannot be used if the password is not entered correctly This is an important security feature for users whose Organizers contain sensitive information Turning on the LOCK 1 Press twice to enter the Second Main Menu select Secret then press The SECRET submenu appears 2 Select LOCK ORGANIZER then press The LOCK ORG...

Страница 58: ... locked which hides all secret entries an entry which has just been marked as secret will be hidden together with all other secret entries for more information see the next section Accessing Secret entries Entries marked as secret are not shown in any of the Organizer s display modes when it is locked and cannot be accessed using any of the search methods To be able to recall and access secret ent...

Страница 59: ...Select Secret then press The SECRET submenu appears 3 Select LOCK ORGANIZER and press appears at the top right corner indicating that the Organizer is now locked Changing or deleting the password To register a new password the current one must first be deleted 1 Press twice to enter the Second Main Menu 2 Select Secret then press The SECRET submenu appears 3 Select DELETE PASSWORD then press 4 Ent...

Страница 60: ...s A submenu appears 3 In WEEKLY FORMAT press to select SUNDAY or MONDAY then press The Three month view and daily view are then displayed accordingly Setting up the date format Almost all Organizer applications require a date to be entered at some point The default format for date entry is MM DD YYYY where MM is the two digit month DD is the two digit day of the month and YYYY is the four digit ye...
Страница 61: ... Select ASSIGN TO KEY then press The current key assignments are displayed 4 Press the number or move the cursor and press to assign the application on the selected key e g press Calendar is assigned to KEY 1 5 A message showing that the buttons are successfully set appears on the screen When you select Key Assignment in the Second Main Menu the current key assigned can be seen Press to reset the ...

Страница 62: ...nizer ou cannot run PC software on your Organizer ou cannot run PC software on your Organizer ou cannot run PC software on your Organizer ou cannot run PC software on your Organizer Using the A Using the A Using the A Using the A Using the AUTORUN feature you can run an add on UTORUN feature you can run an add on UTORUN feature you can run an add on UTORUN feature you can run an add on UTORUN feat...

Страница 63: ...y then press 3 In AUTORUN field select ON then press Once the autorun is activated you can then choose the application for autorun 1 Press then press Select AUTORUN in MY PROGRAMS MENU and press 2 Use and to select application then press 3 A checkmark is added to the chosen application When you press next time the chosen application will automatically start My Programs application menu Assigns key...

Страница 64: ...ve may erase some or all of the data stored in memory Do not use anything breakable anything with a sharp tip or anything that might break to press the RESET switch In case that the Organizer does not work properly after reset you can remove the batteries and insert the batteries several seconds later Then press to open the Organizer All reset operation If the unit still fails to function after it...

Страница 65: ...ries from the unit when they become weak or when the unit will not be used for a long period of time Leaving weak batteries in the unit may cause battery leakage and damage from corrosion Do not dispose of batteries by fire as they may explode Replacing the operating batteries The Organizer detects two low battery levels which are warning and fatal When the batteries are in warning level alert mes...

Страница 66: ... is set to NORMAL OPERATION Repeat the above battery replacement procedure step by step C Specifications Model OZ 730 OZ 750 Display 239 x 80 dot matrix liquid crystal display Electronic unit section Applications Calendar Schedule To Do Birthday Anniversary Telephone Memo Expense Expense Report Clock Calculation Conversion Add on Memory capacity OZ 730 1 5MB Flash memory User area approx 896KB for...

Страница 67: ...rminator User interfaces Keyboard Other features Secret function data transfer search function et al Calculator digits 12 Functions Addition subtraction multiplication division constant memory calculation conversion calculation Clock Crystal oscillation 32 768 Hz frequency Accuracy Average variance per day 2 seconds at 25 C 77 F Display information Year month day day of the week hours minutes AM P...

Страница 68: ...hanged with new one at least once a year Backlight life Backlight life may vary depending on usage If the backlight is on for 10 minutes per day eg 1 minute 10 times a day the brightness will be reduced by half after 10 years at an ambient temperature of 25 C and 65 humidity This figure may vary depending on the surrounding environment Operating 0 C to 40 C 32 F to 104 F temperature Dimensions Ope...

Страница 69: ...C Calc ulator application 35 Date calculations 24 Calculations Examples 36 Performing 35 Date calculation 24 Conversion 36 Calendar application Setting up the initial display 59 Calendar view Daily 23 Monthly 23 Selecting 23 3 month 23 Caring for the Organizer 4 Categories To Do application category list 28 Changing see also customizing Large font view 60 Calendar format 59 Local city Clock 38 Che...

Страница 70: ... Edit mode 14 Index mode 13 View mode 14 E Edit mode 14 Editing Techniques 16 Editing Categories 28 Entries 16 Exchanging information with Personal Computer 52 F Fields 16 Finding entries 18 34 see also Search By date 19 Using keywords 19 Using the index mode 18 Font Changing large font view 60 I Index mode 13 Infrared transfer 51 Initializing 7 Installing Batteries 6 K Key beep 10 Keyboard 12 L L...

Страница 71: ...rning on and off 10 R Replacing Operating batteries 64 S Schedule alarms 25 Clearing 25 Setting 25 Schedule application 24 Scroll the display 18 Search see the Finding By keyword 19 By date 19 Search function 18 Secret function 56 Selecting Calendar views 23 Date 23 Display modes 13 Setting Clock 8 38 Date Format 59 LCD contrast 10 Local city 38 Owner Information 55 Password 56 Schedule alarms 25 ...

Страница 72: ...nsferring data Between two OZ 750 51 Organizers With an Organizer other than OZ 750 51 Single entries 52 Via infrared 51 With a personal computer 52 Turning on off Key beep 10 Power 10 Setup display 9 Typing in text Letters 17 Numbers 17 Symbols 17 U Unlocking the Organizer 56 W World City 40 ...

Страница 73: ...the enclosed registration card so that we can keep you up to date as new products and services become available so that we can keep you up to date as new products and services become available so that we can keep you up to date as new products and services become available so that we can keep you up to date as new products and services become available so that we can keep you up to date as new pro...

Страница 74: ...und at the set time The Backlight does not function Solution Solution Solution Solution Solution Adjust the LCD contrast see p 10 Install new batteries see p 6 Adjust the LCD contrast see p 10 Reset the Organizer see p 63 The Organizer s memory is full or nearly full Delete unnecessary data You can check the amount of free memory using CHECK MEMORY in the Second Main Menu see p 21 Enable alarms in...

Страница 75: ... sole and exclusive remedy available to the purchaser Correction of defects in the manner and for the period of time described herein shall constitute complete fulfillment of all liabilities and responsibilities of Sharp to the purchaser with respect to the Product and shall constitute full satisfaction of all claims whether based on contract negligence strict liability or otherwise In no event sh...

Страница 76: ...12345678901 12345678901 12345678901 12345678901 12345678901 12345678901 12345678901 12345678901 12345678901 12345678901 12345678901 12345678901 12345678901 12345678901 12345678901 12345678901 12345678901 12345678901 12345678901 12345678901 12345678901 Changing the batteries Changing the batteries Changing the batteries Changing the batteries Changing the batteries When using the organizer if the b...

Страница 77: ... Search F Search F Search F Search F Search Function unction unction unction unction This function allows you to locate any previously stored entry by using partial or specific data as a search key 1 Open the desired application 2 Press 3 Type in any word stored in the entries you want to find To search only secret entries press to check the SECRET ONLY item if the Organizer is unlocked 4 Press to...

Страница 78: ...by pressing to paste it elsewhere If you make a mistake and want to restore the original entry simply press Birthday Ann Anniversary Application Birthday Ann Anniversary Application Birthday Ann Anniversary Application Birthday Ann Anniversary Application Birthday Ann Anniversary Application Makes it easy for you to keep track of annual events such as wedding anniversaries and birthdays of friends...

Страница 79: ... 4 Press or to copy or cut the selected text 5 Display in Edit mode the entry to which you want to add the copied or cut text and press Schedule Application Schedule Application Schedule Application Schedule Application Schedule Application Used for tracking meetings appointments and time sensitive data Press then press If you want to use a different date move up to the DATE field and press the ke...

Страница 80: ...tion keys Three function keys are available for key assignment 1 Highlight the application for key assignment first 2 Press and select ASSIGN TO KEY then press 3 Press the respective number key 4 Press the assigned key can enter the application chosen before T T T T To Do Application o Do Application o Do Application o Do Application o Do Application Used for organizing and tracking tasks and obje...

Страница 81: ... F assword Secret F assword Secret F assword Secret Function unction unction unction unction This function allows you to keep selected information in your organizer secure by locking it with a password that you specify Entries that you have marked as secret cannot be accessed until the organizer is unlocked using the password Turning on the Lock 1 Press twice to enter the Second Main Menu 2 Select...

Страница 82: ...at in the TIME SYSTEM 7 Press or to cancel the changes Expense application Expense application Expense application Expense application Expense application A sophisticated and easy to use tool for managing your personal and business finances etc 1 Press to enter the Main Menu and select Expense then press 2 Press 3 Press to move to the CATEGORY field Press to select the desired category 4 Enter the...

Страница 83: ... to open the conversion index display 3 Press or to select the desired item 4 Press 5 Enter the amounts you want to convert then press or Changing the currency rate Changing the currency rate Changing the currency rate Changing the currency rate Changing the currency rate 1 Select Conversion in the Main Menu 2 Press to open the conversion index display 3 Select the desired currency item and press ...

Отзывы: