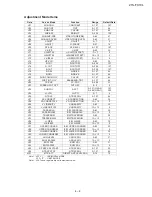

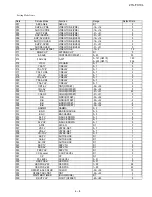
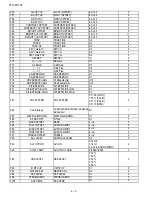


21S-FX10L
5 – 9
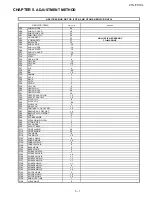
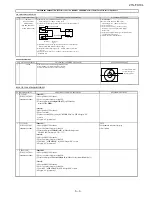
FUNCTION OPERATION CHECKING (VIDEO & AUDIO) (1)
NO
ADJUSTMENT POINT
WAVEFORM OR REMARKS
1
PICTURE Key
(1) Receive "US 4 CH LION HEAD Signal (NTSC 60 Hz)" signal.
(2) Press to Menu mode, then select Picture Mode and set to select CONTRAST.
(3) Press Volume Up/Down key to check whether the CONTRAST effect is OK or not.
2
COLOUR Key
(1) Receive the "US 10 CH HALF Color Bar" signal
(2) Press to Menu mode, then select Picture Mode and set to select COLOUR.
(3) Press Volume Up/Down key to check whether the COLOUR effect is OK or not.
3
BRIGHTNESS Key
(1) Receive "US 4 CH LION HEAD Signal (NTSC 60 Hz)" signal.
(2) Press to Menu mode, then select Picture Mode and set to select BRIGHTNESS.
(3) Press Volume Up/Down key to check whether the BRIGHTNESS effect is OK or not
4
TINT Key
(1) Receive the "US 10 CH HALF Color Bar" signal
(2) Press to Menu mode, then select Picture Mode and select TINT.
(3) Press Volume Up/Down key to check TINT, UP for GREEN direction and
DOWN for RED direction whether is OK or not.
5
SHARPNESS Key
(1) Receive "US 4 CH LION HEAD Signal (NTSC 60 Hz)" signal.
(2) Press to Menu mode, then select Picture Mode and set to select SHARPNESS.
(3) Press Volume Up/Down key to check whether the SHARPNESS effect is OK or NOT.
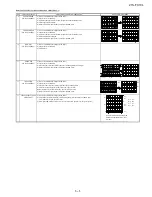
6
SURROUND
(1) Receive "music" sound signal.
(2) Set MENU, then go into SOUND MENU to select SURROUND.
(3) Press VOLUME UP/DOWN key to check SURROUND effect.
7
BALANCE
(1) Receive mono-tone signal.
(2) Set MENU, then go into SOUND MENU to select BALANCE
(3) Press VOLUME UP/DOWN key to check whether the left to right BALANCE effect is OK or not
8
EQUALIZER
(1) Receive "music" sound signal.
(2) Set MENU, then go into SOUND MENU to select EQUALIZER.
(3) Press VOLUME UP/DOWN key to check EQUALIZER effect is OK or not
ADJUSTMENT CONDITION / PROCEDURE
Содержание 21SFX10L
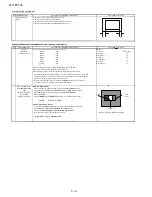
Страница 27: ...21S FX10L 8 2 19 18 17 16 15 14 13 12 11 10 ...
Страница 28: ...21S FX10L 8 3 A C B D E F G H 2 10 9 8 7 6 5 4 3 1 21S FX10L ...
Страница 31: ...21S FX10L 10 2 19 18 17 16 15 14 13 12 11 10 ...
Страница 32: ...21S FX10L 10 3 A C B D E F G H 2 10 9 8 7 6 5 4 3 1 ...
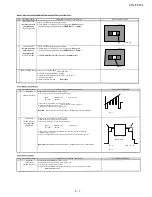
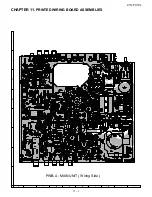
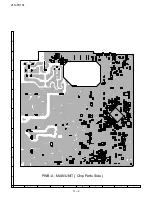
Страница 34: ...21S FX10L 11 2 PWB A MAIN UNIT Chip Parts Side A C B D E F G H 2 10 9 8 7 6 5 4 3 1 ...
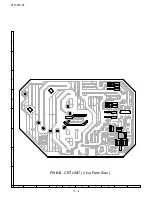
Страница 35: ...21S FX10L 11 3 PWB B CRT UNIT Wring Side A C B D E F G H 2 10 9 8 7 6 5 4 3 1 ...
Страница 36: ...21S FX10L 11 4 PWB B CRT UNIT Chip Parts Side A C B D E F G H 2 10 9 8 7 6 5 4 3 1 ...


