21S-FX10L
5 – 5
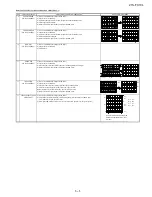
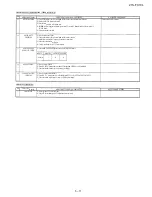
HORIZONTAL ,VERTICAL,DEFLECTION LOOP ADJUSTMENT (2)
NO
ADJUSTMENT POINT
ADJUSTMENT CONDITION / PROCEDURE
WAVEFORM OR OTHERS
8
UPPER CORNER
(1) Receive CrossHatch Pattern Signal (NTSC 60 Hz).
(I2C BUS CONTROL)
(2) Choose the service data
V37
(3) Adjust the 2nd upper vertical line from the right end of the crosshatch pattern
so that the upper line are straight.
(4) Make sure both left / right of 2nd vertical line at optimum point
9
LOWER CORNER
(1) Receive CrossHatch Pattern Signal (NTSC 60 Hz).
(I2C BUS CONTROL)
(2) Choose the service data
V39
(3) Adjust the 2nd lower vertical line from the right end of the crosshatch pattern
so that the bottom line are straight.
(4) Make sure both left / right of 2nd vertical line at optimum point
10
BOW-ADJ
(1) Receive CrossHatch Pattern Signal (NTSC 60 Hz).
(I2C BUS CONTROL)
(2) Choose the service data
V43
(3) Set
V43
to 32
11
ANGLE ADJ
(1) Receive CrossHatch Pattern Signal (NTSC 60 Hz).
(I2C BUS CONTROL)
(2) Choose the service data
V41
(3) Adjust the 2nd vertical line from the end of the crosshatch pattern line is straight
(4) Make sure both left / right of 2nd vertical line at optimum point
12
TRAPEZIUM
(1) Receive CrossHatch Pattern Signal (NTSC 60 Hz).
(I2C BUS CONTROL)
(2) Choose the service data
V33
(3) Adjust the 2nd vertical line from the right end of the crosshatch pattern
so that the D1 (center area of the second vertical line - edge of screen)
and D2 (top area of the second vertical line - edge of screen) are same.
(4) Make sure both left / right of 2nd vertical line at optimum point
13
FINAL INSPECTION OF (1) Receive CrossHatch Pattern Signal (NTSC 60Hz).
ADJUSTMENT
(2) Please make sure picture distortion (overall picture quality) must be balance at optimum point
TOP / BOTTOM at LEFT / RIGHT corner.
A1
A2
(3) If NG, please RE-ADJUST follow step 7 to 13 or adjust at NG position to get best picture quality
A1
B1
B2
C1
C2
D1 = D2
D2
D1
D2
D1
A1
B1
C1
A2
D1
B2
D2
C2
~
~
~
~
~
~
OVERALL PICTURE QUALITY MUST BE
BALANCE AT OPTIMUM POINT ( LEFT
& RIGHT )
Содержание 21SFX10L
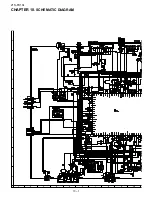
Страница 27: ...21S FX10L 8 2 19 18 17 16 15 14 13 12 11 10 ...
Страница 28: ...21S FX10L 8 3 A C B D E F G H 2 10 9 8 7 6 5 4 3 1 21S FX10L ...
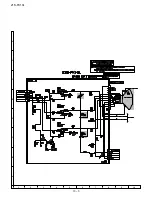
Страница 31: ...21S FX10L 10 2 19 18 17 16 15 14 13 12 11 10 ...
Страница 32: ...21S FX10L 10 3 A C B D E F G H 2 10 9 8 7 6 5 4 3 1 ...
Страница 34: ...21S FX10L 11 2 PWB A MAIN UNIT Chip Parts Side A C B D E F G H 2 10 9 8 7 6 5 4 3 1 ...
Страница 35: ...21S FX10L 11 3 PWB B CRT UNIT Wring Side A C B D E F G H 2 10 9 8 7 6 5 4 3 1 ...
Страница 36: ...21S FX10L 11 4 PWB B CRT UNIT Chip Parts Side A C B D E F G H 2 10 9 8 7 6 5 4 3 1 ...

