


Creating the site map
Page 98
FiberPatrol FP1150 Product Guide
5.
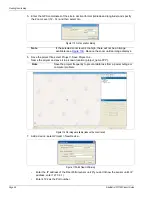
Enter the GPS coordinates of the site in decimal format (latitude and longitude) and specify
the Zoom Level (12 - 14) and then select Go.
6.
Save the project file; select Project > Save Project As...
Name the project and save it in a known location (project_name.FPP).
7.
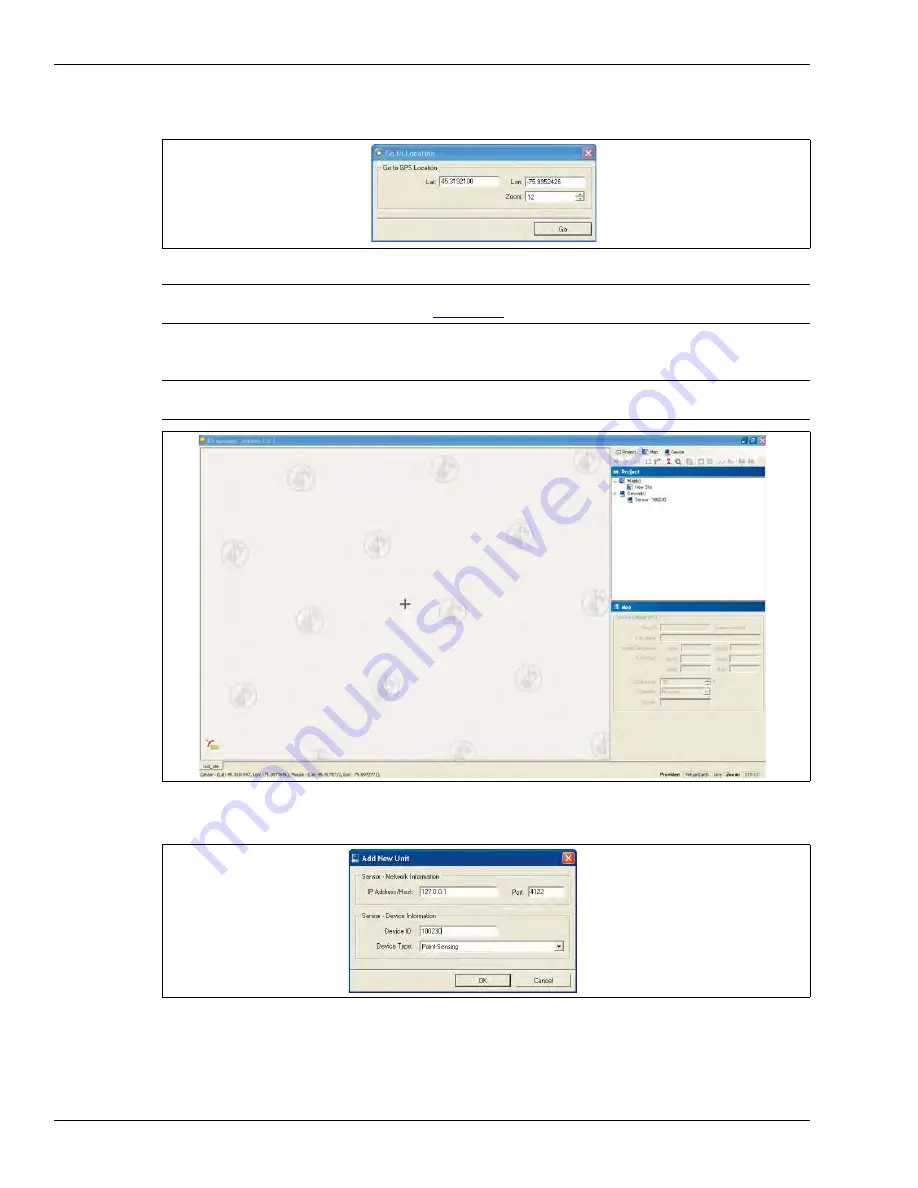
Add a device; select Project > New Device...
•
Enter the IP address of the FiberPatrol sensor unit (if you don’t know the sensor unit’s IP
address, enter 127.0.0.1).
•
Enter 4122 as the Port number.
Figure 113 Go to Location dialog
Note
If the selected zoom level is too high, there will not be an image
available (see
). Reduce the zoom until an image displays.
Note
Save the project frequently to prevent data loss from a power outage or
computer problem.
Figure 114 No image available (reduce the zoom level)
Figure 115 Add New Unit dialog
Содержание FiberPatrol FP1150 Series
Страница 72: ...Troubleshooting procedures Page 72 FiberPatrol FP1150 Product Guide ...
Страница 124: ...Page 124 FiberPatrol FP1150 Product Guide ...
Страница 134: ...Page 134 FiberPatrol FP1150 Product Guide ...


