background image

Unit

Manual

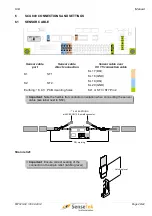
7.2.2  AUTO-SEEK

Press TA1 and TA2 simultaneously.

All LEDs other than the alarm LEDs light up

Automatic recognition and registration of all active sensors.

Sensors, connected to cable port K1, are allocated to Zone 1 (AL1).

Sensors, connected to cable port K2, are allocated to Zone 2 (AL2).

Automatic transition to monitoring mode.

Warning:

 Selecting this function will delete the current cable configuration, zones

and all messages, as well as reset all parameters to the default values.

7.2.3  TEST

This function is used to compare the expected number of sensors with the number of active sensors 
during commissioning and inspection.

During commissioning:

 Compare the number of active (recognised) sensors to the number of sensors 

noted on plans, while installing the sensor cable (

 4.1 SENSOR CABLE: Imprints). It is recommended 

to connect and test sensor cable branches individually, so that possible faults can be isolated. Connect 
all sensor cables, once individual cables have been tested and found to be correct.

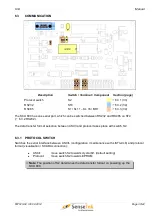
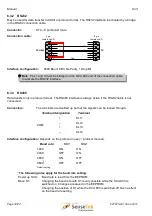
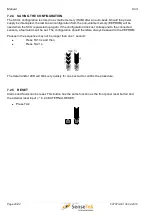
Press TA1.

The number of active sensors are indicated by the “data transfer” LED:

Tens: slow blinking

Units:  quick blinking

Example: 5 x slow, 3 x quick blinks = total of 53 active sensors

60T023-04 / 30.04.2014

LISTEC GmbH

Page 39/44

TA1

TA2

TA1

TA2

Содержание d-LIST SCU 800

Страница 1: ...are version V1 24 SenseTek Fire Security Solutions Abberdaan 162 1046 AB Amsterdam T 31 0 20 6131611 F 31 0 20 6132212 IBAN SEPA NL31INGB0006837477 BIC INGBNL2A BTW nr NL854029503B01 KvK nr 60716517 www sensetek nl info sensetek nl LISTEC and LIST are registered trade marks ...

Страница 2: ...o part of this manual may be duplicated transferred to third parties or used for other purposes than intended without prior written consent of LISTEC GmbH Subject to technical change without notice Copyright LISTEC GmbH 2013 Page 2 44 60T023 04 30 04 2014 ...

Страница 3: ...ONS 21 5 1 SECCON CONNECTIONS 21 5 1 1 CONNECTION CABLE 21 5 1 2 UNLOCK SECCON CONNECTIONS 22 5 2 CRIMP CONNECTIONS 23 5 2 1 CUTTING 23 5 2 2 STRIPPING 23 5 2 2 1 STRIPPING LS SENSOR CABLES 23 5 2 3 CRIMPING 24 5 2 4 SHIELD CONNECTOR 25 5 2 5 CONNECTION MODULES 26 5 2 5 1 UCM SEC 26 5 2 5 2 UCM ESD 27 5 2 5 3 CCM 150 A 28 6 SCU 800 CONNECTIONS AND SETTINGS 29 6 1 SENSOR CABLE 29 6 2 RELAYS AND RES...

Страница 4: ... 2 AUTO SEEK 39 7 2 3 TEST 39 7 2 4 SAVING THE CONFIGURATION 40 7 2 5 RESET 40 8 INSPECTION AND MAINTENANCE 41 8 1 INSPECTION 41 8 2 MAINTENANCE 41 APPENDIX PART NUMBERS 42 APPENDIX DIMENSIONS 43 SCU 800 43 CBO 5 SEC AND CBO 5 ESD T 43 APPENDIX OPENING SECCON 44 Page 4 44 LISTEC GmbH 60T023 04 30 04 2014 ...

Страница 5: ...of buttons are shown as follows Command CLEAR TEXT COMMAND nn Clear text command from a PC keyboard Numerical command from a PC Keyboard Manual Commands and system messages BUTTONS AND CONTROL ELEMENTS IN SOFTWARE ARE SHOWN IN THIS FONT 1 1 ABBREVIATIONS ESD Electrostatic Discharge KL Terminal LED Light Emitting Diode NC Normally Closed relays NO Normally Open relays PLC Programmable Logic Control...

Страница 6: ... safe functioning of the equipment Never pour any liquid into the housing of the equipment Short circuits and fire could result Do not drop the equipment The control unit s service temperature ranges from 10 C to 60 C Avoid exposure to moisture Get the equipment checked by service personnel if moisture has penetrated into the equipment it does not work well or it does not work according to the use...

Страница 7: ... or repaired parts Beyond these regulations the current General Conditions for the Supply of Products and Services of the Electrical and Electronics Industry issued by ZVEI the Zentralverband Elektrotechnik und Elektronikindustrie e V are applicable 2 3 STANDARDS AND CONFORMITY The SCU 800 and SEC 15 sensor cable have been tested according to the DIN EN 54 5 03 2001 product standard and its refere...

Страница 8: ...ended commissioning manual for a d LIST system 60T024 An extension of the d LIST manual 60T023 describing the commissioning of zoned d LIST systems and zonal alarm relay outputs using the REL 800 16 relay card Prerequisites for this manual are the terminal programme LISTterm8 and a training course The configured mode commissioning 3 3 OPERATION MODES and maintenance of a d LIST system are describe...

Страница 9: ...allow an exact physical location of each sensor Each sensor s position is indicated by a contiguous numerical imprint on the sensor cable jacket Imprints 4 1 SENSOR CABLE Note A d LIST system requires at least 10 sensors for a correct differential evaluation An aluminium shield screens the cable from EMI The jacket material is flame retarding and halogen free The operating temperature range of the...

Страница 10: ...re already fitted to the sensor cable Sensor cable branching is possible if the length limitations listed below are met 250 m maximum total cable length per sensor cable port SEC 15 CC 15 99 sensors maximum per sensor cable port Sensor cable is delivered prefabricated Quick connection on site no special tools required Crimping on site Stripping and crimping of the sensor cable takes place on site ...

Страница 11: ...essable sensors allows branching within certain physical limitations The following limitations should be taken into consideration Other configurations may but do not necessarily have to function Note Sub branches are not allowed Total cable length per sensor cable port for 2 branches 200 m to SCU 800 to SCU 800 60T023 04 30 04 2014 LISTEC GmbH Page 11 44 Lineare S en sor Tech nik G m b H Lineare S...

Страница 12: ... with 15 sensors 5 2 5 CONNECTION MODULES Page 12 44 LISTEC GmbH 60T023 04 30 04 2014 Linea re Se nsor Tec hnik G m b H Linea re Se nsor Tec hnik G m b H Lineare Se nsor Tec hnik G m b H Lineare Se nsor Tec hnik G m b H Linea re Se nsor Tec hnik G m b H Linea re Se nsor Tec hnik G m b H Linea re Se nsor Tec hnik G m b H Lineare Se nsor Tec hnik G m b H Lineare Se nsor Tec hnik G m b H Linea re Se ...

Страница 13: ...e length specifies the total length of all cables connected to one sensor cable port Total cable length SEC 15 Sensor cable CC 15 connection cable length of each external sensor s connection lead The combination of external sensors with a sensor cable reduces the total cable length to 200 m In this case 99 sensors may be connected to one sensor cable port with max 4 external sensors connected to e...

Страница 14: ...ode operation requires the terminal programme LISTterm8 Windows XP Windows 7 Sensors can be sorted into the required order and grouped into 64 alarm sections Thresholds can be defined for each alarm section and further project specific settings can be made Note This configuration mode requires SCU 800 software versions V1 24 or higher and at least LISTterm8 version V8 0 4 Trained personnel may pro...

Страница 15: ...erature is higher than the maximum value The differential value is higher than the threshold The differential temperature is calculated according to an algorithm which compensates for natural temperature variations e g day night seasons Note An alarm is only triggered if a pre alarm was set in the previous measuring cycle In case of an alarm the following LED and relay assignment applies for the S...

Страница 16: ...l the connection of the sensor cable takes place ESD protection ESD protection cap Heatshrink Sensor cable Prefabricated sensor cables must be installed so that the red ESD protection cap is situated at the SCU 800 or the connection box The ESD protection cap also protects the crimp and shield connectors Sensor cable delivered on cable spools always has the ESD protection on the innermost sensor c...

Страница 17: ... runs These can be up to 24m long and do not contain sensors Pre and post runs are not part of the length s shown on the delivery notes When installing the cable proceed as follows 1 Use the delivery note or spool label to determine the imprint of the first sensor Sensors are alwayslocatedunder the sensor imprint 2 Cut and seal the sensor cable at least 50 cm before the first sensor The same appli...

Страница 18: ... cables can also be connected to a SCU 800 with CC15 connection cable The change from a sensor cable to the connection cable may occur in a connection box CBO Note To ensure ingress protection IP use the correct mounting holes Important Close all unused openings with plugs Use the supplied O rings on glands and plugs Dimensions APPENDIX DIMENSIONS CBO 5 SEC AND CBO 5 ESD T Page 18 44 LISTEC GmbH 6...

Страница 19: ...edure 1 Use suitable cutters to cut off the sensor cable end straight and clean 2 Push the end cap completely over the sensor cable 3 Use a heat gun to shrink the cap shrinking temperature is approximately 120 C 60T023 04 30 04 2014 LISTEC GmbH Page 19 44 Thermoplastic glue END Section ...

Страница 20: ...It is not necessary to remove the lid from the SCU 800 during installation Cable glands Important All cable glands and plugs must be fitted with O rings Close all unused openings with plugs M202 M251 M251 Cable Ø 1 13 18 mm 2 10 14 mm 3 5 10 mm M163 M163 M202 M202 Dimensions APPENDIX DIMENSIONS SCU 800 Page 20 44 LISTEC GmbH 60T023 04 30 04 2014 Sensor Control Unit SCU 800 Lineare Sensor Technik G...

Страница 21: ...rectly in the SCU 800 6 1 SENSOR CABLE Without connectors all crimping and connections are made on site 5 2 CRIMP CONNECTIONS 5 1 SECCON CONNECTIONS SECcon connectors used to connect the sensor cable to a CC 15 connection cable which leads to the SCU 800 The opposite side of the sensor cable is sealed with an end cap The SECcon connector and the end cap are pre fitted 5 1 1 CONNECTION CABLE Fit th...

Страница 22: ... UNLOCK SECCON CONNECTIONS 8 The connection between sensor and connection cable is established once the two connectors are plugged and locked See APPENDIX OPENING SECCON for instructions to open SECcon connectors 5 1 2 UNLOCK SECCON CONNECTIONS Important Do not open the connection while the SCU 800 is switched on A SECcon connection can be opened as indicated below Page 22 44 LISTEC GmbH 60T023 04...

Страница 23: ...ngth 90 cut 5 2 2 1 STRIPPING LS SENSOR CABLES Sensor cables with low smoke jacket material are marked with the additional imprint LS The material used in this type of sensor cable sticks to the flexible flat cable therefore requiring an intermediate step inbetween checking the orientation 2nd step above and breaking the cable jacket 3rd step above Use adjustable joint pliers to apply light pressu...

Страница 24: ...he top of the tool 2 CLB2 female crimp connector Open the lid of the CLB2 connector so that the contacts are exposed Insert the CLB2 from the side of the tool Both contacts must must be positioned over the two middle fingers of the anvil 3 Insert sensor cable Fully insert the flexible cable into the CLB2 contacts 4 Crimping Close the crimping tool completely by pressing the tool handle The ratchet...

Страница 25: ...letely up to the cable jacket Take care not to damage the flexible flat cable when fitting the shield connector Shield connector types SCON 15 1 Terminated with a ferrule for connection to UCM and CCM modules 5 2 5 CONNECTION MODULES SCON 15 0 Terminated with a ring lug for connection in the SCU 800 6 1 SENSOR CABLE 60T023 04 30 04 2014 LISTEC GmbH Page 25 44 ...

Страница 26: ... the adaptors Note All signals on connection modules are connected in parallel 5 2 5 1 UCM SEC Connection module for two sensor cables in a CBO 5 SEC connection box SCON 15 1 shield connector SEC 15 sensor cable DQ marking Connector X12 for CC 15 connection cable E30 E60 shielded Connector X11 for CC 15 connection cable E30 E60 shielded DQ marking SCON 15 1 shield connector SEC 15 sensor cable Cab...

Страница 27: ...l colour terminal Adaptor element DQ GND SHIELD SEC 15 ST11 Marking Shield connector BU1 ST9 SEC 15 ST12 Marking Shield connector BU1 ST10 ESD external sensors X1 white 1 brown 2 Shield 3 ST1 X2 white 1 brown 2 Shield 3 ST2 X3 white 1 brown 2 Shield 3 ST3 X4 white 1 brown 2 Shield 3 ST4 X5 white 1 brown 2 Shield 3 ST5 X6 white 1 brown 2 Shield 3 ST6 X7 white 1 brown 2 Shield 3 ST7 X8 white 1 brown...

Страница 28: ...daptor element for sensor cable Connection cable CC 15 E30 E60 shielded Connection cable CC 15 E30 E60 shielded Adaptor element for sensor cable DQ marking SEC 15 sensor cable SCON 15 1 shield connector Cable Signal Colour DQ GND Shield SEC 15 Marking Shield connector CC 15 red blue Shield Note Removing the jumper actives the respective adaptor element Page 28 44 LISTEC GmbH 60T023 04 30 04 2014 ...

Страница 29: ...ng holes KL1 or ST3 ST7 Pin 2 Important Note the flexible flat conductor orientation when connecting the sensor cable see label next to ST2 6 4 3 EARTHING with SECON 15 0 shield connector Strain relief Important Ensure correct seating of the connector in the strain relief latching level 60T023 04 30 04 2014 LISTEC GmbH Page 29 44 Latching level 8 7 KL20 KL19 KL18 KL17 KL16 KL15 KL14 GND DQ K2 GND ...

Страница 30: ...max resistive load 6 2 1 ALARM RELAYS Signal alarms on exceeding maximum or differential thresholds Relay output coding with IC socket LG1 Normally open Normally closed Monitored outputs NO NC with resistors Relay Terminal designation Terminal Relay Terminal designation Terminal REL1 AL1 A KL5 REL2 AL2 B KL7 C KL6 C KL8 Page 30 44 LISTEC GmbH 60T023 04 30 04 2014 Ra Rn Ra Rn Rn Ra 1 7 8 14 8 14 1 ...

Страница 31: ...f delivery of the SCU 800 and must therefore be ordered separately Resistor values must meet the fire panel s specifications Fault Alarm A B KL2 REL3 REL1 REL2 Rs Rf Ra KL4 Rs Resulting monitoring resistance Ra Alarm resistor Rf Fault resistor Depending on the SCU800 s alarm and fault status the resulting monitoring resistance Rs can have the following values Normal operation no fault no alarms Rs...

Страница 32: ...DC default setting Contact using internal voltage EXR EXR KL9 KL9 10 30 V DC 0 V EXR EXR KL10 KL10 Terminal designation Terminal EXR KL9 KL10 Warning Do not use an external power supply if internal power is selected Page 32 44 LISTEC GmbH 60T023 04 30 04 2014 BR2 6 5 4 3 2 1 BR2 6 5 4 3 2 1 KL8 KL7 KL6 KL5 KL4 KL3 KL2 KL1 C B AL2 C A AL1 C NO NC ST5 C NO NC FAULT C A AL1 C B AL2 EXR COM GND COM GN...

Страница 33: ...ta transfer format selection between ASCII and protocol takes place with switch S2 6 3 1 PROTOCOL SWITCH Switches the serial interface between ASCII configuration maintenance with LISTterm8 and protocol format visualisation SCADA connection ASCII move switch S2 towards crystal Q1 default setting Protocol move switch S2 towards EPROM Note The position of S2 determines the data transfer format on po...

Страница 34: ... is not connected Connectors The terminals are doubled up so that the signals can be looped through Terminal designation Terminal COM KL11 KL12 KL13 KL14 Interface configuration Depends on the protocol in use protocol manual Baud rate1 S1 1 S1 2 1200 ON ON 2400 OFF ON 4800 ON OFF 96002 OFF OFF 2 Default setting 1 The following rules apply for the baud rate setting Power up SCU Baud rate is read fr...

Страница 35: ...thout repeaters Cabling Twisted pair cable with 120 Ω impedance Star type wiring topologies are NOT allowed Termination Active Always at the communication master i e at the i e LISTcontroller PLC or PC Passive Jumper BR1 enables the resistor for passive termination Must always be set in the SCU 800 at the end of the RS485 bus None Jumper BR1 open Termination active none none none passive BR1 open ...

Страница 36: ...n 2 4 PCB mounting holes 6 4 3 37 Use in electrical fields BR3 6 4 4 37 6 4 1 LED BOARD The LED board must be connected else a fault alarm is set BR1 on the LED board activates closed or deactivates open default the front panel reset button Note In most cases resetting may only take place from the fire panel and by authorised persons Page 36 44 LISTEC GmbH 60T023 04 30 04 2014 ...

Страница 37: ...connection cable KL1 CC 15 connection cable 4 PCB mounting holes Sensor cable SCON 15 0 shield connector 6 4 4 INSTALLATION IN STATIC ELECTRICAL FIELDS When using the system in static electrical fields direct current greater than 5kV BR3 should be closed This prevents the electronics from getting charged up which may lead to the destruction of the control unit Under normal conditions BR3 should re...

Страница 38: ...gured operation 3 3 OPERATION MODES Note All settings conform to a system response behaviour according to EN 54 5 class A1 The unit is commissioned with the buttons TA1 and TA2 using the following procedure 1 7 2 2 AUTO SEEK Automatic recognition of all active sensors 2 7 2 3 TEST Compare expected and recognised number of sensors 3 7 2 4 SAVING THE CONFIGURATION Important The final configuration m...

Страница 39: ...o compare the expected number of sensors with the number of active sensors during commissioning and inspection During commissioning Compare the number of active recognised sensors to the number of sensors noted on plans while installing the sensor cable 4 1 SENSOR CABLE Imprints It is recommended to connect and test sensor cable branches individually so that possible faults can be isolated Connect...

Страница 40: ...o the connected sensors a fault alarm will be set The configuration should therefore always be saved to the EEPROM Pauses in the sequence may not be longer than one 1 second Press TA1 3x and then Press TA2 1x The data transfer LED will blink very quickly for one second to confirm the procedure 7 2 5 RESET Alarms and faults can be reset This button has the same function as the front panel reset but...

Страница 41: ...ed to project specific conditions The project name position unit name number the number of configured measuring points and the SCADA connection can be pre specified The following points are checked during an inspection The state of all LEDs The number of active sensors Sensor cable fixings SCU 800 and connection box cable glands 8 2 MAINTENANCE Note Maintenance can only be performed by trained per...

Страница 42: ... cable shield connector in a SCU 800 M00316 SCON 15 1 Sensor cable shield connector to UCM or CCM 150 A Z00315 CLB 2 crimp connector Female 2 way crimp connector for flexible flat cables 100 pcs Z00503 END end cap Heat shrinkable cap to seal the ends of SEC 15 and SEC 20 sensor cables G00396 N15 repair set Heat shrinkable cable sleeve with flexible flat cable shield connector connectors sealing ma...

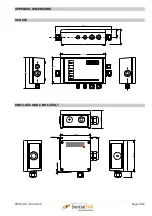
Страница 43: ...Control Unit SCU 800 Lineare Sensor Technik GmbH 454 260 0 mm 150 0 mm 179 mm 46 0 mm 90 0 mm M25x1 5 M25x1 5 M25x1 5 M25x1 5 M16x1 5 M16x1 5 M20x1 5 M20x1 5 M20x1 5 M20x1 5 M16x1 5 GmbH Lineare Sensor Technik 4 5 mm 75 0 mm 130 0 mm 130 0 mm M20x1 5 M20x1 5 M20x1 5 M25x1 5 M25x1 5 4 0 mm 31 0 mm 28 0 mm M25x1 5 ...

Страница 44: ... screwdriver to unlock wires from spring clamps Abberdaan 162 1046 AB Amsterdam T 31 0 20 6131611 F 31 0 20 6132212IBAN SEPA NL31INGB0006837477 BIC INGBNL2A BTW nr NL854029503B01 KvK nr 60716517www sensetek nl info sensetek nl Subject to change without prior notice Page 44 44 LISTEC GmbH 60T023 04 30 04 2014 ...

Отзывы: