DISPOSAL
•Disconnect power supply before installation.
•Only qualified personnel can connect the electronic device to the heating element.
•Make sure that the power of the electric resistance does not exceed the maximum power allowed by
the electronic control device.
1.
Make sure that the towel radiator does not have leakage or air lock.
2.
The device shall not be positioned directly in front of an electric plug.
3.
Prevent water jets from hitting the equipment.
4.
Connect the temperature controller only to a suitable heating element.
5.
Ensure that the mains voltage is the same as indicated in the technical specifications.
6.
Make sure that the type of electric resistance is compatible with the model of towel radiator being
used (check the product specifications provided by the manufacturer). The usage of a heating element
with higher power:
-
Does not increase the actual power of the towel radiator;
-
Might shorten life of the heating element;
-
Could damage the equipment.
7.
Make sure that the power of the electric resistance does not exceed the maximum power of the
towel radiator (check the label on the heating element).
8.
When installed in a room with bathtub or shower, respect the “Protection Zones” according to
IP44 insulation class (in UK according to IEE cabling directives). Furthermore, make sure to respect all
local safety directives.
9.
The device has to be protected by a 30mA circuit breaker (RCD).
10.
Power the device with the recommended voltage (see technical specifications).
11.
For models having no plug it is necessary to install a suitable omnipolar disconnection switch
ensuring complete disconnection in case of category III overvoltage (that means a switch with at least 3
mm of space between open contacts).
12.
After ensuring that the "O-Ring" is correctly positioned, screw the electric resistance in the
relevant threaded hole of the towel radiator, properly secure it and insert the cover ring.
13.
Place the "O-Ring" before the fastening area.
14.
Extract the connecting cables from the device. The four poles connector and the ground
connector (only Class I).
15.
Connect the four poles connector to the heating element.
16.
Connect the female Faston connector to Earth (only Class I).
17.
Insert the lower part of the heating element into the ready connected thermostat.
18.
Align the device to the towel radiator. Warning! Do not rotate the device more than 30 degrees on
both directions.
19.
Push the device against the base of the heating element to compress the “O-Ring”, properly fix
the related fastener so that the device remains well secured and does not rotate around the heating
element.
20.
Connect the power supply cable.
Selmo
Electronic
Via Pacinotti, 24 - 35030 Rubano
www.selmo.it
(PD) Italy- Tel 049.8976761, Fax 049.8976085 -
Selmo
Electronic
Via Pacinotti, 24 - 35030 Rubano
www.selmo.it
“
”
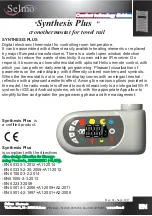
Synthesis Plus
cronothermostat for towel rail
EN
Comfort technology division
Selmo
Rev. 01- Sept. 2017


