background image


Warning

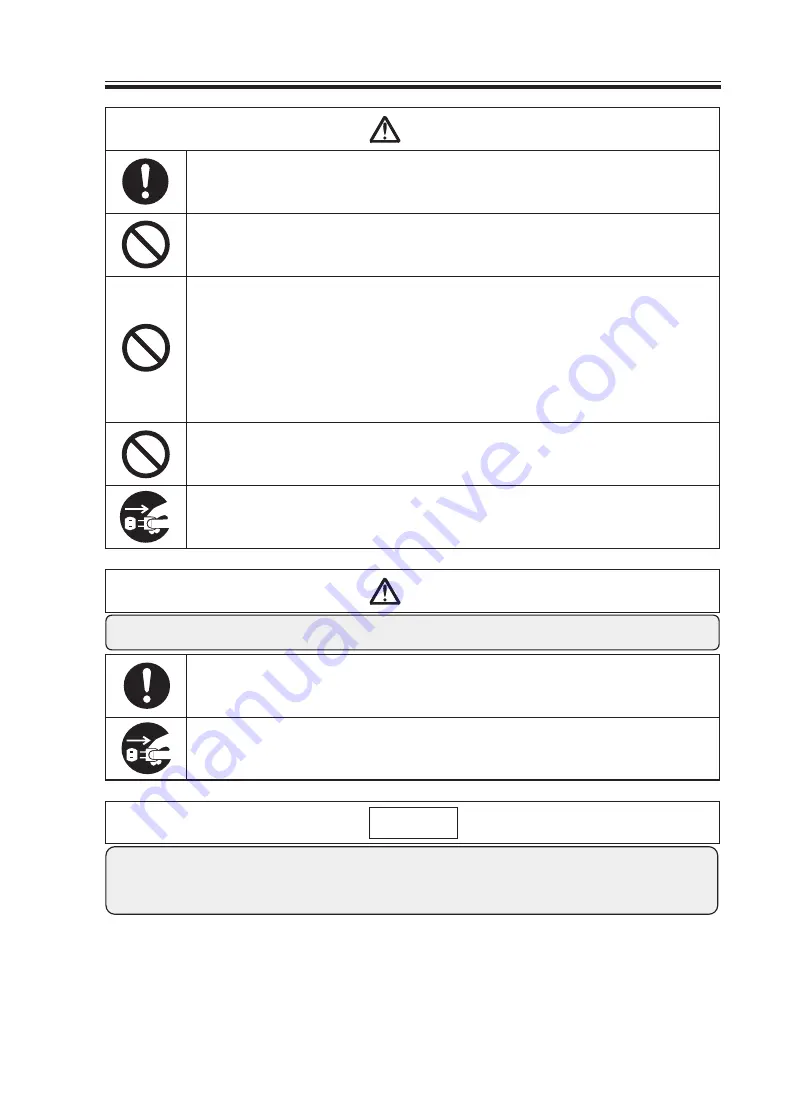
Be sure to ground the device with a ground cable.

Otherwise, an electric shock may occur.

Connect a ground cable and ground the device.

Warning

How to Handle the Device

Otherwise, an electric shock may occur.

When connecting or disconnecting the ground cable, unplug the power cord first.

Flammable gas remaining inside the device can catch fire from static electricity, which 

may cause a fire, burn or injury.

Do not spray organic solvent such as flammable fluids or paint thinner.

If the device is dropped or the cover is broken, immediately turn the power switch off and 

remove the power plug from the outlet. Then contact the distributor.

If the device is dropped or the cover is broken, power down and remove the power plug.

Only service staff should remove the cover. Do not attempt to do this yourself as it may 

cause an electric shock.

For internal inspection, adjustment or repair of the product, contact the distributor.  

Caution: High Pressure

There is a high voltage part inside. It may cause a fire or an electric shock.

Do not modify the device, remove the cover or disassemble it.

This may cause a fire.

Do not place the device in areas subject to liquid, dust, or humidity.

This may result in a fire or an electric shock.

Don't insert or drop foreign objects such as metals or flammables into the opening.

Do not place a container with chemicals or liquid or a small metal piece on the device.  

This may cause a fire.

Do not place a container with liquid or a metal piece on the device.

Otherwise, the heat contained inside could result in a fire.

Do not cover the vent holes.

It is extremely dangerous to use the device in a place where there is explosive, combusti-

ble or flammable gas. You must not do this.

Do not use in a place where there is explosive, combustible or flammable gas.


Before moving the device, make sure to unplug the power cord from the outlet.

If the power cord is damaged, a fire or an electric shock may occur.

Before moving the device, make sure to unplug the power cord from the outlet.

Caution

Caution

Caution

Cleaning

Caution

Do not place or install the device on an unstable surface.

It may fall, resulting in an injury.

Do not install on an unstable surface.

1. a place receiving radiant heat (such as direct sunlight) 

2. a place where mechanical vibration frequently occurs 

3. a place near the source of an electromagnetic field

4. a place where dust and oily smoke are frequently released

5. a place prone to steam, water or condensation

6. an environment that contains organic gas, inorganic gas or salinity.

Avoid using the device in the following places as this may cause malfunction.

The device is designed only for indoor use. Do not use it outdoors. 

This may cause a fire or malfunction.

The device should only be used indoors. Do not use it outdoors.

When the device is not in use for a long period of time, remove the power cord from the 

outlet for safety.

When the device is not in use for a long time, remove the power cord for safety.

If dust builds up on the power plug, it may cause problems in insulation, which could lead 

to a fire. *Unplug the power cord and wipe with a dry cloth.

Regularly  wipe off dust on the power plug.

When cleaning, first unplug the power cord for your safety.

Failure to so may cause an electric shock, fire or injury.

Unplug the power cord before cleaning for safety.

Waste electrical product disposal must be conducted according to the regulations of the area or the 

relevant local government.

Do not dispose of the device with general household waste.

Содержание SR-450

Страница 1: ...https www sekonic co jp CM0697510 Operating manual Operating manual Head Office 3 1 3 Ikejiri Setagaya ku Tokyo 154 0001 Japan Telephone 81 3 5433 3611 Fax 81 3 3410 2611 SECONIC SR 450 368mm 257mm D...

Страница 2: ...the operating manual before using this product and be sure to use it properly After reading this operating manual be sure to keep it in a place that you can access at any time This equipment has been...

Страница 3: ...his agreement includes the software program and all related materials included in this packaging 2 License SEKONIC gives the user the license to use the software mentioned in this agreement The user m...

Страница 4: ...oftware The user will agree to this agreement with the understanding that the user must make responsible use of this software The software is provided as it is and SEKONIC makes no guarantees SEKONIC...

Страница 5: ...ter unpacking the product 1 Main unit 2 Power cord 3 Operation manual 4 Stopper plate 5 Cards 1 12 line standard sized check cards 5 2 15 line postcard sized check cards 5 3 Paper feeding roller prote...

Страница 6: ...o repair it For details contact the shop at which you have purchased it In case that the free warranty period has expired or the failure is related to your responsibility or has resulted from a worn p...

Страница 7: ...tions that must be carried out The exact required actions are shown in the symbols Safety Precautions Notice Handling the Device Correctly and Safely Read the Safety Precautions carefully before using...

Страница 8: ...tric shock or short circuit Do not damage the power cord or power plug Make sure the power outlet is within reach so the power cord can be easily unplugged Make sure the plug is firmly inserted into t...

Страница 9: ...o this yourself as it may cause an electric shock For internal inspection adjustment or repair of the product contact the distributor Caution High Pressure There is a high voltage part inside It may c...

Страница 10: ...device in the following places as this may cause malfunction The device is designed only for indoor use Do not use it outdoors This may cause a fire or malfunction The device should only be used indo...

Страница 11: ...ark 8 Adjusting Reading Sensitivity 9 Control Commands 9 A Initialize Commands 9 B Card Feed Commands 9 C Device Control Setting Commands 10 Data Transfer Mode 10 A Data Transfer Commands 10 B A Mode...

Страница 12: ...Table of Contents 12 External Views 13 Appendix 13 A Reference for card creation 13 B Code Tables 13 C Typical sample program 54 55 55 61 63...

Страница 13: ...unded or the metallic part is touched malfunction or an elec tric shock may result 5 Do not place the device in a place subject to direct sunlight or near a heater Also be careful not to allow sudden...

Страница 14: ...s of Each Part TEST LED yellow Power switch READY LED green POWER LED orange Total counter RS 232C connector Fuse holder Power connector Power cord Ground terminal reserved ERROR LED red Clear switch...

Страница 15: ...2 Names of Each Part Side guard Card stopper Stacker Guide lock lever Top cover Side guide Guide wire Lock lever Hopper 3...

Страница 16: ...2 Names of Each Part Rotary switch SW2 Rotary switch SW3 Rotary switch SW1 DIP switch DIPSW Card detection sensor Separation pad Paper feeding roller 4...

Страница 17: ...tandard sized cards at room temperature 8 Hopper capacity Max 200 cards paper of ream weight of 110kg basis weight of 127 9g m2 standard sized card 9 Error check Four types of errors can be judged jam...

Страница 18: ...s Operating Environment The OS must be preinstalled The software may not work for certain computer models and configurations Operation is not guaranteed for systems with an upgraded OS add on USB inte...

Страница 19: ...ter Click Yes to restart the computer If you have installed incorrect USB driver please un install it from the computer When finished please install the correct USB driver to the computer If using Win...

Страница 20: ...4 Installing the USB Driver 5 After the computer is restarted turn on the power for the SR 450 and connect it to the computer s USB port 1 Turn on the power 2 Connect to the PC using a USB cable 8...

Страница 21: ...re After installing the USB driver follow the procedure below to check the port number assigned when using the USB interface 1 Right click this PC on the Desktop to open a pop up menu and click Manage...

Страница 22: ...a specific port The procedure for changing the port is de scribed below 1 Right click the SR 450 entry from the Device Manager screen see section 4 C and then click Properties from the pop up menu 4 I...

Страница 23: ...4 E Uninstall Procedure On the Start menu click Settings open the App select the Driver and then click Uninstall 4 Installing the USB Driver 11...

Страница 24: ...ctly enter the card ejector or hopper Open the stacker Raise the side guard Card stopper and card size Stopper plate When using long sized cards it is recommended to use the stopper plate so as to pre...

Страница 25: ...switch feeds one card CLEAR Clears an error if any The hardware or cover open error however cannot be cleared 2 Meanings of LED display TEST yellow Comes on in the test mode ERROR red Comes on when a...

Страница 26: ...ss they are well aligned 3 Press the side guide hard to the cards so that no clearance is allowed between them Otherwise a reading error may occur When moving the side guide keep pressing the guide lo...

Страница 27: ...o the initial setting Note Please set position between 0and 6 The deveice will not work correctly if it is not set to the correct position as specified bellow Switch position and paper ream weight DF...

Страница 28: ...f cards Avoid storing cards in a place subject to sudden environmental change Pay sufficient atten tion to moisture and keep them in a cabinet or the like Do not leave them in a dusty place like near...

Страница 29: ...No clearance but cards are not aligned Clearance OK NG 5 Operation Good No good 17...

Страница 30: ...d check card that came with the device 1 Turning the power switch on while pressing the Feed switch sounds a buzzer and calls the test mode turning all LEDs on 2 Pressing the Feed switch once feeds ca...

Страница 31: ...k r a m g n i m i t e l b a l i a v A k r a m g n i m i t o n r o s s e l r o e e r h t s d r a c k c e h C d e t c e t e d s i r o r r e e n i l n o i t a c i n u m m o C d n a r e t u p m o c t s o...

Страница 32: ...d e l i o S g n i n a e l C 1 1 n i s r e l l o r f o g n i n a e l C 1 m o t p m y n S o i t c A n o d e n r u t e b t o n n a c r e w o p e h T y l r e p o r p s i cord r e w o p e h t t a h t e r...

Страница 33: ...set the following settings even if you use either USB initerface or RS232 C initerface 2 Setting data transfer rate Set the same data transfer rate baud rate to this device and the computer The device...

Страница 34: ...t d e z i s d r a c t s o P e p y t l o r t n o c g n i m i t d e z i s d r a C e p y t r e d n u t c e r i d 8 7 e t o n e d o m n o i t a r e p 8 7 O 0 5 4 R S F F F O F O e l b i t a p m o c 7 0 3...

Страница 35: ...at the high level RS The device outputs low level RSs in the unreceivable state DR The device outputs high level DRs while the power is turned on Signal level High 3V to 12V Low 3V to 12V The followi...

Страница 36: ...pencil be sure to fill in a mark with enough density 1 PCS Printed Contrast Signal It refers to the contrast in reflectance of a printed mark symbol or letter against the non printed part of paper It...

Страница 37: ...maximize the reading sensitivity Turn SW2 to level 8 to minimize the reading sensitivity For SW2 use level 1 to 8 and do not use level 0 9 to F 2 When adjusting the sensitivity fill in marks with diff...

Страница 38: ...ity Setting Command Explanation This command is for setting the reading sensitivity level 16 levels corresponding to density levels 1 to 16 can be set For example a mark of density level 2 or more is...

Страница 39: ...ifference marks thinner than the setting are cancelled and those in the allowable range are all output The density difference is set at 01 by default In this case mark data of the darkest density are...

Страница 40: ...o H e v i e c e R R C N X T S R C T E L D 10H 55H 0DH 02H 0DH N Specifies the format 1 byte ASCII numerical code between 1 and 5 N values determine the mark read areas in the formats shown in the tabl...

Страница 41: ...ect under type 3 Mark to mark type Not read blank space of front end 4 Mark to mark type Read blank space of front end d R R d x m m Specified multiple fixed at 3 d Timing mark width R R 1st column R...

Страница 42: ...ndicating the reading method N values determine the mark read areas in the formats shown in the table below 4 3 In SR 305 SR 305S compatible mode Format e c i v e d s i h T r e t u p m o C t s o H e v...

Страница 43: ...front end R R 2nd column R 1st column Approx 2 5mm Descriptions of each read timing format R refers to the read area 1 Timing control type d R R d x m m Specified multiple fixed at 3 d Timing mark wi...

Страница 44: ...lines as 15 The modes in which the 15 line format is available are C CA D E EA ED ES and F modes 6 DC3 L Command Read Line Area Setting Command Explanation This command is executed together with any...

Страница 45: ...S1 3 Adds the STX code This value adds the code specified by S2 as the STX code CR is added as ETX S3 is not necessary S1 4 Adds the STX and ETX codes This value adds the code specified by S2 as the...

Страница 46: ...Contents of separators added for each mode SR 450 SR 410 430 compatible mode Data output from the device S1 9 Control Commands 34...

Страница 47: ...ernally and returns the ACK code 06H At the time the READY LED green and ERROR LED red blink The host computer must be designed to transmit the next command after receiving this code Separators like S...

Страница 48: ...d e h t e d i s n i n i a m e r s d r a C 3 H 3 3 n o d e n r u t e b t o n n a c 2 S r o r r e d e e f d r a C 4 H 4 3 d e s u t o N 5 H 5 3 d e s u t o N 6 H 6 3 t e s s i k c e h c F D a n e h w y...

Страница 49: ...ts N 2 The red LED flashes three times without sounding a buzzer for all types of errors e d o C X E n H o i t a n a l p x E 0 H 0 3 y l l a m r o n t n e s n e e b e v a h s d r a C 1 H 1 3 d e s u t...

Страница 50: ...38...

Страница 51: ...N1N2N3 and M1M2M3 cannot be omitted as 6 byte fixed length data 39...

Страница 52: ...N1N2N3 and M1M2M3 cannot be omitted as 6 byte fixed length data 40...

Страница 53: ...41...

Страница 54: ...N1N2N3 and M1M2M3 cannot be omitted as 6 byte fixed length data 42...

Страница 55: ...Example 9 8 7 6 Mark position Mark Reading density 10 2 6 7 43...

Страница 56: ...44...

Страница 57: ...45...

Страница 58: ...46...

Страница 59: ...47...

Страница 60: ...For error statuses see 9 B 2 48...

Страница 61: ...In the case of the mark to mark type the contents of data vary for each mode SR 450 SR410 430 compatible mode Number of read areas SR 307 compatible mode Number of timing marks 49...

Страница 62: ...50...

Страница 63: ...S1 S2 S3 S4 Hopper Paper feeding roller DF sensor Reader Direction of card feeding Cover open 51...

Страница 64: ...plug from the outlet 1 Cleaning of rollers After feeding 5 000 cards a large amount of cards or carbon paper gently wipe the rollers with a clean cloth slightly wetted with disinfectant alcohol ethano...

Страница 65: ...vent the roller material from deteriorating 11 B Service Schedule Spare or consumption parts are required to be regularly changed in order to use this device safely and comfortably Please make contact...

Страница 66: ...12 External Views 360 2 2 2 1 7 1 695 12 External Views Unit mm 54...

Страница 67: ...formation in marked area Drop out color 1 of PCS 0 15 or lower 3 Direction of fiber Parallels the longer side of paper direction of card feeding 4 PCS measurement wavelength 940nm for the near infrare...

Страница 68: ...n the timing mark width W Length H 3 5 to 4 3mm b Print color Use a drop out color and set the PCS value to 0 15 or lower 5 Corner cut When cutting one corner of cards for reference to align cards cut...

Страница 69: ...andard sized card A 0 1 A 0 1 0 1 6 35 3 0 1 6 35 6 35 11 Tolerance not accumulated 82 55 Timing mark Mark frame Allowable range of overall dimensions 5 0 min 9 0 min 2 21 2 21 4 0 0 8 max 1 0 0 05 18...

Страница 70: ...13 Appendix Timing mark direct under type General tolerance 0 20 Unit mm Mark frame 58...

Страница 71: ...13 Appendix Timing mark control type General tolerance 0 20 Unit mm Mark frame 4 17 59...

Страница 72: ...13 Appendix Timing mark to mark type General tolerance 0 20 Unit mm Mark frame 60...

Страница 73: ...13 B Code Tables 1 ASCII code 2 ASCII decimal notation correspondence table 13 Appendix 61...

Страница 74: ...3 EBCDIC punch code ASCII code correspondence table 13 Appendix 62...

Страница 75: ...M The sample program is designed to open and close a communion line transmit data and control how to receive data of a fixed or variable length Refer to this program for programming Note We do not sup...

Отзывы: