EN
::: 63
EN
Away from electrical
appliances, such as a TV,
personal computer or
another cordless phone.
In a HIGH and CENTRAL
location with no
obstructions such as walls
microwave oven and WIFI.
.
,
Align
1
2
3
4
1.Choose a proper location for the outdoor phone.
Be sure to consider the average height of visitors.
2.Align the rain cover and screws with the holes in
the wall.
3.Install the outdoor phone into the rain cover.
Please refer to the picture 3 below
4.Drill a screw to fix
.
and finish the installation.
Installation Instruction
Installing the Indoor phone
Installing the Outdoor phone
13
63
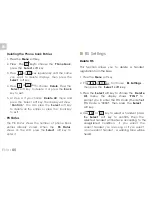
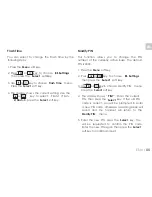
Adding the Phone book Entries
Phonebook
Select
Select
New
Name ?
Save
Number ?
Save
Select
soft
3. Press the
soft key to choose
.
4. The display shows "
". Enter the name
you want to use, then press the
soft key
to confirm. The display shows "
".
Enter the desired number (up to 24 digits),
press the
soft key.
5.*Use
to select the ring you like to
associate with the number, press the
soft key to confirm.
6. Repeat if necessary.
1. Press the
soft key.
2. Press
to choose
, press
the
key.
Menu
the
key
or
key
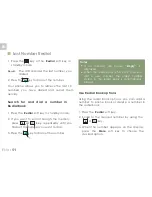
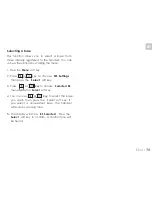
Using a Pause
Viewing the Phone book Entries
A pause is useful when you access an interactive
voice response system, such as an automated
banking system. A pause provides a delay of 3
seconds. If you want to insert a pause when you
dial a number in standby mode or store a number
in memory, press the
key. The letter
will
appear at the pause entry.
1. In the standby mode, press the key.
2. Press
repeatedly until the desired
entry is displayed.
P
or
key
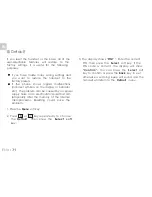
Note:
Erase
If you make a mistake while entering a
name or a number, use the
soft key
to correct it. Each time you press the key,
the last character or digit is deleted.
* If you want to set a VIP number, you should
select a special ring tone for it. The ring tone
should be different from the external ring you
have set. You can set up to 9 VIP ring tones
associate with 9 VIP numbers/groups.
Содержание CL-3645
Страница 1: ...FR KIT EVOLUTIF Sans fil Portier vid o CCTV T l phone DECT S V 06 2014 Ind A Manuel d utilisation FR...
Страница 10: ...FR 1 re partie portier vid o et cam ra de vid o surveillance...
Страница 13: ...FR FR 6 Bouton marche arr t Emplacement carte micro SD Vue de c t Vue de haut 6...
Страница 46: ...FR 2 me partie T l phone DECT...
Страница 85: ...FR FR 77...
Страница 87: ...S V 06 2014 Ind A EN KIT EVOLUTIF Wireless Video intercom CCTV DECT phone User s manual...
Страница 95: ...EN PART 1 Doorbell...
Страница 98: ...EN 6 EN Power on off key micro SD card slot Side view Top view 6...
Страница 100: ...EN 8 EN Rear view Antenna Pair button Antenna jack Sensor light Power indicator Front view Camera 8...
Страница 101: ...EN EN 9 Outdoor Phone Camera LED light Microphone Call button Sensor light Speaker 9 ds or rm o ll m o...
Страница 131: ...EN Part2 Dect Phone...

