background image

• 8 •

5.4 

POWERING A 12V DC DEVICE

The unit is a power source for all 12V DC accessories that are equipped with a 12V accessory plug. Use it for 

power outages and on fishing or camping trips.

NOTE:

 Do not power a 12V device with the unit while charging the internal battery. 

1. 

Make sure the device to be powered is OFF before inserting the 12V DC accessory plug into the 12V 

DC accessory outlet.

2. 

Open the protective cover of the DC power outlet on the unit. 

3. 

Plug the 12V DC device into the DC power outlet and turn on the 12V DC device (if required).

4. 

When finished, turn off the DC device (if required) and unplug from the DC power outlet.

CAUTION:

 Do not use the unit to run appliances that draw more than 15A DC.

NOTE: 

Extended operation of a 12V DC device may result in excessive battery drain. Recharge the unit  

immediately after unplugging the 12V DC device.

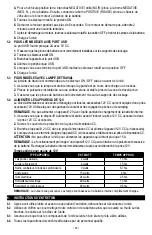
Estimated run-times 

APPLIANCE TYPE

EST WATTAGE

EST USAGE

Cell phone

4 watts

13 hrs

Fluorescent light

4 watts

15 hrs

Radios, fans

9 watts

6.7 hrs

Depth finder

9 watts

6.7 hrs

Camcorder

15 watts

4 hrs

Electrical tool

24 watts

2.5 hrs

Electric cooler

48 watts

1.3 hrs

Car vacuum, air compressor

80 watts

0.8 hrs

NOTE:

 Actual time may vary. Times are based on the internal battery being fully charged.

6.  MAINTENANCE INSTRUCTIONS

6.1 

After use and before performing maintenance, unplug and disconnect the jump starter.

6.2 

Use a dry cloth to wipe all battery corrosion and other dirt or oil from the battery clips, cords and the 

jump starter case.

6.3 

Ensure that all of the jump starter components are in place and in good working condition.

6.4 

All servicing should be performed by qualified service personnel.

7.  MOVING AND STORAGE INSTRUCTIONS

7.1 

Store inside, in a cool, dry place.

7.2 

Do not store the clips on the handle, clipped together, on or around metal, or clipped to cables. The clips 

on the jump starter are live when the switch is in the ON position and will produce arcing or sparking if 

they come in contact with each other. To prevent accidental arcing, always place the switch in the OFF 

position and keep the clips on the storage holders when not using it to jump start a vehicle.

7.3 

If the jump starter is moved around the shop or transported to another location, take care to avoid/

prevent damage to the cords, clips and jump starter. Failure to do so could result in personal injury or 

property damage.

IMPORTANT:

  Do not use and/or store the jump starter in or on any area or surface where damage 

could occur if the internal battery should unexpectedly leak acid.

7.4 

IMPORTANT:
• CHARGE IMMEDIATELY AFTER PURCHASE
• KEEP FULLY CHARGED

Charge the jump starter’s internal battery immediately after purchase, after every use and every 30 days.

All batteries are affected by temperature. The ideal storage temperature is at 70°F. The internal battery will 

gradually self-discharge (lose power) over time, especially in warm environments. Leaving the battery in a 

discharged state may result in permanent battery damage. To ensure satisfactory performance and avoid 

permanent damage, charge the internal battery every month.

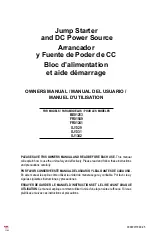
Содержание BE01253

Страница 1: ...and precautions carefully POR FAVOR CONSERVE ESTE MANUAL DEL USUARIO Y LEALO ANTES DE CADA USO En este manual le explica c mo utilizar la unidad de manera segura y confiable Por favor lea y siga las...

Страница 2: ...SONAL PRECAUTIONS 5 FEATURES 6 CHARGING THE INTERNAL BATTERY OF THE UNIT 6 USING THE JUMP STARTER 7 MAINTENANCE INSTRUCTIONS 8 MOVING AND STORAGE INSTRUCTIONS 8 TROUBLESHOOTING 9 ACCESSORIES 9 BEFORE...

Страница 3: ...ACTER STICAS 12 PARA CARGAR LA BATERIA INTERNA DE LA UNIDAD 12 C MO UTILIZAR LA UNIDAD 13 INSTRUCCIONES DE MANTENIMIENTO 14 INSTRUCCIONES PARA EL MANEJO Y ALMACENAMIENTO 15 LOCALIZACI N Y SOLUCI N DE...

Страница 4: ...LLES 18 CARACT RISTIQUES 18 CHARGEMENT DE LA BATTERIE INTERNE DE L AIDE AU D MARRAGE 19 CONSIGNES D UTILISATION 19 INSTRUCTIONS D ENTRETIEN 20 INSTRUCTIONS DE STOCKAGE ET EMPLACEMENT 21 D PANNAGE 21 A...

Страница 5: ...E YOU USE THE POWER PACK b To reduce risk of battery explosion follow these instructions and those published by battery manufacturer and manufacturer of any equipment you intend to use in vicinity of...

Страница 6: ...NTERNAL BATTERY FULLY CHARGED AND PROLONG BATTERY LIFE 4 1 CHECKING THE LEVEL OF THE INTERNAL BATTERY Press the Battery Status button on the front of the unit The LED lights will indicate the current...

Страница 7: ...on OFF 2 Lay the DC cables away from any fan blades belts pulleys and other moving parts 3 For a negative ground vehicle as in most vehicles connect the unit s POSITIVE RED clamp to the POSITIVE POS P...

Страница 8: ...oil from the battery clips cords and the jump starter case 6 3 Ensure that all of the jump starter components are in place and in good working condition 6 4 All servicing should be performed by quali...

Страница 9: ...cked Turn the unit ON OFF switch to the ON position The unit won t power my 12V device The 12V device is not turned on The unit s battery is not charged The 12V device draws more than 15A or has a sho...

Страница 10: ...ited Warranty is void if the product is misused subjected to careless handling repaired or modified by anyone other than Manufacturer or if this unit is resold through an unauthorized retailer Manufac...

Страница 11: ...iones El montaje incorrecto podr a representar riesgo de incendio o descarga el ctrica 1 10 Para reducir el riesgo de choque el ctrico desconecte el bloque de alimentaci n desde la salida antes de int...

Страница 12: ...e realizarlo un t cnico de reparaci n calificado utilizando nicamente repuestos id nticos Esto permite garantizar la seguridad del producto 2 12 Conecte cables de salida a la bater a y al chasis como...

Страница 13: ...fe auxiliar del veh culo encendedor NOTA La luz LED ROJO no opera durante este m todo de carga Al utilizar este m todo para cargar la bater a se anula el modo de mantenimiento y la bater a podr a sobr...

Страница 14: ...positivo de 12V CC a la toma de alimentaci n de CC y enci ndalo si es necesario 4 Cuando haya terminado de cargarse apague el dispositivo de CC si es necesario y desench felo de la toma de alimentaci...

Страница 15: ...entes c lidos Si se deja la bater a en estado de descarga puede sufrir da os permanentes Para asegurar el rendimiento satisfactorio y evitar da os permanentes cargue la bater a interna mensualmente 8...

Страница 16: ...para su uso con este producto La presente Garant a Limitada ser nula si el producto se utiliza en forma err nea se trata de manera inadecuada es reparado o modificado por personas que nos sean el Fab...

Страница 17: ...u exploser ou causer des blessures 1 8 Ne pas faire fonctionner tout bloc d alimentation qui aurait un cordon fiche ou c ble de sortie endommag 1 9 Ne pas ouvrir le bloc d alimentation Si une r parati...

Страница 18: ...rant suffisant pour souder une bague ou autre bijou causant de graves br lures 2 8 Lors de la recharge d un accumulateur interne travaillez dans des lieux bien a r s et ne pas restreindre la circulati...

Страница 19: ...rie interne pendant la conduite en utilisant un c ble de chargement m le m le Num ro 94500109 vendu s par ment IMPORTANT LORSQUE L UTILISATION D UN C BLE DE CHARGE DE PORT 12V NE PAS RECHARGER LA BATT...

Страница 20: ...ourant et des voyages de p che ou de camping REMARQUE Ne pas alimenter un appareil 12V avec l unit pendant le chargement de la batterie interne 1 Assurez vous que le dispositif alimenter est teint ava...

Страница 21: ...La temp rature a un effet sur toutes les batteries La temp rature id ale de rangement est de 21 C La batterie interne se d chargera perdra de la puissance graduellement avec le temps particuli rement...

Страница 22: ...er Electric Corporation et approuv s pour une utilisation avec ce produit Cette garantie limit e est annul si le produit est mal utilis soumis une manipulation imprudente r par ou modifi par une perso...

Отзывы: