


24
VIS1X
Operating Instructions
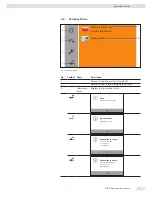
Installation
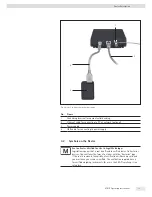
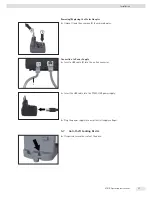
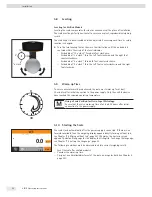
Installing Power Supply
t
WARNING
Lethal electric shock and equipment damage due to incorrect
power plug adapter! Only use the country-specific power plug adapter. Never
plug the power plug adapter into the socket when it is disconnected from the
power supply.
t
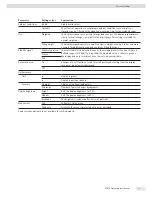
Use the right mains adapter for your mains power supply:
Mains adapter set YAK01
Bag
Region/Country
a) transparent
Europe/EU (except United Kingdom)
b) blue
USA
c) yellow
United Kingdom
Mains adapter set YAK02
d) red
Australia
e) turquoise
South Africa
f) white
Argentina
g) pink
Brazil
Mains adapter set YAK03
h) light brown
China
i) black
India
j) green
Korea
t
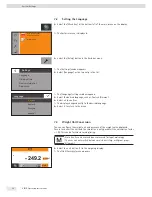
Push (1) and slide (2) the mains adapter required for your power supply into the
opening of the power supply module. When doing this, the mains adapter needs
to lock into position.
Содержание VIS1X
Страница 2: ......
Страница 58: ...58 VIS1X Operating Instructions Conformity Approvals...
Страница 72: ...72 VIS1X Operating Instructions Conformity Approvals...
Страница 73: ...VIS1X Operating Instructions 73 Conformity Approvals...
Страница 74: ...74 VIS1X Operating Instructions Conformity Approvals...
Страница 75: ...VIS1X Operating Instructions 75 Conformity Approvals 18 3 EU Type Examination Certificate Verified Models...