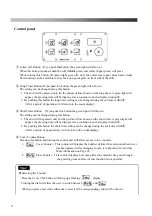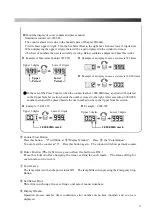
5.
diP
(
dip function setting
)
・
After 1, 2 process, when
is displayed, push
④
Enter button.
・
After display number (table4) is selected with
⑤
Set/Select Dial, when
④
Enter button is
pushed, present setting is displayed. Setting is changed with
⑤
Set/Select Dial and push
④
Enter button to save it.
Table
-
4
Dip function list
Display
number ON/OFF Setting
contents
Initial
Setting
d
1
ON
While the power is ON, Long Timer is selected as the initial setting.
ON
OFF
While the power is ON, Short Timer is selected as the initial setting.
d
2
ON
While the power is ON, Collar/Cuff Mode is selected as the initial
setting.
ON
OFF
While the power is ON, Collar Mode is selected as the initial setting.
6.
tou
(
Time setting in display window.
)
・
After 1,2 process, when
is displayed, push
④
Enter button.
・
Display number is selected with
⑤
Set/Select Dial and when
④
Enter button is pushed,
present setting time is displayed. Setting time is changed with
⑤
Set/Select Dial and push
④
Enter button to save it.
Table
-
5
Timer list
Display
number
Setting contents
t 1
Not in Use (Nothing happens even though you change the time)
t 2
Not in Use (Nothing happens even though you change the time)
t 3
Not in Use (Nothing happens even though you change the time)
t 4
Time to finish service menu if any button is not touched in this menu.
t 5
Time to return to normal display from input test.
26
Содержание LP-660E-V2
Страница 2: ......
Страница 38: ...36...
Страница 39: ...Spare Parts List Index 1 Front Diagram 2 Rear Diagram 3 Steam Piping 4 Cover Diagram 37...
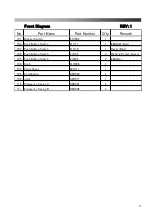
Страница 40: ...1 Front Diagram REV 1 38...
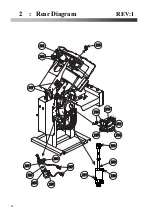
Страница 42: ...2 Rear Diagram REV 1 201 202 207 203 204 205 205 206 208 209 210 211 212 213 214 215 216 217 218 40...
Страница 44: ...3 Steam Piping REV 1 42...
Страница 46: ...4 Cover Diagram REV 1 44...
Страница 48: ...Diagram Sensor Diagram Electric Connection Diagram 1 4 4 4 Steam Piping Diagram All Air System 46...
Страница 50: ......
Страница 51: ......
Страница 52: ......
Страница 53: ......

