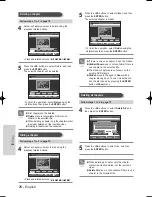
background image

R

ecording

Recording through the
DV Input jack

Recording from
External Devices

Follow these directions to record onto a disc or a tape
from External Devices such as a Camcorder.

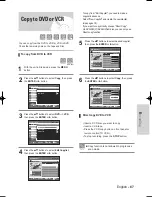
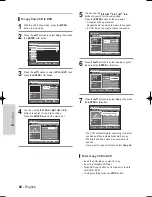
1

Connect the AV out jack of your External Device to
the AV IN jack on the front or rear of your DVD
Recorder & VCR using the Audio/Video Cable.

2

Power on your DVD Recorder & VCR and switch
to AV In mode by pressing the INPUT SEL. button
on the remote control.
The front panel display changes in the following
sequence depending on the Video input setting in
the menu.

AV1: 

Channel Number 

➝ 

AV 1 

➝ 

AV 2

➝ 

DV

S-Video:  

Channel Number 

➝ 

SUPER 

➝ 

AV 2

➝ 

DV

3

Press the REC SPEED button repeatedly to select
the recording speed(quality).

SP

LP

EP

XP

4

When your DVD Recorder & VCR is in the Stop
mode, start playback on your external device.

5

Press the REC button on your DVD Recorder &
VCR to start recording when the desired video is
displayed from the external device.

6

Press the STOP button on your DVD Recorder &
VCR when the recording is finished.

You may control your Camcorder using the IEEE1394
(DV) interface.
Follow these directions to record onto a disc or tape
from a camcorder that has a DV output jack.

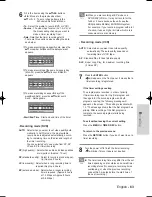
1

Connect the DV output jack of your camcorder to
the DV input jack on the front of your DVD
Recorder & VCR using a DV cable.

2

Power on your DVD Recorder & VCR and switch
to DV mode by pressing the INPUT SEL. on the
remote control.

3

Press the REC SPEED button repeatedly to select
the recording speed(quality).

SP

LP

EP

XP

4

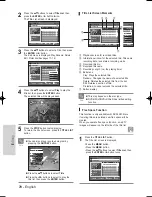
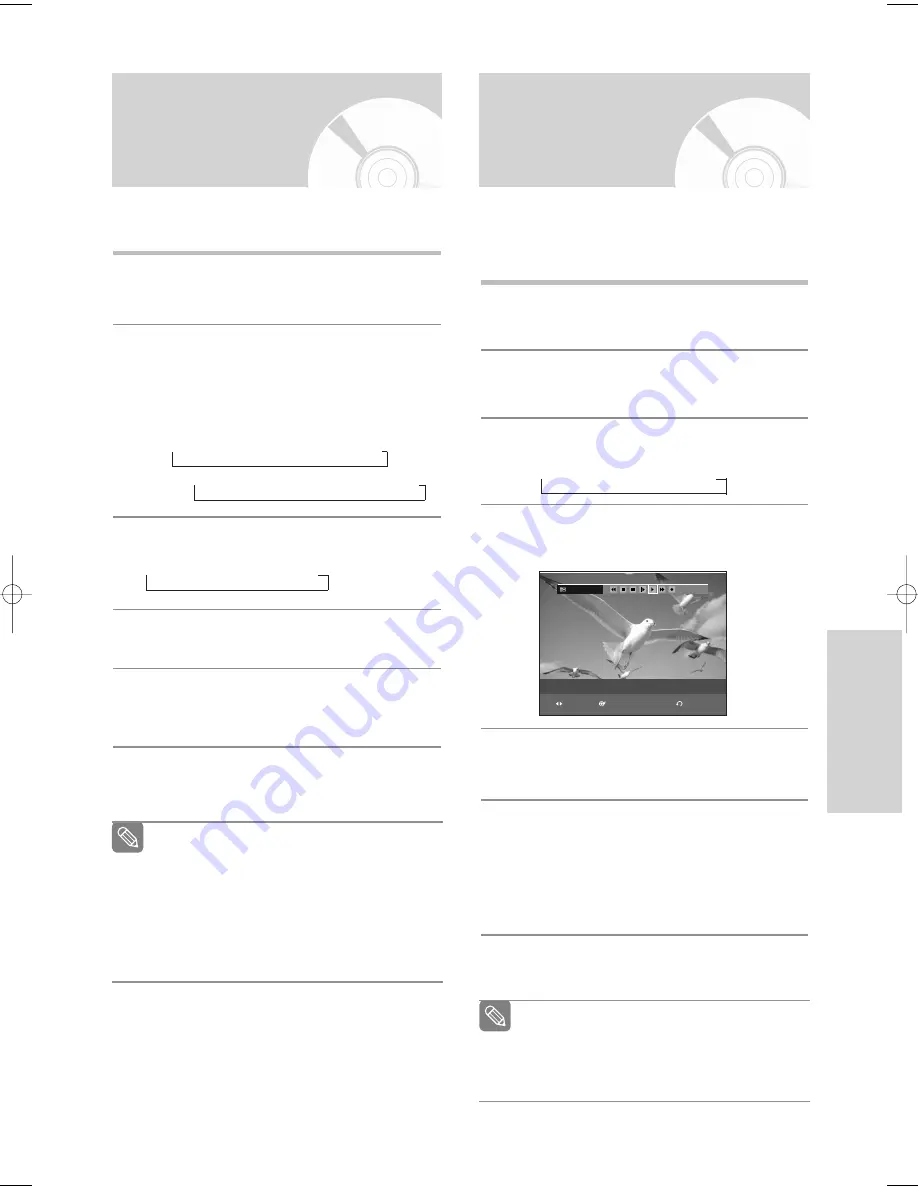
If the input is set to DV, a playback/record menu that
enables camcorder control appears on the top of the
screen.

5

Select the Play icon on the upper part of the
screen to playback the camcorder and find the
starting position to copy.

6

To start recording, Press the 

œ √

button to select

rec

(

)

icon in the top side of the screen, then

press the ENTER button.
You can press the REC button on the remote con-
trol to start recording. To display playback related
icons on the screen, press either direction button
on the remote control.

7

Press the STOP button on your DVD Recorder &
VCR when the recording is finished.

Note

Also refer to the user manual for your External
Devices when recording through AV In jacks on
the DVD/VCR using Audio/Video cable.

You can record an external source through 
S-Video cable. (see page 24). 

For more information on changing the Video
Input from AV1 to S-Video, see page 39(Video
Input).

Some camcorders may not work with your
DVD Recorder & VCR even if they have a DV
output jack.

Also refer to the user manual for your cam-

corder when recording through the DV jack.

Note

English - 61

DV

RETURN

SELECT

MOVE

The DV device is connected.

00995B_VR330_XAC-Eng2  2006.3.14  3:20 PM  Page 61

Содержание VR330 - DVD - DVDr/ VCR Combo

Страница 1: ...Manuel d instructions DVD VR330 www samsung com ca AK68 00995B 00 English Français ...

Страница 2: ...s dans une installation résidentielle Ce matériel produit utilise et peut émettre de l énergie radiofréquence et s il n est pas installé et utilisé conformément aux instructions il peut causer des interférences nuisibles aux communications radio Toutefois il n est nullement garanti qu il n y ait pas d in terférences dans une installation particulière Si cet appareil produit des interférences nuisi...

Страница 3: ...bjets sont tombés à l intérieur l appareil est tombé à terre ou a été exposé à la pluie ou à une humidité excessive Précautions à prendre lors de la manipulation de cet appareil Mettez tout composant hors tension avant de le brancher sur l appareil Ne déplacez pas l enregistreur DVD avec magnéto scope lorsqu un disque est en cours de lecture car cette manœuvre pourrait endommager le disque et les ...

Страница 4: ... finalisé vous ne pouvez pas effectuer d enregistrement supplémentaire Un DVD RW enregistré en mode vidéo devient un DVD vidéo lorsque l enregistrement est terminé Ne pas apposer d étiquette ni de vignette autocollante sur les disques N utilisez pas de disque comportant des morceaux apparents de ruban adhésif ou de restants d étiquette N utilisez pas de protecteur ou de couvercle anti rayures N ut...

Страница 5: ... la page 72 Protection du disque consulter la section Protection du disque à la page 85 Les disques DVD RAM DVD RW et DVD R qui ne sont pas compatibles avec le format DVD vidéo ne sont pas pris en charge par cet appareil Pour plus d information concernant la compatibilité des enregistrements sur DVD communiquez avec le fabri cant des DVD RAM DVD RW ou DVD R L utilisation de disques DVD RAM DVD RW ...

Страница 6: ...Y PB PR 20 Étape 3 Raccordement du câble audio 21 Raccordement à votre téléviseur 21 Raccordement à un amplificateur stéréo aux connecteurs d entrée analogue 22 Raccordement d un amplificateur AV avec connecteurs d entrée numérique 23 Étape 4 Raccordement à des appareils périphériques 24 Connexion d un magnétoscope d un boîtier décodeur STB ou d un lecteur DVD sur la prise d entrée AV 1 IN ou S VI...

Страница 7: ...programmés 64 Enregistrement avec le magnétoscope Fonctions de base d enregistrement avec le magnétoscope 65 Vérification de la durée restante 66 Fonctionnalités d enregistrement spécifiques au magnétoscope 66 Copie du DVD vers le magnétoscope et inversement 67 Modifications Modifications Lecture de la Liste de Titres 69 Fonctions de modification de base Liste de Titres 71 Modification du nom d un...

Страница 8: ...s Consultez la page 61 pour plus d information Balayage progressif de qualité supérieure Le balayage progressif produit une image vidéo à haute défini tion et sans scintillement La technologie est basée sur un processeur de conversion numérique analogique à 10 bits 54 MHz qui gère des circuits de séparation 2D Y C et un cor recteur de base de temps afin de produire une lecture et un enregistrement...

Страница 9: ...e DVD VR mais pas les deux à la fois Vous pouvez formater un DVD RW en mode V ou VR via le gestionnaire de disques Disc Manager Cependant toutes les données sont perdues lors de cette réinitialisation Remarque Étape 3 enregistrement Étape 4 lecture Étape 5 modification d un disque déjà enregistré Sélectionnez le Title titre souhaité à partir du On Screen Menu Menu de l écran et commencez la lectur...

Страница 10: ...ien qu en général cela ne soit pas nécessaire sur un appareil compatible avec le mode DVD VR Si vous utilisez un disque DVD RW en mode vidéo DVD V Terminez l enregistrement du disque si vous souhaitez en faire la lecture sur un autre appareil que cet enregistreur DVD Lorsque vous avez terminé l enregistrement vous ne pouvez plus enregistrer d autres titres ni modifier son contenu Si vous utilisez ...

Страница 11: ...UCHES DE SÉLECTION DE CANAL 14 ENREGISTREMENT 15 LECTURE PAUSE REMBOBINAGE SAUT ARRIÈRE AVANCE RAPIDE SAUT AVANT ARRÊT Description Afficheur du panneau avant 1 2 3 4 5 6 8 7 9 10 1 DVD est activé 2 DVD RAM est activé 3 DVD R ou DVD RW est activé 4 Balayage progressif est activé 5 Fonction d enregistrement est activée 6 Magnétoscope est activé 7 Un DVD ou un CD est chargé 8 L horloge le chiffre du ...

Страница 12: ...RIQUE COAXIALE 11 PRISES DE SORTIE VIDÉO SORTIE COMPOSANT 10 11 4 2 3 6 7 8 5 9 1 Ventilateur Les pales du ventilateur tournent sans arrêt lorsque l appareil est sous tension Prévoyez un dégagement de 4 pouces de chaque côté du ventilateur lorsque vous installez l appareil Déballage Accessoires Assurez vous que vous avez en main les accessoires énumérés ci dessous Câble audio vidéo AC39 00073A Câb...

Страница 13: ...COPY Appuyez sur cette touche lorsque vous copiez du lecteur DVD vers le magnétoscope 33 Touche REC PAUSE Pour activer la fonction pause de l enregistrement 1 Touche DVD Pour commander l enregistreur DVD 2 Touche TV Pour commander le téléviseur 3 Touche POWER 4 Touches numériques 5 Touche des centaines Pour syntoniser les canaux des positions supérieures à 100 6 Touche F ADV SKIP 7 Touches de lect...

Страница 14: ...nde Bref aperçu 14 Étape 1 Raccordement du câble d antenne 15 Étape 2 Raccordement du câble vidéo 18 Étape 3 Raccordement du câble audio 21 Étape 4 Raccordement à des appareils périphériques 24 Étape 5 Branchement du cordon d alimentation 27 Étape 6 Préparation de la télécommande 27 Note à l intention de l installateur du câble Reportez vous à l article 820 40 du Code national de l électricité sec...

Страница 15: ...anaux non brouillés en sélectionnant la chaîne sur le graveur DVD Utilisez aussi cette méthode si vous visionnez les chaînes sans câblosélecteur Si vous utilisez une antenne extérieure avec un câble plat de 300 ohm utilisez un adaptateur externe 300 à 75 ohm non fourni pour raccorder l antenne au graveur DVD avec magnétoscope Remarque Si vous disposez de deux antennes VHF et UHF utilisez un mélang...

Страница 16: ...sélecteur Graveur DVD avec magnétoscope Téléviseur Câblosélecteur à plusieurs canaux brouillés Vous pouvez enregistrer des chaînes en les syntonisant à partir du câblosélecteur Il est impossible d enregistrer une chaîne tout en visionnant une autre chaîne Assurez vous que le câblosélecteur est allumé ...

Страница 17: ...enne Graveur DVD avec Magnétoscope Câblosélecteur Téléviseur Câblosélecteur à quelques chaînes brouillées Vous pouvez enregistrer des chaînes non brouillées en les syntonisant à partir du câblosélecteur Il est impossible d enregistrer des canaux brouillés qui nécessitent un boîtier décodeur ...

Страница 18: ...VIDEO Jaune Câble Audio Vidéo Raccordement à une prise d entrée vidéo Raccordez un câble vidéo jaune entre la prise d entrée VIDEO OUT SORTIE VIDÉO jaune du graveur DVD avec magnétoscope et la prise d entrée VIDEO IN ENTRÉE VIDÉO jaune du téléviseur ou de l amplificateur AV Vous pourrez profiter d images de qualité Raccordez les câbles audio blanc et rouge entre les prises AUDIO OUT SORTIE AUDIO d...

Страница 19: ...trée S vidéo Raccordez un câble S vidéo non fourni entre la prise S VIDEO OUT SORTIE S VIDÉO du graveur DVD avec magnétoscope et la prise S VIDEO IN ENTRÉE S VIDÉO du téléviseur ou de l amplificateur AV Vous pourrez profiter d images de haute qualité Le format S Video sépare les composantes de l image en signaux noirs et blancs Y et couleur C afin de produire une qualité d images plus nette que le...

Страница 20: ...é 1 Mettez l appareil est en mode d arrêt puis appuyez sur la touche P SCAN située sur le panneau avant du graveur DVD avec magnétoscope 2 Le message Appuyez sur le Oui pour confirmer le mode de balayage progressif Sinon appuyez sur le Non s affiche Appuyez sur les touches œ pour sélectionner Oui puis appuyez sur la touche ENTER Comparé au balayage vidéo entrelacé standard le balayage progressif d...

Страница 21: ... Raccordement du câble audio Sélectionnez une connexion audio sur les pages suivantes INPUT AUDIO R L VIDEO Blanc Rouge Jaune Câble Audio Vidéo Raccordement à un téléviseur Ce raccordement utilise les haut parleurs de votre téléviseur ...

Страница 22: ... Rouge Blanc Raccordement à un amplificateur stéréo à prises d entrée analogiques Utilisez les prises AUDIO OUT SORTIE AUDIO si votre amplificateur stéréophonique ne possède que les prises AUDIO INPUT L R ENTRÉE AUDIO G et D Haut parleur avant G Haut parleur avant D ...

Страница 23: ...sez ce raccordement si votre amplificateur AV possède un décodeur numérique Dolby Digital ou DTS et une prise d entrée numérique Vous devez régler les conditions audio pour profiter du son numérique Dolby Digital ou DTS Voir la page 35 Fabriqué sous licence de Dolby Laboratories Dolby et le symbole du double D sont des mar ques de commerce de Dolby Laboratories DTS et DTS Digital Out sont des marq...

Страница 24: ... IN Raccordement d un magnétoscope ou d un appareil périphérique aux prises AV 1 IN ENTRÉE AV du graveur DVD avec magné toscope Il vous est possible d enregistrer à partir d appareils périphériques magnétoscope boîtier décodeur ou lecteur DVD Permet aussi l utilisation des prises AV 2 IN ENTRÉE AV 2 sur le panneau avant du graveur DVD avec magnétoscope Appuyez sur le touche INPUT SEL pour sélectio...

Страница 25: ...nneau avant du graveur DVD avec magné toscope Vous pouvez enregistrer à partir d un périphérique en tant que caméscope Si vous branchez une source de signaux aux prises AV 2 IN ENTRÉE AV 2 alors que vous regardez la télévision le signal d entrée passe automatiquement à AV 2 Si la source d entrée AV 2 n est pas sélec tionnée automatiquement appuyez sur le touche INPUT SEL pour la sélectionner Remar...

Страница 26: ...ement d un caméscope à la prise DV IN ENTRÉE DV Si votre caméscope est doté d une prise de sortie DV raccordez le à la prise d entrée DV de votre graveur DVD avec magnétoscope Si le mode d entrée n est pas sélectionné automatiquement utilisez la touche INPUT SEL Remarque ...

Страница 27: ...ion des piles dans la télécommande Ouvrez le compartiment à piles sur la face arrière de la télécommande Insérez deux piles AAA Faites correspondre les polarités et des piles à celles indiquées dans le compartiment Refermez le compartiment à piles Si la télécommande ne fonctionne pas correctement Vérifiez la correspondance des polarités des piles piles sèches Vérifiez si les piles sont déchargées ...

Страница 28: ...Touche Fonction TV POWER Commutation marche arrêt du téléviseur INPUT SEL Sélection de la source externe VOL Réglage du volume du téléviseur CH TRK Syntonisation d un canal TV MUTE Touche de sourdine du téléviseur 0 9 Sert à entrer directement le numéro 100 Touche numérique pour les canaux des positions supérieures à 100 Si la case ci dessus correspondant à la marque de votre téléviseur contient p...

Страница 29: ...ur confirmer tout nouveau réglage 4 TOUCHE RETURN Pour revenir au MENU précédent ou pour quitter le MENU à l écran Navigation dans le Menu de l écran 29 Paramétrage Auto Horloge 30 Paramétrage Manuel Horloge 31 Réglage des canaux 32 Mèmoire Canal Auto 32 Ajouter Supprimer Canal 33 Canal de sortie 33 Configuration des options de langue 34 Configuration des options audio 35 Configuration des options...

Страница 30: ...ler l Auto Clock Auto Horloge Consultez les pages 15 et 17 pour plus d information concernant la connexion de l an tenne L horloge se règle automatiquement dès que vous éteignez l enregistreur DVD avec magnétoscope Si votre horloge est réglée selon une heure d été ou un fuseau horaire incorrect vous pouvez modifier ces paramètres sans quitter la fonction Paramétrage Auto Horloge Remarque 30 França...

Страница 31: ...cédant comme suit 1 Lorsque l appareil est en mode Stop Arrêt ou Pas de disque appuyez sur la touche MENU 2 Sélectionnez Paramétrer en déplaçant la barre de sélection à l aide des touches puis appuyez sur ENTER ou sur Pour utiliser toute la précision de la fonction Timer Recording enregistrement par minuterie l horloge interne de votre enregistreur DVD avec magnéto scope doit être réglée correctem...

Страница 32: ... raccordé à un câblosélecteur Voir les page 16 Mèmoire Canal Auto Mèmoire Canal Auto permet de prérégler automatiquement tous les canaux recevables 1 Lorsque l appareil est en mode Stop Arrêt ou Pas de disque appuyez sur la touche MENU 2 Sélectionnez Paramétrer en déplaçant la barre de sélection à l aide des touches puis appuyez sur ENTER ou sur 3 Sélectionnez Réglage des chaînes en déplaçant la b...

Страница 33: ...ER Sélectionnez ensuite OUI Utilisez cette fonction pour ajouter des chaînes qui n ont pas été détectées par la fonction Mèmoire Chaîne Auto ou pour supprimer une chaîne détectée 1 Lorsque l appareil est en mode Stop Arrêt ou Pas de disque appuyez sur la touche MENU 2 Sélectionnez Paramétrer en déplaçant la barre de sélection à l aide des touches puis appuyez sur ENTER ou sur 3 Sélectionnez Réglag...

Страница 34: ...an Syntonisez la chaîne 3 ou 4 sur votre téléviseur de façon à ce qu il corresponde à la chaîne de sortie RF du graveur DVD avec magnéto scope 34 Français Réglage des chaînes DVD Recorder Pas De Disque Enr par minut Paramétrer Antenne Câble TV Antenne Mèmoire Canal Auto Ajouter Supprimer Canal Canal de Sortie CH3 CH3 CH4 Configuration des options de langue Si vous configurez à l avance la langue a...

Страница 35: ...DTS est en lecture le son ne provient pas d une sortie audio analogique Les instructions ci dessous servent à régler votre appareil audio et les paramètres audio en fonction du système audio que vous utilisez 1 Lorsque l appareil est en mode Stop Arrêt ou aucun disque appuyez sur la touche MENU 2 Sélectionnez Paramétrer en déplaçant la barre de sélection à l aide des touches puis appuyez sur ENTER...

Страница 36: ... centrale de l image 16 9 l image sera coupée à l extrême gauche et à l extrême droite 16 9 Large Vous pouvez voir en entier l image 16 9 sur votre téléviseur à grand écran Niveau d Entrée Permet de régler le niveau d entrée du signal vidéo Plus Foncé Sélectionnez cette option si vous trou vez que l image à l écran est trop claire Plus Clair Sélectionnez cette option si vous trouvez que l image à ...

Страница 37: ...s touches puis appuyez sur ENTER ou sur Par exemple si vous sélectionnez les niveaux 6 et moins les disques de niveau 7 et 8 ne pourront être visionnés Un niveau de contrôle plus élevé signifie que le titre vidéo est pour adulte seulement Appuyez sur la touche RETURN ou sur œ pour revenir au menu précédent Appuyez sur MENU pour sortir du menu Consultez la section Dépannage à la page 91 si vous ave...

Страница 38: ...yez sur la touche RETURN ou sur œ pour revenir au menu précédent Appuyez sur MENU pour sortir du menu Remarque Modif Code Secret DVD Recorder Pas De Disque Enr par minut Paramétrer Entrer code secret REVENIR ENTERZ NUMÉRO SORTIE Contrôle Parental DVD Recorder Pas De Disque Enr par minut Paramétrer Utiliser le Code Oui Niveau de Contrôle Niveau 1 Enfants Modif Code Secret Modif Code Secret DVD Reco...

Страница 39: ... d une cassette vidéo démarre automatiquement lorsque vous en insérez une activez l option Auto Play Non désactive la lecture automatique Oui lorsque vous insérez une cassette le magnéto scope démarre automatiquement la lecture de la bande vidéo en autant que l onglet de protection de cette cassette soit retiré Répétition auto Active la lecture à répétition d une cassette vidéo Ce mode de lecture ...

Страница 40: ...isque appuyez sur la touche MENU 2 Sélectionnez Paramétrer en déplaçant la barre de sélection à l aide des touches puis appuyez sur ENTER ou sur 3 Sélectionnez Système en déplaçant la barre de sélec tion à l aide des touches puis appuyez sur ENTER ou sur 4 Sélectionnez Temps DVD en Mode EP en déplaçant la barre de sélection à l aide des touches puis appuyez sur ENTER ou sur 5 Sélectionnez 6 Heures...

Страница 41: ...JAN 01 2006 12 00 AM CH1 JAN 01 2006 12 30 AM CH1 JAN 01 2006 01 00 AM CH1 Précédent Haut Suivant JAN 01 2006 01 30 AM CH1 Enregistrement rapide Le disque prend environ 10 secondes à s initialiser à l al lumage de l appareil Pour éviter cette phase d initialisation activez Quick Recording Enrg rapide Cela permet l en registrement immédiat sans chargement du disque 1 Mettez l appareil en mode Stop ...

Страница 42: ...n disque photo 54 Lecture d une cassette vidéo Utilisation du magnétoscope 55 Alignement 55 Fonctionnalités de lecture spécifiques au magnétoscope 56 Lecture S VHS 56 Système de recherche variable 56 Type de disque Logo Nature du contenu Format du disque Durée de lecture maximale ou minutes Simple face 5po 240 DVD Vidéo VIDEO Double face 5po 480 AUDIO Simple face 3 5po 80 Double face 3 5po 160 CD ...

Страница 43: ... toujours la touche OPEN CLOSE pour ouvrir et fermer le plateau du disque Ne touchez pas au plateau du disque alors qu il est en train de s ouvrir ou de se fermer car ceci pour endommager l appareil Ne déposez ni n insérez aucun objet autre que des disques Selon le type de disque utilisé il est possible que certaines fonctions ne réagissent pas comme prévu ou soient désactivées Dans un tel cas con...

Страница 44: ...s chapitres pistes audio sous titres bandes annonces personnages etc Avec un disque DVD Vidéo 1 Appuyez sur la touche DISC MENU pour accéder au menu spécifique à ce disque Allez au menu des réglages de lecture Sélectionnez la langue et les sous titres parmi les langues offertes sur le disque 2 Appuyez sur la touche TITLE MENU pour accéder au menu des titres spécifique à ce disque Utilisez cette to...

Страница 45: ...os de la fonction ANYKEY La fonction ANYKEY vous permet de retrouver rapidement la scène de votre choix à partir d un titre d un chapitre d une piste ou d une position temporelle Vous pouvez également l utiliser pour modifier un sous titre ou des paramètres audio de même que pour régler certaines fonctions dont la répétition l angle et le niveau de zoom Accéder à une scène directement avec ANYKEY ...

Страница 46: ...l aide des touches numériques puis appuyez sur ENTER Il est possible que cette fonction ne soit pas utilis able avec certains types de disque Certains types de disque CD audio CD DA ou MP3 ne permet tent pas l affichage de ce genre d information Certains types de disque ne permettent pas la recherche temporelle Pour vider l écran appuyez de nouveau sur la touche ANYKEY Remarque Lecture à répétitio...

Страница 47: ...ion de la touche AUDIO 1 Appuyez sur la touche AUDIO durant une lecture 2 Appuyez sur le touche AUDIO ou pour sélectionner la langue de votre choix Utilisation de la touche ANYKEY 1 Appuyez sur la touche ANYKEY durant une lecture 2 Sélectionnez Audio en déplaçant la barre de sélection à l aide des touches œ œ puis sélectionnez de la même façon la langue souhaitée Les langues disponibles sont spéci...

Страница 48: ...as avec certains DVD Elle ne fonctionnera pas avec un DVD qui n a pas été enregistré à l aide d un système d angles à caméras multiples Remarque 1 Appuyez sur la touche ANYKEY durant une lecture 2 Sélectionnez Zoom en déplaçant la barre de sélection à l aide des touches puis appuyez sur ENTER L icône apparaît 3 Utilisez les touches et œ pour déplacer la loupe dans la zone à agrandir 4 Appuyez sur ...

Страница 49: ...créer jusqu à 10 signets correspon dant à 10 scènes Lecture à partir d un Signet 1 Appuyez sur la touche MARKER 2 Sélectionnez le Signet de votre choix en déplaçant la barre de sélection à l aide des touches œ 3 Appuyez sur ENTER ou sur ll pour débuter la lecture à partir de la scène correspondant au Signet sélectionné Suppression d un Signet 1 Appuyez sur la touche MARKER 2 Sélectionnez le Signet...

Страница 50: ...arre de sélection à l aide des touches œ 3 Appuyez sur ENTER ou sur ll pour débuter la lecture à partir de la scène correspondant au marqueur sélectionné Si vous appuyez sur la touche NEXT SKIP l ou sur PREVIOUS SKIP lœœ en mode de marqueur alors que le marqueur actuel est actif depuis moins de trois secondes la lecture passe au début du marqueur suivant ou précédent selon le cas Suppression d un ...

Страница 51: ... cette touche l enregistreur DVD avec magnétoscope passe à la piste précédente et amorce sa lecture En appuyant sur cette touche alors que la piste en cours de lecture est active depuis moins de trois secondes la lecture reprendra au début de la piste précédente Si la piste en cours de lecture est active depuis plus de trois secondes la lecture reprendra au début de cette même piste 2 Touche l Lec...

Страница 52: ...lors que la piste en cours de lecture est active depuis moins de trois secondes la lecture reprendra au début de la piste précédente Si la piste en cours de lecture est active depuis plus de trois secondes la lecture reprendra au début de cette même piste 2 Touche l Lecture de la piste suivante 3 Arrêt de lecture d une piste pièce musicale 4 ll Lecture d une piste pièce musicale ou mise en pause d...

Страница 53: ... s affiche en surbrillance 2 Sélectionnez le mode de lecture en boucle à l aide des touches œ puis appuyez sur ENTER Répéter la piste CD CD DA MP3 Répéter le dossier MP3 Répéter le disque CD CD DA MP3 Pour revenir au mode de lecture normal 3 Appuyez sur la touche CANCEL pour revenir à la lecture normale Lecture en boucle d un disque audio MP3 Liste de Musique CD 001 TRACK 1 00 03 50 002 TRACK 2 00...

Страница 54: ...DDA CDDA CDDA CDDA CDDA CDDA 01 15 PLAY MODE Liste de Lecture CD 001 TRACK 1 002 TRACK 2 003 TRACK 3 004 TRACK 4 TRACK 1 TRACK 2 TRACK 3 TRACK 4 TRACK 5 TRACK 6 TRACK 7 TRACK 8 CDDA CDDA CDDA CDDA CDDA CDDA CDDA CDDA 04 15 PLAY MODE Liste de Lecture CD 001 TRACK 1 002 TRACK 2 003 TRACK 3 TRACK 1 TRACK 2 TRACK 3 TRACK 4 TRACK 5 TRACK 6 TRACK 7 TRACK 8 CDDA CDDA CDDA CDDA CDDA CDDA CDDA CDDA 03 03 P...

Страница 55: ...disparaître les rayures blanches apparaissant à l écran Utilisation du magnéto scope Alignement Languette de protection contre l enregistrement Français 55 5 1 Si vous appuyez sur la touche ll l écran de vitesse du diaporama apparaît Appuyez sur les touches œ pour régler la vitesse de défilement des diapositives puis appuyez sur ENTER 5 2 Sélectionnez une image à l écran Album puis appuyez sur ENT...

Страница 56: ...de de pause appuyez sur la touche F ADV SKIP pour afficher l image suivante Avance rembobinage à vitesse variable En mode de lecture appuyez sur la touche Forward ou Rewind œœ pour faire avancer ou pour rembobiner la bande vidéo selon deux vitesses au choix Recherche d image Appuyez sur cette touche à plusieurs reprises pour activer les fonctions d avance et de retour rapides de la bande à 2 3 5 7...

Страница 57: ...sez cette fonction si vous ne connaissez pas la position exacte d un programme sur une bande vidéo 1 Si la bande vidéo est arrêtée appuyez sur la touche ANYKEY 2 Sélectionnez Balayage avant d intro ou Balayage arrière d intro en déplaçant la barre de sélection à l aide des touches puis appuyez sur ENTER Lorsque l enregistreur DVD avec magnétoscope trou ve une clé d index sur la bande il amorce une...

Страница 58: ...DVD RAM mode VR mode VR mode vidéo V mode vidéo V Samsung Autre fabricant Samsung Autre fabricant Samsung Autre fabricant Samsung Autre fabricant X X Terminé Non terminé Terminé Non terminé Terminé Non terminé Terminé Non terminé Terminé Non terminé Non enregistrable Enregistrable Non enregistrable Enregistrable Non enregistrable Non enregistrable Non enregistrable Enregistrable Non enregistrable ...

Страница 59: ... maximale d enreg istrement et la qualité de l image En mode AUTO le mode d enregistrement le plus approprié sera réglé automatiquement selon le temps restant sur le disque et la durée de l enregistrement minuté Vous ne pouvez sélectionner qu un seul mode parmi les modes XP SP LP et EP pour l enregistrement programmé Les disques DVD R à doubles couches possèdent environ le double de la capacité d ...

Страница 60: ... Appuyez sur la touche OPEN CLOSE pour refermer le plateau Attendez jusqu à ce que le texte LOAD disparaisse de l afficheur sur le panneau avant 3 Sélectionnez la chaîne diffusant le contenu que vous souhaitez enregistrer à l aide des touches CH TRK ou des touches numériques de la télécommande 4 Appuyez à plusieurs reprises sur la touche REC SPEED pour sélectionner la vitesse d enreg istrement et ...

Страница 61: ...sur la touche INPUT SEL Lorsque le signal d entrée est réglé à DV un menu de lecture et d enregistrement apparaît au haut de l écran Ce menu vous permettra de commander le caméscope 5 Sélectionnez l icône de lecture dans la partie supérieure de l écran pour amorcer la lecture du contenu du caméscope et aller à la position de départ de l enregistrement à faire Vous pouvez également utiliser la touc...

Страница 62: ...r la touche STOP Le message Mise à jour de l information sur le disque Veuillez patienter un instant s affiche Le chiffre du compteur de la minuterie défile en décroissant de 4 00 à 0 00 puis l enreg istreur DVD avec magnétoscope s arrête Remarque Vous devez régler l horloge avant de pouvoir activer le Timer Recording l enregistrement par minuterie Mise en marche initiale Clock Set Réglage de l ho...

Страница 63: ...e contenu à enregistrer Date Date du début de l enregistrement Il existe trois options pour le réglage de la date Reportez vous à la section ci dessous Pour effectuer un enregistrement à une date spécifique appuyez sur les touches ou sur les touches numériques jusqu à l affichage de la date souhaitée Pour effectuer un enregistrement à la même heure tous les jours Lun Ven appuyez sur les touches ju...

Страница 64: ...emps Courant 12 27 AM No To Source Date Démar Fin Mode Éditer 01 DVD CH06 01 01 03 05AM 05 05AM SP 02 DVD CH06 01 02 01 06AM 03 06AM SP 03 Liste d Enregistrements Programmée DVD Recorder DVD RAM VR Temps Courant 12 27 AM No To Source Date Démar Fin Mode Éditer 01 DVD CH06 01 01 03 05AM 05 05AM SP 02 DVD CH06 01 02 01 06AM 03 06AM SP 03 Éditer Suppr 64 Français Liste d Enregistrements Programmée DV...

Страница 65: ... Vérifiez les connexions de l antenne et des canaux du téléviseur 2 Vérifiez la durée d enregistrement disponible sur la bande vidéo Vous pouvez enregistrer une émission en cours simple ment en insérant une cassette vidéo vierge et en appuyant sur la touche REC Il vous est même pos sible d ajouter des heures en incréments pré réglés allant jusqu à 4 heures en appuyant plusieurs fois sur la touche ...

Страница 66: ...trez un contenu provenant du sig nal d antenne appuyez sur la touche TV VCR de la télécommande Passez au canal que vous souhaitez regarder Passez à la chaîne que vous souhaitez regarder à l aide de la télécommande du téléviseur 2 Regarder le contenu d un autre disque Vous pouvez regarder un DVD pendant un enreg istrement sur bande vidéo et inversement Pendant un enregistrement sur bande vidéo insé...

Страница 67: ... Insérez le disque DVD que vous souhaitez copier Insérez une cassette vidéo VHS Appuyez sur la touche de copie VCR sur le panneau avant ou sur TO VCR sur la télécommande Appuyez sur la touche STOP pour arrêter l enregistrement Copie du DVD au magné toscope et inversement VR mode La fonction Copy n est pas disponible en mode de balayage progressif Remarque Editer liste à copier DVD Recorder 01 JAN ...

Страница 68: ...acement vierge puis il commence automatiquement à copier Les points Start et End peuvent ne pas corre spondre exactement Pour copier tout le contenu sélectionnez Copier tout Copie directe du magnétoscope au DVD Insérez la cassette vidéo VHS que vous souhaitez copier Insérez un DVD enregistrable Appuyez sur la touche de copie DVD sur le pan neau avant ou sur TO DVD sur la télécommande Appuyez sur l...

Страница 69: ...ue 86 Finalisation du disque 86 Annulation d une finalisation de disque modes V et VR 87 Suppression de toutes les Listes de Titres 88 Compatible avec les modifications 89 Lecture de la Liste de Titres Suivez les instructions ci dessous pour lire une scène à partir de la Liste de Titres Avec la touche TITLE LIST 1 Appuyez sur la touche TITLE LIST L écran Liste de Titres s affiche 2 Sélectionnez le...

Страница 70: ...ages télévisées en cours de diffusion apparaissent du côté gauche de la liste de titres 1 Appuyez sur la touche TITLE LIST L écran Liste de Titres s affiche Ou utilisez le touche MENU Appuyez sur MENU Sélectionnez Liste de Titres en déplaçant la barre de sélection à l aide des touches puis appuyez deux fois sur ENTER ou sur La disponibilité de ces différents éléments varie d un disque à l autre Le...

Страница 71: ... instructions ci dessous pour renommer une Liste de Titres c est à dire pour modifier le titre d un programme enregistré 1 Appuyez sur la touche TITLE LIST L écran Liste de Titres s affiche Ou utilisez le touche MENU Appuyez sur MENU Sélectionnez Liste de Titres en déplaçant la barre de sélection à l aide des touches puis appuyez deux fois sur ENTER ou sur 2 Sélectionnez le titre que vous souhaite...

Страница 72: ...Insère une espace et avance le curseur d une position vers la droite Suppr Efface le caractère qui se trouve à la position actuelle du curseur Effacer Efface tous les caractères qui ont été insérés Enreg Enregistre les caractères qui ont été insérés 5 Sélectionnez Save en déplaçant la barre de sélection à l aide des touches œ puis appuyez sur ENTER Le nouveau nom du titre est affiché dans le champ...

Страница 73: ...00 AM CH1 JAN 01 2006 EP Non Oui DVD RAM VR JAN 01 2006 DVD RW mode vidéo DVD RW DVD R aucune Playlist Liste de Lecture n étant activée le message suivant s affiche Souhaitez vous supprimer Ces messages varient d un disque à l autre 4 Sélectionnez Oui en déplaçant la barre de sélection à l aide des touches œ puis appuyez sur ENTER Vous ne pouvez pas supprimer un titre verrouillé Pour supprimer un ...

Страница 74: ...nnez le titre dont vous souhaitez supprimer une partie en déplaçant la barre de sélection à l aide des touches puis appuyez sur ENTER ou sur 3 Sélectionnez Éditer en déplaçant la barre de sélection à l aide des touches puis appuyez sur ENTER ou sur L écran Éditer la Liste de Titres s affiche 4 Appuyez sur la touche ENTER lorsque vous avez positionné le disque au début de la partie à sup primer L i...

Страница 75: ...pitres modifiés ne s affichent qu avec les lecteurs DVD existants et seulement après avoir exécuté la fonction Vérifier la compatibilité Voir la page 89 Lorsque vous ajoutez un chapitre le titre est divisé à partir de ce point Lorsque vous ajoutez un chapitre à un titre n en comportant qu un seul un nouveau chapitre est créé Remarque Français 75 Liste de Titres 01 JAN 01 2006 12 00 00 04 48 02 JAN...

Страница 76: ...priées Touches de lecture II Iœœ I œ œ 5 Appuyez sur les touches œ pour sélectionner Supprimer puis appuyez sur ENTER Le chapitre sélectionné est supprimé Pour terminer l opération sélectionnez Termi à l aide des touches œ puis appuyez sur ENTER Le premier chapitre ne peut être supprimé Le menu Suppr n est pas disponible lorsque le titre sélectionné comporte un seul chapitre Lorsque vous supprimez...

Страница 77: ...res disparaît Remarque Liste de Titres 01 JAN 01 2006 12 00 00 04 48 02 JAN 01 2006 12 30 00 01 47 03 JAN 01 2006 01 00 00 49 57 04 Espace libre 01 13 08 No Titre Longu Édit DVD RW JAN 01 2006 1 4 JAN 01 2006 12 00 AM CH1 JAN 01 2006 SP Diviser le titre Liste de Titres No 03 Démar Fin 00 00 00 00 00 00 00 00 01 Pointer Diviser Termi DVD RW Diviser le titre Liste de Titres No 03 Démar Fin 00 00 00 ...

Страница 78: ... 00 AM 01 JAN 01 2006 12 0 00 00 03 02 JAN 01 2006 12 3 00 00 25 03 JAN 01 2006 01 0 00 00 05 No Titre Longu Édit Modifications avancées Liste de Lecture Création d une Liste de Lecture Suivez les instructions ci dessous pour créer un nouveau titre de playlist Liste de Lecture à partir d un titre enregistré 1 Lorsque l appareil est en mode Stop Arrêt appuyez sur la touche MENU 2 Sélectionnez Liste...

Страница 79: ...r la lecture Vous serez ramené à l écran Éditer la Liste de Lecture Modification du nom d un titre dans la Liste de Lecture Suivez les instructions ci dessous pour renommer un titre dans la Liste de Lecture c est à dire pour modifier son nom 1 Appuyez sur le touche PLAY LIST lorsque le disque est arrêté L écran Éditer la Liste de Lecture s affiche Ou utilisez le touche MENU Lorsque l appareil est ...

Страница 80: ...t appuyez sur la touche MENU Sélectionnez Liste de Lecture en déplaçant la barre de sélection à l aide des touches puis appuyez sur ENTER ou sur Sélectionnez Éditer la Liste de Lecture en déplaçant la barre de sélection à l aide des touches puis appuyez sur ENTER ou sur 2 Sélectionnez dans la Liste de Lecture le titre que vous souhaitez éditer en déplaçant la barre de sélec tion à l aide des touch...

Страница 81: ...00 11 04 00 00 03 Lect Modif Dépla Ajout Suppr 6 Appuyez sur la touche ENTER lorsque vous avez identifié la nouvelle position de départ de la scène L image et l heure de la position de départ s affichent dans la sous fenêtre Démar Utilisez les touches de lecture II Iœ œ I œ œ pour identifier les nouvelles positions de départ et de fin de la scène à modifier 7 Appuyez sur la touche ENTER lorsque vo...

Страница 82: ...ectionnez Dépla en déplaçant la barre de sélec tion à l aide des touches puis appuyez sur ENTER La fenêtre de la scène à déplacer s affiche en jaune 6 Appuyez sur les touches œ pour sélectionner la position de destination de la scène que vous souhaitez déplacer puis appuyez sur la touche ENTER La scène sélectionnée est déplacée à la position choisie Déplacement d une scène modification de la posit...

Страница 83: ...che Ou utilisez le touche MENU Lorsque l appareil est en mode Stop Arrêt appuyez sur la touche MENU Sélectionnez Liste de Lecture en déplaçant la barre de sélection à l aide des touches puis appuyez sur ENTER ou sur Sélectionnez Éditer la Liste de Lecture en déplaçant la barre de sélection à l aide des touches puis appuyez sur ENTER ou sur 2 Sélectionnez le titre que vous souhaitez copier sur band...

Страница 84: ...aide des touches puis appuyez sur ENTER ou sur 2 Sélectionnez dans la Liste de Lecture le titre que vous souhaitez supprimer en déplaçant la barre de sélection à l aide des touches puis appuyez sur ENTER ou sur Les fonctions de modification disponibles sont Lecture Renommer Éditer Scène Copier Supprimer 3 Sélectionnez Suppr en déplaçant la barre de sélec tion à l aide des touches puis appuyez sur ...

Страница 85: ...sque Supprimer Toutes les Listes de Titres Protection du Disque La fonction Protection du Disque permet de verrouiller un disque afin d éviter qu il ne soit formaté par erreur ou qu une partie de son contenu ne soit supprimée 1 Lorsque l appareil est en mode Stop Arrêt appuyez sur la touche MENU 2 Sélectionnez Gestion de Disque en déplaçant la barre de sélection à l aide des touches puis appuyez s...

Страница 86: ...ER ou sur 3 Sélectionnez Format du Disque en déplaçant la barre de sélection à l aide des touches puis appuyez sur ENTER ou sur DVD RAM RW Le message suivant s affiche Souhaitez vous formater ce disque Suivi de ce message Toutes les données vont être supprimées Souhaitez vous poursuivre Gestionnaire de Disque DVD Recorder Liste de Titres Liste de Lecture Gestion de Disque Enr par minut Paramétrer ...

Страница 87: ... du Disque Protection du Disque Non Protégé Format du Disque DVD VR Finaliser le Disque Supprimer Toutes les Listes de Titres Le disque sera finalisé Souhaitez vous poursuivre Oui Non Annulation d une finalisation de disque modes V et VR 1 Lorsque l appareil est en mode Stop Arrêt appuyez sur la touche MENU 2 Sélectionnez Gestion de Disque en déplaçant la barre de sélection à l aide des touches pu...

Страница 88: ... sera pas finalisé Souhaitez vous pour suivre 4 Sélectionnez Oui en déplaçant la barre de sélection à l aide des touches œ puis appuyez sur ENTER La finalisation du disque n est pas achevée Gestionnaire de Disque DVD Recorder Liste de Titres Liste de Lecture Gestion de Disque Enr par minut Paramétrer Copier DVD RW VR F Nom du Disque Format du Disque DVD VR Disque Non Finalisé Souhaitez vous ne pas...

Страница 89: ...ité en déplaçant la barre de sélection à l aide des touches puis appuyez sur ENTER ou sur Le message de confirmation Souhaitez vous exécuter Vérifier la compatibilité Selon votre configuration ceci pourrait prendre plus d une heure s affiche Ce processus dure un maximum de 10 minutes 4 Appuyez sur les touches œ pour sélectionner Yes puis sur le touche ENTER pour lancer le programme de compatibilit...

Страница 90: ...ils de référence Dépannage Fiche technique GARANTIE LIMITÉE DE L ACHETEUR INITIAL Dépannage DVD VIDEO DVD RAM DVD RW DVD R 91 Dépannage DVD 92 Dépannage VCR 93 Problèmes et solutions Affichage des messages d erreur 94 Fiche technique 96 ...

Страница 91: ...amment d espace disponible pour l enregistrement L enregistrement n est possible que sur un disque DVD RAM DVD RW ou DVD R De plus il est impossible d enregistrer un programme protégé contre la copie Appuyez sur la touche CH du panneau frontal de l appareil sans disque et maintenez là enfoncée pour plus de 5 secondes puis appuyez sur la touche POWER OFF ON Tous les réglages y compris le mot de pas...

Страница 92: ... une défectuosité Les options de langue audio et de langue de sous titres sont spécifiques à chaque disque Seules les langues disponibles sur le disque DVD s affichent dans le menu du disque et peuvent être choisies Vérifiez si le sigle PS est affiché sur le panneau avant Assurez vous d utiliser la touche Progressive afin de modifier la sortie vidéo à composantes lorsque le disque est arrêté Point...

Страница 93: ...réglage syntoniseur source externe Celui ci devrait être réglé sur régulières syntoniseur Rayures ou lignes noires à la lecture Vérifiez les connexions de l antenne du téléviseur Appuyez sur les touches CH TRK pour atténuer cet effet En appuyant sur la touche II pendant Une image figée peut comporter des rayures horizontales si la bande vidéo une lecture l image figée contient est endommagée Appuy...

Страница 94: ... Problème Vous ne pouvez pas enregistrer un film protégé contre la copie Vous ne pouvez pas enregistrer Ce disque est protégé Ce disque ne peut être formaté il est protégé Ce disque ne peut être renommé il est protégé Ce disque ne peut être finalisé il est protégé Ce Menu n est pas disponible le disque est protégé Ce disque ne peut être lu Veuillez vérifier le code régional du disque Ce disque ne ...

Страница 95: ...che Ouvrir et enlevez le disque Veillez à ce que le DV soit bien raccordé à la sortie DV S il est bien raccordé éteignez le et rallumez de nouveau Problème Erreur sur le disque Erreur de système Essayez de nouveau après avoir éteint l appareil Le dispositif DV n est pas raccordé Si vous ne pouvez résoudre le problème après avoir lu ces directives notez Le numéro de modèle et le numéro de série sit...

Страница 96: ...apport entre le signal et le bruit min 100 dB Distorsion harmonique totale max 0 005 à 1 KHz Vidéo Prises de sortie vidéo 1 Prise de sortie S Vidéo Y 1 0 V c à c C 0 286 V c à c 75 Ω Sortie à composantes Y 1 0 V c à c Pb 0 70 V c à c Pr 0 70 V c à c 75 Ω Format de compression d image MPEG II Format de compression audio Dolby AC 3 256 Kbit s DVD Qualité d enregistrement XP environ 8 Mbit s SP envir...

Страница 97: ...agréé au moment où il fait la demande d une réparation sous garantie Cette garantie ne couvre pas les dommages causés par un accident un incendie une inondation un cas de force majeure un mauvais usage ou une tension incorrecte La garantie ne couvre pas une mauvaise installation une mauvaise réparation une réparation non autorisée et tout usage commercial ou dom mages survenus durant le transport ...

Страница 98: ...om cz DENMARK 38 322 887 www samsung com dk FINLAND 09 693 79 554 www samsung com fi FRANCE 08 25 08 65 65 0 15 Min www samsung com fr GERMANY 01805 121213 0 12 Min www samsung de HUNGARY 06 40 985 985 www samsung com hu ITALIA 199 153 153 www samsung com it LUXEMBURG 02 261 03 710 www samsung lu NETHERLANDS 0900 20 200 88 0 10 Min www samsung com nl NORWAY 231 627 22 www samsung com no POLAND 0 8...

Страница 99: ...AK68 00995B 00 English Français ...

Страница 100: ...Instruction Manual DVD VR330 www samsung com ca AK68 00995B 00 English Français ...

Страница 101: ...dio frequency energy and if not installed and used in accordance with the instruc tions may cause harmful interference to radio communi cations However there is no guarantee that interfer ence will not occur in a particular installation If this equipment does cause harmful interference to radio or television reception which can be determined by turning the equipment off and on the user is encourag...

Страница 102: ...is ture does not operate normally or has been dropped Handling Cautions Before connecting other components to this recorder be sure to turn them all off Do not move the recorder while a disc is being played or the disc may be scratched or broken and the recorder s internal parts may be damaged Do not put a flower vase filled with water or any small metal objects on the recorder Be careful not to p...

Страница 103: ... VR Modes Once a DVD RW recorded in VR Mode or Video mode is finalized you cannot perform additional recording Once a DVD RW recorded in Video Mode is finalized it becomes DVD Video Do not use scratch proof protectors or covers Do not use discs printed with label printers available on the market Do not load warped or cracked discs Disc Storage Be careful not to harm the disc because the data on th...

Страница 104: ...Protection Program protection See page 72 Locking a Title Disc protection See page 85 Disc Protection DVD RAM DVD RW DVD R discs that are incompati ble with the DVD VIDEO format cannot be played with this product For more information on DVD recording compatibility consult your DVD RAM DVD RW DVD R manufacturer Use of poor quality DVD RAM DVD RW DVD R discs may cause following unexpected problems i...

Страница 105: ...B PR 20 Step 3 Connecting the Audio Cable 21 Connecting to your TV 21 Connecting to a stereo amplifier with analog input jacks 22 Connecting to an AV amplifier with a digital input jack 23 Step 4 Connecting External Devices 24 Connecting a VCR Set Top Box STB or DVD player to the AV 1 IN or S VIDEO IN jacks 24 Connecting a Camcorder to the AV 2 IN jacks 25 Connecting a Camcorder to the DV IN jack ...

Страница 106: ...ing the Scheduled Record List 64 Deleting the Scheduled Record List 64 VCR Recording Basic VCR Recording 65 Check Remaining Time 66 Special Recording Features 66 Copy to DVD or VCR 67 Editing Editing Playing the Title List 69 Basic Editing Title List 71 Renaming Labeling a Title 71 Locking Protecting a Title 72 Deleting a Title 73 Deleting a Section of a Title 73 Editing a Chapter 75 Dividing a Ti...

Страница 107: ... 9 4 GB DVD RAM disc up to 15 hours on a dual layer 8 5GB DVD R disc and up to 8 hours on a 4 7 GB DVD RAM DVD RW DVD R disc depending on the recording mode Creating DVD video titles using DVD RW DVD R discs With the DVD VR330 you can create your own DVD video titles on 4 7 GB DVD RW DVD R or 8 5GB DVD R discs A Variety of Recording Options Select an appropriate recording mode between XP SP LP and...

Страница 108: ...n they have been finalized You can only use either the VR or Video mode on a DVD RW but not both at the same time You can format a DVD RW to V or VR mode using disc manager It should be noted that the disc s data will be lost when changing formats Note Step 3 Recording Step 4 Playing Step 5 Editing a recorded disc You can select the title you want to play in a displayed menu and then immediately s...

Страница 109: ...necessary when playing the disc on a VR Mode compatible compo nent a finalized disc should be used for playback When using a DVD RW disc in Video Mode The disc should be finalized first to enable playback on anything other than this recorder No more editing or recording can be made on the disc once it has been finalized When using a DVD R disc You should finalize the disc to play it on a component...

Страница 110: ...UTTON 13 CHANNEL BUTTONS 14 RECORD BUTTON 15 PLAY STILL REW SKIP F F SKIP STOP BUTTONS Description Front Panel Display 1 3 2 4 5 6 8 7 9 10 1 DVD is activated 2 DVD RAM is activated 3 DVD R or DVD RW is actived 4 Progressive Scan mode is activated 5 Record function is activated 6 VCR is activated 7 DVD or CD media is loaded 8 The time counter position or current deck status is indicated 9 When you...

Страница 111: ...DIGITAL AUDIO OUT JACK COAXIAL 11 VIDEO OUT JACKS COMPONENT OUT 10 11 4 2 3 6 7 8 5 9 1 Fan The fan always revolves when the power is on Ensure a minimum of 4 clear space on all sides of the fan when installing the product Unpacking Accessories Check for the supplied accessories below Audio Video Cable AC39 00073A RF Cable for TV AC39 42001J Batteries for Remote Control AAA Size AC43 12002H Remote...

Страница 112: ...on Press this when you use Timer Recording 32 TO VCR COPY Button Press this when you copy from the DVD to the VCR 33 REC PAUSE Button Press this to pause during recording 1 DVD Button Press this when you use a DVD 2 TV Button Press this to operate TV 3 POWER Button 4 NUMBER Button 5 100 Button Press this to select channel 100 or higher 6 F ADV SKIP Button 7 Playback related Buttons Forward Rewind ...

Страница 113: ...ting the Antenna Cable 15 Step 2 Connecting the Video Cable 18 Step 3 Connecting the Audio Cable 21 Step 4 Connecting External Devices 24 Step 5 Connecting the Power Cord 27 Step 6 Preparing the Remote Control 27 Note to CATV system installer This reminder is to call CATV system installer s attention to Article 820 40 of the National Electrical Code Section 54 of Canadian Electrical Code Part I th...

Страница 114: ... the channel on the DVD Recorder VCR Also use this method if you watch channels without cable box If you are using an off air antenna that has 300 ohm twin flat leads use an external antenna connector 300 75 ohm adaptor not supplied to connect the antenna to the DVD Recorder VCR Note If you have two separate antennas one VHF and the other UHF use a UHF VHF combiner adaptor available at most electr...

Страница 115: ...able box DVD Recorder VCR TV Cable box with many scrambled channels You can record channels by selecting the channel on the cable box You cannot record one channel while watching another channel Be sure that the cable box is turned on ...

Страница 116: ...17 Antenna DVD Recorder VCR Cable box TV Cable box with a few scrambled channels You can record non scrambled channels by selecting the channel on the cable box You cannot record scrambled channels that require a cable box ...

Страница 117: ...ctions on this unit INPUT R L AUDIO White Red VIDEO Yellow Audio Video Cable Connecting to a Video input jack Connect a video yellow cable between the VIDEO yellow OUT jack on DVD Recorder VCR and VIDEO yellow IN jack on the TV or AV amplifier You will enjoy regular quality images Connect audio cables white and red between the AUDIO OUT jacks on the DVD Recorder VCR and AUDIO IN jacks on TV or AV ...

Страница 118: ...PUT S VIDEO Connecting to an S Video input jack Connect an S Video cable not supplied between the S VIDEO OUT jack on DVD Recorder VCR and S VIDEO IN jack on your TV or AV amplifier You will enjoy high quality images S Video separates the picture element into black and white Y and color C signals to present clearer images than regular video input mode Connect audio cables white and red between the...

Страница 119: ...1 With the unit in stop mode press the P SCAN but ton on the front of the DVD Recorder VCR 2 The message Press Yes to confirm Progressive scan mode Otherwise press No will appear Press the œ buttons to select Yes and then press the ENTER button Compared to standard interlaced video progres sive scan doubles the amount of video lines fed to your TV resulting in a more stable flicker free and clear ...

Страница 120: ...ions Step 3 Connecting the Audio Cable Select one of the Audio connections on the following pages INPUT AUDIO R L Red White VIDEO Yellow Audio Video Cable Connecting to your TV This connection will use your TV s speakers ...

Страница 121: ... Audio Video Cable INPUT ANALOG AUDIO R L Red White Connecting to a stereo amplifier with analog input jacks If your stereo amplifier only has AUDIO INPUT jacks L and R use the AUDIO OUT jacks Front L speaker Front R speaker ...

Страница 122: ...our AV amplifier has a Dolby Digital or DTS decoder and a digital input jack use this connection To enjoy Dolby Digital or DTS sound you will need to set up the audio settings See page 35 Manufactured under license from Dolby Laboratories Dolby and the double D symbol are trademarks of Dolby Laboratories DTS and DTS Digital Out are trademarks of Digital Theater Systems Inc ...

Страница 123: ...Top Box STB or DVD player to the AV 1 IN or S VIDEO IN jacks Connecting a VCR or external device to AV 1 IN jacks of the DVD Recorder VCR You can record from connected equipment VCR STB or DVD You can also use the AV 2 IN jacks on the front panel of the DVD Recorder VCR Press the INPUT SEL button to select the AV1 or S Video input Copy protected content cannot be recorded Depending on your input c...

Страница 124: ...2 IN jacks on the front panel of the DVD Recorder VCR You can record from connected equipment such as a camcorder When an input source is inserted into AV 2 IN while viewing TV the input will be switched to AV 2 IN automatically If the AV 2 In input source is not selected automatically press the INPUT SEL button to select the AV 2 input Note ...

Страница 125: ...upplied Camcorder Connecting a Camcorder to the DV IN jack If your camcorder has a DV output jack connect it to the DV input jack of your DVD Recorder VCR If the input is not selected automatically use INPUT SEL button to select proper input Note ...

Страница 126: ... Step 5 Connecting the Power Cord Install Batteries in the Remote Control Open the battery cover on the back of the remote control Insert two AAA batteries Make sure that the polarities and are aligned correctly Replace the battery cover If the remote control does not operate properly Check the polarity of the batteries Dry Cell Check if the batteries are drained Check if the remote sensor is bloc...

Страница 127: ... 12 24 RCA 07 29 SANYO 05 20 SHARP 02 16 22 SONY 03 TELEFUNKEN 26 TOSHIBA 09 ZENITH 17 Button Function TV POWER Used to switch the television on and off INPUT SEL Used to select an external source VOL Used to adjust the volume of the television CH TRK Used to select the desired channel TV MUTE Used to toggle the sound on and off 0 9 Used to input number directly 100 Used to select channels over 10...

Страница 128: ...this button on the remote control to confirm any new settings 4 RETURN Button Press this button on the remote control to return to the previous MENU screen displayed or to exit the on screen MENU On Screen Menu Navigation 29 Auto Clock Set 30 Manual Clock Set 31 Channel Set 32 Auto Channel Memory 32 Channel Add Delete 33 RF Output Channel 33 Setting Up the Language Options 34 Setting Up the Audio ...

Страница 129: ...set the Auto Clock See pages 15 17 for Antenna Connections The Clock will be automatically set when you turn off the recorder If your clock is set to the wrong time zone or daylight saving you can adjust these settings without turning off the Auto Clock Set function Note 30 English Setup DVD Recorder No Disc Timer Rec Setup System Clock Set Channel Set Language Audio Video Parental Control Clock S...

Страница 130: ...these steps to set the date and time manually 1 With the unit in Stop mode No Disc mode press the MENU button 2 Press the buttons to select Setup then press the ENTER or button For accurate Timer Recording your DVD Recorder VCR s internal clock must be set correctly Note Auto Clock Set DVD Recorder Clock Data CH Automatic Time Zone Automatic Daylight Saving Automatic No Disc Timer Rec Setup Automa...

Страница 131: ...nected to a cable TV See page 16 Auto Channel Memory Auto Channel Memory will automatically seek and store all active channels in your area 1 With the unit in Stop mode No Disc mode press the MENU button 2 Press the buttons to select Setup then press the ENTER or button 3 Press the buttons to select Channel Set then press the ENTER or button Channel Set DVD Recorder No Disc Timer Rec Setup Antenna...

Страница 132: ... select YES Use this feature if Auto Channel Memory missed a channel that you would like to add or if you wish to remove a channel 1 With the unit in Stop mode No Disc mode press the MENU button 2 Press the buttons to select Setup then press the ENTER or button 3 Press the buttons to select Channel Set then press the ENTER or button Total channel numbers 02 125 Saved channel Auto Channel Memory St...

Страница 133: ...e in advance they will come up automatically every time you watch a movie If the selected language is not recorded on the disc the original pre recorded language is selected 1 With the unit in Stop mode No Disc mode press the MENU button Press the RETURN or œ button to return to the previous menu Press the MENU button to exit the menu The selected language will only appear if it is supported on th...

Страница 134: ...ec Setup System Clock Set Channel Set Language Audio Video Parental Control RETURN ENTER MOVE EXIT RETURN ENTER MOVE EXIT Digital Output 1 PCM Converts to PCM 2CH 48kHz audio Select PCM when using the Analog Audio Outputs 2 Bitstream Converts to Dolby Digital Bitstream 5 1CH Select Bitstream when using the Digital Audio Outputs DTS 1 Off Doesn t output digital signal 2 On Outputs DTS Bitstream via...

Страница 135: ...ght side of movie picture will be cut off 16 9 Wide You can view the full 16 9 picture on your wide screen TV Input Level Adjusts the level of the input signal Darker If you feel the screen is too light and you want to make the screen darker Lighter If you feel the screen is too dark and you want to make the screen lighter Black Level Adjusts the black level of the screen 7 5 IRE This will enhance...

Страница 136: ...ars to confirm the password Enter your password again and then press the ENTER or button 6 Press the buttons to select On then press the ENTER or button The Parental Control screen appears About the Rating Level 1 Press the buttons to select Rating Level then press the ENTER or button 2 Press the buttons to select the rating level you want then press the ENTER or button For example if you select u...

Страница 137: ...TURN or œ button to return to the previous menu Press the MENU button to exit the menu Note Parental Control DVD Recorder No Disc Timer Rec Setup Password On Rating Level Level 1 Kids Change Password System DVD Recorder No Disc Timer Rec Setup VCR Video Input AV 1 DVD EP Mode Time 6 Hours Chapter Creator Off Quick Recording Off VCR DVD Recorder No Disc Timer Rec Setup Tape Length T120 Auto Play On...

Страница 138: ...etup Tape Length T120 Auto Play On Auto Repeat Off Off On VCR DVD Recorder No Disc Timer Rec Setup Tape Length T120 Auto Play On Auto Repeat Off Off On VCR RETURN ENTER MOVE EXIT RETURN ENTER MOVE EXIT RETURN ENTER MOVE EXIT Video Input You can watch video from an external component through the AV 1 Composite or S video input jacks 1 With the unit in Stop mode No Disc mode press the MENU button 2 ...

Страница 139: ...de No Disc mode press the MENU button 2 Press the buttons to select Setup then press the ENTER or button 3 Press the buttons to select System then press the ENTER or button 4 Press the buttons to select DVD EP Mode Time then press the ENTER or button 5 Press the buttons to select 6 Hours or 8 Hours then press the ENTER or button DVD EP Mode Time System DVD Recorder No Disc Timer Rec Setup VCR Vide...

Страница 140: ...2 00 AM CH1 JAN 01 2006 12 30 AM CH1 JAN 01 2006 01 00 AM CH1 Previous Top Next JAN 01 2006 01 30 AM CH1 Quick Recording It takes about 10 seconds for a disc to load initialize every time you turn on the unit To bypass this initializa tion process you can set the Quick Recording feature to On This enables you to record immediately without having to wait for the disc to load 1 With the unit in Stop...

Страница 141: ...ures 56 S VHS Playback 56 Variable Search System 56 Disc Types Disc Logo Recorded Disc Shape Max Playing Time content or minute Single sided 5 240 DVD VIDEO VIDEO Double sided 5 480 AUDIO Single sided 3 5 80 Double sided 3 5 160 AUDIO CD AUDIO Single sided 5 74 Single sided 3 5 20 JPEG Images Single sided 5 Single sided 3 5 MP3 Audio Single sided 5 Single sided 3 5 1hr XP ExcellentQuality Single s...

Страница 142: ... the OPEN CLOSE button to open or close the disc tray Do not push the disc tray while it is being opened or closed as this may cause a product malfunction Do not place foreign materials on or in the disc tray Some functions may perform differently or be disabled depending on the disc type If this occurs refer to the instructions written on the disc case Be especially careful that children s finger...

Страница 143: ...for title chapters audio track subtitles film previews information on characters etc For DVD VIDEO disc 1 Press the DISC MENU button to enter the disc menu of the disc Move to the setup menu related to playback opera tion You can select audio language and subtitle etc provided by the disc 2 Press the TITLE MENU button to move to the title menu of the disc Use this button if the disc contains more ...

Страница 144: ... return to normal speed playback press the ll button No sound is heard during Step or Slow mode Note About ANYKEY The ANYKEY functions allows you to easily search for a desired scene by accessing title chapter or time You can also change the subtitle and audio settings and set some features including Repeat Angle and Zoom Moving to a scene directly using the ANYKEY If you want to move to a title o...

Страница 145: ...ENG ENG D 5 1CH Off 1 1 Off Repeat Playback Playing Repeatedly Repeat Playback 1 Press the ANYKEY button during playback 2 Press the buttons to select Repeat Playing a Certain section Repeatedly A B Repeat Playback 1 Press the ANYKEY button during playback 2 Press the buttons to select Repeat 3 Press the œ œ button to select A B then press the ENTER button 4 Press the ENTER button at the point whe...

Страница 146: ... Some discs allow you to select the language for the disc menu only Note Selecting the Audio language Audio languages may not work depending on the disc type This is only available during playback Using the AUDIO button 1 Press the AUDIO button during playback 2 Press the AUDIO or buttons to select the desired audio language Using the ANYKEY button 1 Press the ANYKEY button during playback 2 Press...

Страница 147: ...when a DVD has not been recorded with a multi camera angle system Note Angle 1 3 1 Press the ANYKEY button during playback 2 Press the buttons to select Zoom then press the ENTER button will be displayed 3 Press œ buttons to move to the area you want to enlarge 4 Press the ENTER button Each time the ENTER button is pressed the picture is enlarged up to 4X four times the normal size Zooming In You ...

Страница 148: ...the marked position 1 Press the MARKER button during playback 2 Press the ENTER button when the desired scene appears The number 1 is displayed and the scene is memorized 3 Press the œ button to move to the next position 4 Press the ENTER button again when the desired scene appears The number 2 is displayed and the scene is memorized Repeat above to bookmark other positions You can bookmark up to ...

Страница 149: ...tton during playback 2 Press the œ buttons to select a marked scene 3 Press the ENTER or ll button to start playing from the selected scene If you press the NEXT SKIP l button or the PREVIOUS SKIP lœœ button in marker mode and the next or current marked point plays for shorter than three seconds playback starts from the previous marked point Clearing a Marker 1 Press the MARKER button during playb...

Страница 150: ...ray The Audio CD menu appears and the tracks songs are played automatically 2 Press the buttons to select the track song to start playback from and then press the ENTER button Audio CD CD DA Screen Elements 1 Play mode icon 2 Current track song Displays the number of the track currently being played 3 Displays the current play index and total track number 4 This shows the operating state of a disc...

Страница 151: ...our DVD Recorder VCR moves to and plays the previous track If you press this button within three seconds after playback starts the previous track will be played If you press this button after three seconds the current track will be replayed from the beginning 2 l button Plays the next track 3 Stops a track song 4 ll Plays a track song or pauses playback 5 RETURN button Moves to the folder to which...

Страница 152: ...red repeat mode you want to play repeatedly then press the ENTER button Repeat Track CD CD DA MP3 Repeat Folder MP3 Repeat Disc CD CD DA MP3 To return to normal playback 3 Press the CANCEL button to return to normal playback Repeat Playback of an Audio MP3 Disc Music List CD TRACK 1 0 00 01 001 TRACK 1 00 03 50 002 TRACK 2 00 04 00 003 TRACK 3 00 03 49 004 TRACK 4 00 03 47 005 TRACK 5 00 04 29 006...

Страница 153: ...and then press the ENTER or button 4 Press the œ buttons to select a picture To see the next 8 pictures press the l button To see the previous 8 pictures press the l œœ button 54 English Disc Navigation DVD Recorder Disc Navigation Timer Rec Setup JPEG RETURN ENTER MOVE EXIT Photo Music Slide Show Photo List JPEG JPEG01 01 10 ROOT JPEG01 JPEG02 JPEG03 JPEG04 JPEG05 JPEG06 JPEG07 RETURN ENTER MOVE ...

Страница 154: ...emove white lines from the picture Playing the VCR Tracking Record Safety Tab 5 1 If you press the ll button the Slide Show Speed screen will appear Press the œ buttons to set the slide show speed then press the ENTER button 5 2 Press the ENTER button with a picture selected in the Album screen and select a display mode Album screen Slide show Rotation or Zoom using the œ buttons then press the EN...

Страница 155: ...es 1 Insert an S VHS tape into the VCR deck 2 Press II PLAY PAUSE button on the remote control or on the front panel to play a S VHS tape Special VCR Playback Features S VHS Playback Each time you record a cassette on this DVD Recorder VCR an index is automatically marked on the tape when recording is started The Search function allows you to fast forward or rewind to a specific index and start pl...

Страница 156: ...tton 2 Press the buttons to select End Search then press the ENTER button The VCR will fast forward searching for a blank position and then automatically stop at that posi tion If the VCR reaches the end of the tape during end search the tape will be ejected Forward Reverse Intro Scan Use scan and play when you don t know exactly where a program is located on a cassette tape 1 While a cassette is ...

Страница 157: ...ent Channel you are watching 60 Recording from External Devices 61 Recording through a DV Input jack 61 Making a One Touch Recording OTR 62 Making a Timer Recording 62 Editing the Scheduled Record List 64 Deleting a the Scheduled Record List 64 VCR Recording Basic VCR Recording 65 Check Remaining Time 66 Special Recording Features 66 Copy to DVD or VCR 67 Disc Types Recording Recording Device Fina...

Страница 158: ...TO mode the most suitable record mode is adjusted automatically according to remaining time on the disc and length of the timer recording You can select only one mode from XP SP LP and EP for timer recording The dual layer DVD Rs have approximately double the capacity of single layer DVD Rs See page 42 Unrecordable video Pictures with copy protection cannot be recorded on this DVD Recorder VCR Whe...

Страница 159: ...EN CLOSE button and place a recordable disc on the disc tray 2 Press the OPEN CLOSE button to close the disc tray Wait until LOAD disappears from the front panel display 3 Press the CH TRK buttons or number buttons to select the channel you want to record 4 Press the REC SPEED button repeatedly to select the recording speed quality XP High approx 1 hour SP Standard approx 2 hours LP Low approx 4 h...

Страница 160: ...the DV input jack on the front of your DVD Recorder VCR using a DV cable 2 Power on your DVD Recorder VCR and switch to DV mode by pressing the INPUT SEL on the remote control 3 Press the REC SPEED button repeatedly to select the recording speed quality SP LP EP XP 4 If the input is set to DV a playback record menu that enables camcorder control appears on the top of the screen 5 Select the Play i...

Страница 161: ...r Record is displayed Press the STOP button again The message Updating the Information of disc Please wait for a moment is displayed The timer counter decreases by the minute from 4 00 to 0 00 then the DVD Recorder VCR stops recording Note The clock Setup Clock Set must be set before pro ceeding with a timer recording See page 30 1 Press the OPEN CLOSE button and place a recordable disc on the dis...

Страница 162: ...g channel you want to make a timer recording from Date Date that the timer recording starts There are three options when setting the date see below To make a recording on a specific date press the or number buttons until the date you want appears To make a recording at the same time every day Mon Fri press the buttons until Mon Fri appears To make a recording on a specific day of the week Sun s Sa...

Страница 163: ... Copy DVD RAM VR Timer Record Scheduled Record List Scheduled Record List DVD Recorder DVD RAM VR Current Time 12 27 AM No To Source Date Start End Mode Edit 01 DVD CH06 01 01 03 05AM 05 05AM SP 02 DVD CH06 01 02 01 06AM 03 06AM SP 03 Scheduled Record List DVD Recorder DVD RAM VR Current Time 12 27 AM No To Source Date Start End Mode Edit 01 DVD CH06 01 01 03 05AM 05 05AM SP 02 DVD CH06 01 02 01 0...

Страница 164: ...prox 9 hrs The selected Record Speed will appear on the front panel and on screen displays Note 3 Press the button to select Scheduled Record List then press the ENTER or button 4 Press the button to select the number of the scheduled record list you want to delete and then press the ENTER button The Edit and Delete items are displayed 5 Press the button to select Delete then press the ENTER or bu...

Страница 165: ...g Press the TV VCR button on the remote control Change the channel you want to watch with the TV s remote 2 Watch a different media during record ing You can watch a DVD during VCR recording or watch a Video tape during DVD recording During VCR recording insert a DVD in the DVD deck The output will automatically change to the DVD and start playback During DVD recording insert a Video tape in the V...

Страница 166: ...nel or remote control TO VCR To stop recording press the STOP button Copy to DVD or VCR Copy function is not allowed in progressive scan mode Note Edit Copylist DVD Recorder No Title Length Edit DVD RAM VR 1 2 JAN 01 2006 12 00 AM 1 Scene JAN 01 2006 12 00 AM 01 JAN 01 2006 12 0 00 00 11 02 JAN 01 2006 12 0 00 00 09 Play Rename Edit Scene Copy Delete Edit Copylist DVD Recorder No Title Length Edit...

Страница 167: ...omatically start a copy The Start and End points may not match up exactly If you want to copy all content select Copy All Direct copy VCR to DVD Insert the VHS tape you want to copy Insert a recordable DVD disc Press DVD copy button on front panel or remote control TO DVD To stop recording press the STOP button VCR DVD DVD Recorder 01 Copy All No Start End Edit DVD RAM VR Copy DVD Recorder Title L...

Страница 168: ...nalizing a disc V VR mode 87 Delete All Title Lists 88 Edit Compatible 89 Playing the Title List Follow these instructions to play back a scene from the Title List Using the TITLE LIST button 1 Press the TITLE LIST button The Title List screen is displayed 2 Press the buttons to select a title you want to play from Title List and then press the PLAY but ton The selected title will be played back 3...

Страница 169: ... Title List screen is displayed Or use the MENU button Press the MENU button Press the buttons to select Title List then press the ENTER or button twice This may depend on the disc type DVD RW V DVD RW R has limited editing function Note Title List 01 JAN 01 2006 12 00 00 00 11 02 JAN 01 2006 12 30 00 00 09 03 JAN 01 2006 01 00 00 01 36 04 JAN 01 2006 01 30 00 00 11 No Title Length Edit 3 4 JAN 01...

Страница 170: ...1 36 04 Free Space 01 30 01 58 04 No Title Length Edit 4 4 Free Space CH1 SP RETURN ENTER MOVE EXIT DVD RW Free Space Title List Do you want to delete 3 4 JAN 01 2006 01 00 AM CH1 JAN 01 2006 SP No Yes RETURN ENTER MOVE EXIT DVD RW JAN 01 2006 Basic Editing Title List Renaming Labeling a Title Follow these instructions to rename a title list name i e to edit the title of a recorded program 1 Press...

Страница 171: ... 01 2006 01 30 00 00 11 No Title Length Edit 3 4 JAN 01 2006 12 00 AM CH1 JAN 01 2006 EP Title List 01 JAN 01 2006 12 00 00 00 11 02 JAN 01 2006 12 30 00 00 09 03 JAN 01 2006 01 00 00 01 36 04 JAN 01 2006 01 30 00 00 11 No Title Length Edit 1 4 JAN 01 2006 12 00 AM CH1 JAN 01 2006 SP RETURN ENTER MOVE EXIT RETURN ENTER MOVE EXIT RETURN ENTER MOVE EXIT RETURN ENTER MOVE EXIT DVD RAM VR JAN 01 2006 ...

Страница 172: ...01 2006 EP No Yes RETURN ENTER MOVE EXIT RETURN ENTER MOVE EXIT RETURN ENTER MOVE EXIT DVD RAM VR JAN 01 2006 DVD RAM VR JAN 01 2006 DVD RAM VR JAN 01 2006 DVD RW Video mode DVD RW DVD R Since Playlist is not present the message Do you want to delete is displayed The message may depend on the type of disc 4 Press the œ buttons to select Yes then press the ENTER button Deleting a Section of a Title...

Страница 173: ...ER MOVE EXIT RETURN ENTER MOVE EXIT RETURN ENTER MOVE EXIT DVD RAM VR DVD RAM VR DVD RAM VR 2 Press the buttons to select a title you want to delete from the Title List then press the ENTER or button 3 Press the buttons to select Edit then press the ENTER or button The Edit Title List screen is displayed 4 Press the ENTER button at the starting point The image and starting point time are displayed...

Страница 174: ...otection Chapter Edit Divide Title English 75 Chapter Edit Screen Elements 1 Current chapter number and status 2 Playback bar 3 Playtime 4 Chapter Edit menu Chapter Edit 00 00 00 Add Return Delete All Hidden Delete Chapter 1 3 Show RETURN ENTER MOVE EXIT DVD RW 4 Select the point where you want to add a chapter using the playback related buttons then press the ENTER button at that point Each time ...

Страница 175: ...XIT DVD RW Chapter Edit 00 00 00 Add Return Delete All Hidden Delete RETURN ENTER MOVE EXIT DVD RW Do you want to delete all chapter marks Yes No Deleting a chapter Follow steps 1 to 3 in page 75 4 Select a chapter you want to delete using the playback related buttons Playback related buttons II Iœœ I œ œ 5 Press the œ buttons to select Delete and then press the ENTER button The selected chapter w...

Страница 176: ...01 2006 Divide Title Title List No 03 Start End 00 00 00 00 00 00 00 00 01 Point Divide Return RETURN ENTER MOVE EXIT DVD RW 4 Select the point you want to divide using the playback related buttons then press the ENTER button Playback related buttons II Iœ œ œ œ 5 Press the œ buttons to select Divide then press the ENTER button 6 Press the œ buttons to select Yes then press the ENTER button The se...

Страница 177: ...AM 1 Scene JAN 01 2006 12 00 AM 01 JAN 01 2006 12 00 00 00 03 02 JAN 01 2006 12 30 00 00 25 03 JAN 01 2006 01 00 00 00 05 No Title Length Edit RETURN ENTER MOVE EXIT RETURN ENTER MOVE EXIT Advanced Editing Playlist Creating a Playlist Follow these instructions to create a new playlist title from a recorded title 1 With the unit in Stop mode press the MENU button 2 Press the buttons to select Playl...

Страница 178: ...2 30 00 00 25 03 JAN 01 2006 01 00 00 00 05 No Title Length Edit Play Rename Edit Scene Copy Delete RETURN ENTER MOVE EXIT RETURN ENTER MOVE EXIT RETURN ENTER MOVE EXIT 4 Press the STOP button to stop playing The screen returns to the Edit Playlist screen RAM VR EP Renaming a Playlist Title Follow these instructions to rename a playlist title i e to edit the title of a playlist title 1 Press the P...

Страница 179: ...isc stopped The Edit Playlist screen is displayed Or use the MENU button Press the MENU button with the disc stopped Press the buttons to select Playlist then press the ENTER or button Press the buttons to select Edit Playlist then press the ENTER or button 2 Press the buttons to select the title you want to edit from the Playlist and then press the ENTER or button The Edit Playlist menu is displa...

Страница 180: ...10 RETURN ENTER MOVE EXIT RETURN ENTER MOVE EXIT RETURN ENTER MOVE EXIT 4 Press the œ buttons to select the scene you want to play then press the ENTER button The playlist title to be played is selected 5 Press the ENTER button The selected scene will be played back To stop scene play press the STOP button 4 Press the œ buttons to select the scene you want to modify then press the ENTER button 5 P...

Страница 181: ...2 00 00 03 03 00 00 04 Play Modify Move Add Delete RETURN ENTER MOVE EXIT RETURN ENTER MOVE EXIT RETURN ENTER MOVE EXIT RETURN ENTER MOVE EXIT 82 English Editing Depending on the kind of disc the displayed screen may have a slight difference Note 4 Press the œ buttons to select the scene that will have a new scene inserted before it then press the ENTER button A yellow selection window is displaye...

Страница 182: ... Playlist Title to the VCR 1 Press the PLAY LIST button with the disc stopped The Edit Playlist screen is displayed Or use the MENU button Press the MENU button with the disc stopped Press the buttons to select Playlist then press the ENTER or button Press the buttons to select Edit Playlist then press the ENTER or button 2 Press the buttons to select the title you want to copy to the VCR and then...

Страница 183: ...gth Edit DVD RAM VR 3 3 Dolphin 2 Scene JAN 01 2006 12 00 AM 01 JAN 01 2006 12 00 00 00 11 02 JAN 01 2006 12 30 00 00 09 03 Dolphin 00 01 36 Play Rename Edit Scene Copy Delete Edit Playlist DVD Recorder DVD RAM VR Dolphin 2 Scene JAN 01 2006 12 00 AM Do you want to delete No Yes RETURN ENTER MOVE EXIT RETURN ENTER MOVE EXIT RETURN ENTER MOVE EXIT 84 English Editing 4 Press the œ buttons to select ...

Страница 184: ...ENTER MOVE EXIT Rename DVD Recorder DVD RAM VR Back Space Space Save Delete Clear Disc RETURN ENTER MOVE EXIT RETURN ENTER MOVE EXIT RETURN ENTER MOVE EXIT Disc Protection Disc Protect allows you to protect your discs from being formatted or deleted due to unintended operations 1 With the unit in Stop mode press the MENU button 2 Press the buttons to select Disc Manager then press the ENTER or but...

Страница 185: ...e Disc Protection Not Protected Disc Format Delete All Title Lists Do you want to format disc Yes No RETURN ENTER MOVE EXIT Title List DVD Recorder Title List Title List Playlist DiscManager Timer Rec Setup Copy DVD RAM VR RETURN ENTER MOVE EXIT Editing 86 English DVD RW You will be prompted with the confirmation message Choose the recording format for DVD RW 4 Press the œ buttons to select Yes th...

Страница 186: ...E EXIT RETURN ENTER MOVE EXIT RETURN ENTER MOVE EXIT RETURN ENTER MOVE EXIT Disc Manager DVD Recorder Title List Playlist DiscManager Timer Rec Setup Copy DVD RW VR Disc Name Disc Protection Not Protected Disc Format DVD VR Disc Finalize Delete All Title Lists RETURN ENTER MOVE EXIT Once a disc is finalized you cannot delete titles from the record list Once a DVD R DVD RW video mode disc is finali...

Страница 187: ... Timer Rec Setup Copy DVD RW VR F Disc Name Disc Format DVD VR Disc Unfinalize Disc will be unfinalized Do you want to continue Yes No RETURN ENTER MOVE EXIT RETURN ENTER MOVE EXIT Delete All Title Lists 1 With the unit in Stop mode press the MENU button 2 Press the buttons to select Disc Manager then press the ENTER or button 3 Press the button to select Delete All Title Lists then press the ENTE...

Страница 188: ... sage Do you want to execute Edit compatible This may take more than an hour depending on the configuration 4 Press the œ buttons to select Yes then press the ENTER button to execute the edit compatible After performing this function you can go to TITLE MENU screen directly by pressing the TITLE MENU button Disc Manager DVD Recorder Title List Disc Manager Timer Rec Setup Copy DVD RW Disc Name Dis...

Страница 189: ... Troubleshooting Specifications LIMITED WARRANTY TO ORIGINAL PURCHASER Troubleshooting DVD VIDEO DVD RAM DVD RW DVD R 91 Troubleshooting DVD 92 Troubleshooting VCR 93 Problems and Solutions Display error Message 94 Specifications 96 ...

Страница 190: ...nt free space Recording is available on DVD RAM DVD RW DVD R discs only If a program is copy protected you cannot record it Press and hold the CH button on the front panel of your unit for more than 5 seconds with no disc and then press the POWER OFF ON button All settings including password will revert to factory settings Do not use it if not absolutely required Note that this function is availab...

Страница 191: ...y the screen may jitter temporarily but it is not a defect Sound languages and subtitle languages are disc specific Only the sound and subtitle languages contained on a DVD disc are available and displayed on the disc menu Check whether PS is displayed on front panel Make sure to change the component video output using the Progressive button when the disc is stopped Point the remote control at the...

Страница 192: ... see normal broadcasts Check the tuner external setting It should be on tuner Check the TV antenna connections Noise bars or streaks on playback Press the CH TRK buttons to minimize this effect When the II button is pressed A still picture may have noise bars depending on the during playback the still picture condition of the tape Press the CH TRK buttons has severe noise bar streaks during slow m...

Страница 193: ...movie You cannot record This disc is protected This disc cannot be formatted the disc is protected This disc cannot be renamed the disc is protected This disc cannot be finalized the disc is protected This Menu is not available the disc is protected The disc cannot be played Please check the regional code of the disc This disc cannot be formatted Please check the disc You could not format the disc...

Страница 194: ...rom the device Make sure the DV device is connected properly to the DV connection Jack If it is connected properly turn it off and on once again Problem Error is detected on the disc System error is found Please try it again after turning off the power The DV device is not connected If you are unable to solve the problem after reading the above instructions note The model and serial number on the ...

Страница 195: ...ut support Min 100 dB signal to noise ratio Max 0 005 total harmonic distortion T H D Output at average 1 KHz Video Video output jacks 1 S Video output 1 Y 1 0Vp p C 0 286Vp p at 75Ω load Component output Y 1 0Vp p Pb 0 70Vp p Pr 0 70Vp p at 75Ω load Picture Compression format MPEG II Audio Compression format Dolby AC 3 256kbps Recording Quality XP about 8 Mbps SP about 4 Mbps LP about 2 Mbps DVD ...

Страница 196: ...It must be presented to the authorized service center at the time service is requested This warranty does not cover damage due to accident fire flood and or other acts of God misuse incorrect line voltage improper installation improper or unauthorized repairs commercial use or damage that occurs in shipping Exterior and interior finish lamps glass are not covered under this warranty Customer adjus...

Страница 197: ...om cz DENMARK 38 322 887 www samsung com dk FINLAND 09 693 79 554 www samsung com fi FRANCE 08 25 08 65 65 0 15 Min www samsung com fr GERMANY 01805 121213 0 12 Min www samsung de HUNGARY 06 40 985 985 www samsung com hu ITALIA 199 153 153 www samsung com it LUXEMBURG 02 261 03 710 www samsung lu NETHERLANDS 0900 20 200 88 0 10 Min www samsung com nl NORWAY 231 627 22 www samsung com no POLAND 0 8...

Страница 198: ...AK68 00995B 00 English Français ...

Отзывы: