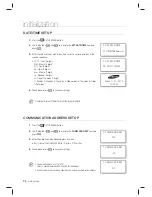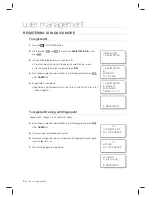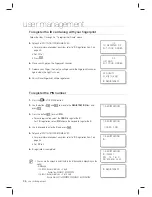
background image

42_


user management

user management

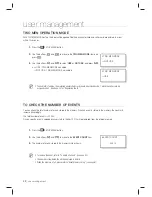
TWO MEN OPERATION MODE

With TWO MEN MODE active, the door will be opened if both administrator card and visitor card are entered in a row 
within 10 seconds.

Press the 

F

3

 SETUP MENU button.

Use the buttons 

4

 and 

6

 to move to the 

TWO MEN MODE

 item and 

press 

ENT

.

Use the buttons 

4

 and 

6

 to select 

USE

 or 

NOT USE

, and press 

ENT

.

€

 USE :  TWO MEN MODE is enabled.

€

 NOT USE :  TWO MEN MODE is disabled. 

To enable this function, the preferred administrator card should be assigned code 1, while the visitor card be 
assigned code

 2. (See Page 35 for “Registering the ID ”.)

TO CHECK THE NUMBER OF EVENTS

You can check the total number of events stored in the memory. When an event is stored in the memory, the count will 
increase accordingly.

The total number of events is 20,000.

Once a specifi c event is uploaded successfully to the host PC, it will be removed from the internal memory.

Press the 

F

7

 SETUP MENU button.

Use the buttons 

4

 and 

6

 to move to the 

EVENT COUNT

 item.

The number of events stored in the memory will be shown.

To remove the event, refer to “To delete all events”. (see page 43)

The number of registered IDs will be displayed in 5 digits.

When the memory is full, please refer to “Event Memory Setup”. (see page 61)

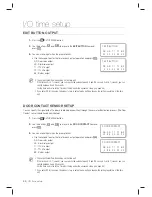
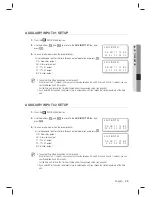
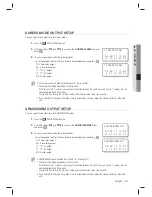
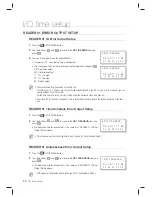
1.

2.

3.

M

1.

2.

3.

M


3.TWO MEN MODE

J

 NOT USE

3.TWO MEN MODE

J

 USE

6.EVENT COUNT

00014

Содержание SSA-S3010

Страница 1: ...troller user manual SSA S3010 SSA S3011 SSA S3020 SSA S3021 SSA S3040 SSA S3041 imagine the possibilities Thank you for purchasing this Samsung product To receive more complete service please visit our website www samsungsecurity com ...

Страница 2: ...ins metal parts etc or containers filled with water on top of the controller Doing so may cause personal injury due to fire electric shock or falling objects Do not install the unit in humid dusty or sooty locations Doing so may cause fire or electric shock If any unusual smells or smoke come from the unit stop using the product In such case immediately disconnect the power source and contact the ser...

Страница 3: ...ing antenna Increase the separation between the equipment and receiver Connect the equipment into an outlet on a circuit different from that to which the receiver is connected Consult the dealer or an experienced radio TV technician for help 7 8 9 1 2 Read these instructions Keep these instructions Heed all warnings Follow all instructions Do not use this apparatus near water Clean only with dry c...

Страница 4: ...munication cables 17 I O Connection 19 External Reader Connection 20 Communication Line Connection INITIALIZATION 23 23 Initializing the system 24 To access the master mode 24 Registering a master ID 26 Name Display 27 User Count Setup 27 Language Setup 28 Date Time Setup 28 Communication Address Setup 29 Baud Rate Setup 29 Factory Defaults READER MODE SETUP 30 30 Reader 1 Mode 30 READER 2 Mode 31...

Страница 5: ...it Button Output 44 Door Contact Sensor Setup 45 Auxiliary Input 1 Setup 45 Auxiliary Input 2 Setup 46 Tamper Alarm Output Setup 46 Cut Off Output Setup 47 Duress Mode Output Setup 47 ARM DISARM Output Setup 48 Door Open Timeout Setup 48 Output Setup for Level IDs Accessing READER 1 50 READER 1 Error Output Setup 51 Output Setup for Level IDs Accessing READER 2 52 READER 2 Error Output Setup ADVAN...

Страница 6: ...enu Structure 75 Default Settings ADDITIONAL FEATURES 61 61 Event Memory Setup 61 ID Display 62 WIEGAND Output Setup 62 Voice Volume Setup 63 One Time Read 63 Version Check 64 Input Test 64 Output Test 65 LCD Test 65 Keypad Test 66 READER Test 66 Memory Test 67 Communication Test 67 Fingerprint Module Version Check 68 Input Type Setup ...

Страница 7: ...nd is designed to operate via the network Standalone Operation SSA S30XX is connected to the external card reader which is used to control one entrance It determines to allow access by reading data from the internal or external card reader and controls the open close of the door relay and other output settings On an external signal from a sensor or Exit button reception the device relay correspond...

Страница 8: ...back error APB error occurs which will be saved into the internal memory And you can configure to output a signal through a specific pin when such an error occurs Refer to Antipassback Error Output Setup at pages 50 and 53 Arm Disarm As long as the device is in Arm mode the reader ports are all frozen so that no one can get access to the door and any input from the corresponding external pin will no...

Страница 9: ...n Unit Wall Mount CABLE 2PIN Connector X 1 3PIN Connector X 1 4PIN Connector X 1 5PIN Connector X 1 6PIN Connector X 1 8PIN Connector X 1 Diode X 2 UF4004 1N4001 4007 Resistor X 4 2 2kΩ 1 4W 3 5 X 40mm screws X 4 3 5 X 12mm screws X 4 3 X 8mm screws X 1 6 X 30mm Plastic Anchor X 4 x Gn Quick Guide CD Manual Ferrite Cores X 2 ...

Страница 10: ...he red indicator turns on when relay 1 becomes active The yellow indicator turns on when relay 2 becomes active Menu Buttons 12 menu buttons F1 F12 are available for use Press a menu button to enter the corresponding menu For the complete list of menus refer to Menu Structure on pages 69 through 74 Input Keys Use these to enter numbers or navigate through the menu 4 6 Left right direction buttons ...

Страница 11: ...d to the power cable 5 3 pin Connector Preliminary connector for extension 6 6 pin Connector Can be connected to the I O cable 7 8 pin Connector Can be connected to the relay wiring cable 8 Initialize switch System Initialize switch 9 LED Communication status indicator 10 4 pin Connector Preliminary connector for extension 11 5 pin Connector Can be connected to the RS 232 and RS 485 communication ...

Страница 12: ...ut 2 AUX_IN 2 Green with White Stripes Wiegand Data Input 0 WIK_D_IN0 Pink Wiegand Data Input 1 WIK_D_IN1 Sky Blue 5 PIN Connector I O Pins Signal Cable Color RS 485 RTX RS 485 A Yellow RS 485 RTX RS 485 B Gray RS 232 TX TXD Black with White Stripes RS 232 RX RXD Red with White Stripes RS 232 GND GND Black 8 PIN Connector I O Pins Signal Cable Color Door RELAY NC NC 1 Blue with White Stripes Door ...

Страница 13: ...G 8 Conductor Shielded 3 Door Contact Sensor Exit Button Sensor Input Input This product Belden 9512 22 AWG 4 Conductor Shielded Belden 9514 22 AWG 8 Conductor Shielded 4 RS 232 Cable Converter Host P C Belden 9829 24 AWG 2 twisted pair Shielded 5 RS 485 Cable This product This product This product Converter Belden 9829 24 AWG 2 twisted pair Shielded 4 PIN Connector I O Pins Signal Cable Color RES...

Страница 14: ...r the screws Drill at least 4 of 6 32 holes Drill a 1 2 hole on the center of the wall mount Use 4 screws to fix the wall mount to an appropriate point Arrange the cables through the center hole Connect the cable and use one screw on the bottom of the wall mount to fix it to the product Do not install the product on a metal wall Otherwise this will cause malfunction due to radio frequency interferen...

Страница 15: ...ted an inductor door locks or alarm device to the output relay there should occur a surge voltage while the inductor was turning on and off If you do not connect a bypass diode to the relay the surge voltage will cause damage to the electric circuit of the controller To reduce this surge it is recommended to connect a bypass diode between the devices 1 3 2 6 5 4 7 9 8 ESC 0 ENT F1 F2 F3 F4 F5 F6 F...

Страница 16: ... can locate an earth grounding point nearby connect one end of the shield wire to that point If you could hardly locate an earth grounding point nearby connect one end of the shield wire to the chassis ground point If you could locate neither of an earth or chassis grounding point nearby connect one end of the shield wire to the power ground point GND Note that if the chassis is not properly earth...

Страница 17: ... red stripes Connect the other end of the door contact sensor to GND Auxiliary Input Device Connection auxiliary input 1 green auxiliary input 2 green with white stripes Connect one end of the auxiliary input device to auxiliary input 1 or auxiliary input 2 Connect the other end of the auxiliary input device to GND 1 2 1 2 1 2 1 2 1 3 2 6 5 4 7 9 8 ESC 0 ENT F1 F2 F3 F4 F5 F6 F7 F8 F9 F10 F11 F12 ...

Страница 18: ...he door to DC 12V Connect the relay NO line white with red stripes for locking the door to the plus line of the door lock Connect the minus line of the door lock to GND Alarm Connection Alarm Relay Connect the relay COM white for the alarm device to DC 12V Connect the relay NO line purple for the alarm device to the plus line of the alarm device Connect the minus line of the alarm device to GND 1 ...

Страница 19: ... Connect the Wiegand data input line 1 of the proximity reader to the sky blue line For a list of compliant readers external readers see the followings SSA S30X0 Standard 26bit Wiegand format proximity reader Standard 26bit Wiegand 8bit Burst format proximity keypad reader SSA S30X1 Standard 34bit Wiegand format proximity reader Standard 34bit Wiegand 8bit Burst format proximity keypad reader 1 2 ...

Страница 20: ...connector Connect the GND black line of the product to pin 5 of the 9 pin female connector Plug in the 9 pin female connector to serial port COM port of the host PC Install and launch the application SAMS 1 2 3 4 5 ई ई ई ई ई ई ई ई ई ई ई ई ई ई ई ई ई ई ई ई ई ई ई ई ई ई ई ई ई ई ई ई ई ई ई ई ई ई ई ई ई ई ई ई ई ई ई ई ई ई ई ई ई ई ई ई ई ई ई ई ई ई ई ई ई ई ई ई ई ई ई ई ई ई ई ई ई ई ई ई ई ई ई ई ई ई ई ई ई ई ई ई ई...

Страница 21: ...ई ई ई ई ई ई ई ई ई ई ई ई ई ई ई ई ई ई ई ई ई ई ई ई ई ई ई ई ई ई ई ई ई ई ई ई ई ई ई ई ई ई ई ई ई ई ई ई ई ई ई ई ई ई ई ई ई ई ई ई ई ई ई ई ई ई ई ई ई A B 1 3 2 6 5 4 7 9 8 ESC 0 ENT F1 F2 F3 F4 F5 F6 F7 F8 F9 F10 F11 F12 Mon 01 01 2010 10 30 20 183 003 Gray Yellow HOST PC Max 1200m RS 485 RS 232 Converter RS 232 RS 485 ई ई ई ई ई ई ई ई ई ई ई ई ई ई ई ई ई ई ई ई ई ई ई ई ई ई ई ई ई ई ई ई ई ई ई ई ई ई ई ई ई ई ई ई ई ई...

Страница 22: ... RS 232 of the converter into serial port COM port of the host PC Install and launch the application SAMS RS 485 connection supports multi drop communications up to 32 units TCP IP Communication Port Connection To implement TCP IP communications for the host PC follow the steps below Connect the RJ45 jack of the unit to the RJ45 plug the LAN cable of the network system Set a unique communication a...

Страница 23: ...e system press 0 When the Initializing is done you will move to the standby screen Note that the initialization process will restore all previous settings to the factory default System Initialization in Master Mode You can Initialize the system through authentication of the master card For entering the master mode see page 24 Press the F8 SETUP MENU button Use the buttons 4 and 6 to move to the SY...

Страница 24: ...0 The master number for SSA S30X1 is 0000000000 10 digits REGISTERING A MASTER ID To register a master card Press the F7 SETUP MENU button Use the buttons 4 and 6 to move to the MASTER ID REG item and press ENT Select a master ID index to register and press ENT To select a card press 1 Place the master card to register on the product Enter the password for the master card and press ENT Press 0 to ...

Страница 25: ... To erase a master ID enter 00000000 for the applicable master ID The master number for SSA S30X1 is 0000000000 10 digits To register a master card PIN Press the F7 SETUP MENU button Use the buttons 4 and 6 to move to the MASTER ID REG item and press ENT Select a master ID index to register and press ENT To select a PIN press 2 Enter the PIN for the master card to register and press ENT PIN Range ...

Страница 26: ...ion software only and accepts only alphabetic letters up to 8 characters By using the unit you can register a new user but cannot enter the user s name In case of such a user s accessing no name will be displayed Press the F3 SETUP MENU button Use the buttons 4 and 6 to move to the NAME DISPLAY item and press ENT Use the buttons 4 and 6 to select USE or NOT USE and press ENT USE Name Display is en...

Страница 27: ...x user count 10 000 The max user count will be set to 10 000 20 000 The max user count will be set to 20 000 Before setting the user count you must initialize the system LANGUAGE SETUP Press the F1 SETUP MENU button Use the buttons 4 and 6 to move to the LANGUAGE item and press ENT Use the buttons 4 and 6 to select a max user count ENGLISH ITALIANO FRANÇAIS Optional language Español Deutsch The de...

Страница 28: ...ttings Enter each value for Date Time to fit the respective digits COMMUNICATION ADDRESS SETUP Press the F1 SETUP MENU button Use the buttons 4 and 6 to move to the COMM ADDR SET item and press ENT Enter the 3 digit communication address number Ex if you set the COMM ADDR to 12 press 012 for that When done press ENT to save your settings The default address is set to 000 Select a number between 000...

Страница 29: ...unter a problem with the communication check the followings first Check the communication addresses for this product and the host PC software Check the baud rate settings of each of the host PC and this product Check the communication port and cable Check the host PC for the port settings FACTORY DEFAULTS All menu settings will return to the factory default The memory is not deleted Press the F8 SE...

Страница 30: ...et access through the two pass authentication of the password and your fingerprint after using the proximity card or entering the ID number When done press ENT to save your settings READER 2 MODE READER 2 is an external reader for exit Press the F1 SETUP MENU button Use the buttons 4 and 6 to move to the READER 2 MODE item and press ENT Use the buttons 4 and 6 to select a reader mode 2 modes are a...

Страница 31: ...press ENT to save your settings READER 2 KEY INPUT This enables you to use the keypad of READER 2 numeric keypad of the external device to enter the ID If you want to use the registered ID card number or PIN to get access set this mode to USE Press the F1 SETUP MENU button Use the buttons 4 and 6 to move to the RD 2 KEY INPUT item and press ENT Use the buttons 4 and 6 to select the use of the keyp...

Страница 32: ...lowing table DUAL FINGER Template Fingerprint Count Success Ratio Recommended Authentication Mode NOT USE 2 fingerprint templates for one finger High Identification mode USE 1 fingerprint template for each of 2 different fingers Low Verification mode Make sure not to mix Dual Finger enable disable configurations for multiple units Otherwise it may degrade the recognition performance or cause data commun...

Страница 33: ...ngerprint Registering and recognizing fingerprints in ADAPTIVE MODE the red LED of the optical sensor blinks multiple times while capturing the fingerprint IDENTIFICATION MODE You can select the use of 1 N Identification mode In this mode the product analyzes the input fingerprint against all of registered fingerprint data without demanding the input of the card or ID number then it decides to author...

Страница 34: ...Quick mode will set TA and TB to 00 and RD MA MB LV to 0 Refer to page 35 To register ID along with fingerprint Repeat steps 1 through 3 in To register ID above Enter the password and select whether to use the fingerprint and press ENT Set FINGER to 1 Place your finger on the fingerprint scanner Release your finger then put your finger onto the fingerprint scanner again when the light turns on Your ID a...

Страница 35: ...ministrator 2 2 person authentication visitor 3 Set ARM DISARM 4 Missing card RD Reader assignment to the card user NO Description 0 READER 1 READER 2 assigned 1 READER 1 assigned 2 READER 2 assigned 3 READER 1 READER 2 assigned MA READER 1 operation mode for the registered user NO Description 0 System Operation Mode 1 ID mode 2 ID F P P W 3 ID F P P W Item Description MB READER 2 operation mode f...

Страница 36: ...rd registration select the CARD to register the ID For PIN registration select PIN and use the keypad to register the ID Use the keypad to enter the ID and press ENT Set each of PW TA TB C RD MA MB LV FP For more information about each item refer to ID Registration Items on page 35 Set FP to 0 ID registration is completed You can use the keypad to enter the ID in the following digits depending on ...

Страница 37: ...ELETE mode The number of the ID to delete will be displayed on the screen Press the F7 SETUP MENU button Use the buttons 4 and 6 to move to the ID DELETE item and press ENT Enter the ID to delete and press ENT If you enter the card you don t need to press ENT When the ID is deleted you will see a message of ID DELETED on the screen If the entered ID is not registered with the product you will see ...

Страница 38: ... FP Use disuse of fingerprint 0 disuse 1 Use Use the buttons 4 and 6 to check other registered IDs The EMPTY message will appear if there is no user ID registered The FIRST ID message indicates that the ID displayed on the screen is the first one The LAST ID message indicates that the ID displayed on the screen is the last one TO CHECK THE NUMBER OF REGISTERED IDs You can check the total number of r...

Страница 39: ... work press the button 0 Please upload the ID data to the host PC before deletion just for backup purposes TO CHECK THE NUMBER OF REGISTERED FINGERPRINTS You can check the total number of registered fingerprints Press the F10 SETUP MENU button Use the buttons 4 and 6 to move to the FP REG COUNT item and press ENT The number of registered total recordable fingerprints will be shown 1 2 3 J 1 2 3 3 AL...

Страница 40: ...git numbers for the Duress mode password whose default is 00 If it is set to USE enter the two digit Duress password and press ENT this will open the door normally but the Duress alarm signal is transmitted to the host PC Press the F2 SETUP MENU button Use the buttons 4 and 6 to move to the DURESS MODE item and press ENT Use the buttons 4 and 6 to select USE NOT USE Duress Mode is disabled USE If ...

Страница 41: ...nstalled on the entrance door ARM DISARM With the ARM DISARM code active you can set the ARM mode by entering the ARM code and presenting the card assigned Code 3 in registration of a person who has the ARM DISARM permissions In this mode all connected readers will not take the card input any further To release the ARM mode enter the DISARM code and present the ARM DISARM card Press the F3 SETUP M...

Страница 42: ... 35 for Registering the ID TO CHECK THE NUMBER OF EVENTS You can check the total number of events stored in the memory When an event is stored in the memory the count will increase accordingly The total number of events is 20 000 Once a specific event is uploaded successfully to the host PC it will be removed from the internal memory Press the F7 SETUP MENU button Use the buttons 4 and 6 to move to...

Страница 43: ...time schedules 01 10 all holiday schedules 01 10 holiday codes and time schedules for reader 1 and reader 2 modes can be deleted With the ENT button pressed press the 1 button to remove all time schedules or press the 0 button to cancel the work Press the F8 SETUP MENU button Use the buttons 4 and 6 to move to the T S CLEAR item and press ENT Press the button 1 to remove all time schedules To canc...

Страница 44: ...ned without through the normal authentication process The Door Contact sensor should have been installed Press the F5 SETUP MENU button Use the buttons 4 and 6 to move to the DOOR CONTACT item and press ENT You can make input when the prompt blinks Use the keypad to enter the time for each output operation and press ENT DR Door relay output AR Alarm relay output T1 TTL 1 output T2 TTL 2 output BZ ...

Страница 45: ...it AUXILIARY INPUT 2 SETUP Press the F5 SETUP MENU button Use the buttons 4 and 6 to move to the AUX INPUT 2 item and press ENT You can make input when the prompt blinks Use the keypad to enter the time for each output operation and press ENT DR Door relay output AR Alarm relay output T1 TTL 1 output T2 TTL 2 output BZ Buzzer output The output time differs depending on the time unit If the time un...

Страница 46: ...ou can set the output options when any of the input line is cut off The input cutoff check should have been activated see page 60 Press the F5 SETUP MENU button Use the buttons 4 and 6 to move to the CUT OFF ALARM item and press ENT You can make input when the prompt blinks Use the keypad to enter the time for each output operation and press ENT DR Door relay output AR Alarm relay output T1 TTL 1 ...

Страница 47: ...M DISARM OUTPUT SETUP You can specify the output time for ARM DISARM mode Press the F5 SETUP MENU button Use the buttons 4 and 6 to move to the ARM DISARM SET item and press ENT You can make input when the prompt blinks Use the keypad to enter the time for each output operation and press ENT DR Door relay output AR Alarm relay output T1 TTL 1 output T2 TTL 2 output BZ Buzzer output ARM DISARM must...

Страница 48: ...nit OUTPUT SETUP FOR LEVEL IDs ACCESSING READER 1 Output Setup for the event of Level 1 IDs accessing the READER 1 Press the F6 SETUP MENU button Use the buttons 4 and 6 to move to the RD1 ID OK LV1 item and press ENT You can make input when the prompt blinks Use the keypad to enter the time for each output operation and press ENT DR Door relay output AR Alarm relay output T1 TTL 1 output T2 TTL 2...

Страница 49: ...move to the RD1 ID OK LV3 item and press ENT The operation time for each output is the same as in Output Setup for Level 1 IDs Accessing READER 1 above see page 48 Output Setup for Level 4 IDs Accessing READER 1 Press the F6 SETUP MENU button Use the buttons 4 and 6 to move to the RD1 ID OK LV4 item and press ENT The operation time for each output is the same as in Output Setup for Level 1 IDs Acc...

Страница 50: ...he value the product stays in output mode until you change the setting regardless of the time unit READER 1 Time Schedule Error Output Setup Press the F6 SETUP MENU button Use the buttons 4 and 6 to move to the RD1 T S ERROR item and press ENT The operation time for each output is the same as in READER 1 ID Error Output Setup above Time schedule must be configured before See Page 55 for Time Sched...

Страница 51: ... under the advanced setup see page 54 If you enter 99 for the value the product stays in output mode until you change the setting regardless of the time unit Output Setup for the event of Level 2 IDs accessing the READER 2 Press the F6 SETUP MENU button Use the buttons 4 and 6 to move to the RD2 ID OK LV2 item and press ENT The operation time for each output is the same as in Output Setup for Leve...

Страница 52: ...gured Use the keypad to enter the time for each output operation and press ENT DR Door relay output AR Alarm relay output T1 TTL 1 output T2 TTL 2 output BZ Buzzer output The output time differs depending on the time unit If the time unit is 0 1 second you can specify the value between 0 0 and 9 8 second if set to 1 second you can specify between 0 and 98 seconds For the time unit refer to the Tim...

Страница 53: ...must be configured before See Page 55 for Time Schedule Setup READER 2 Antipassback Error Output Setup Press the F6 SETUP MENU button Use the buttons 4 and 6 to move to the RD2 APB ERROR item and press ENT The operation time for each output is the same as in READER 2 ID Error Output Setup above see page 52 APB mode must be enabled before See Page 55 for AntiPassBack Mode 1 2 M 1 2 M 13 RD2 T S ERR...

Страница 54: ...l affect all I O time settings OUTPUT TIME SCHEDULE ID The Output T S ID feature is used in particular in opening the door for a specified time period in a specific time schedule However you can set it not to open the door after the specified time unless a user entry i e entering the ID is attempted The closing time is of course the end point of the specified time period Press the F2 SETUP MENU button...

Страница 55: ...Output Setup at pages 50 and 53 TIME SCHEDULE SETUP You can set a total of 10 Time Schedule codes The default code is 00 which is used to allow unlimited access Each Time Schedule code has 8 programmable days Sunday through Saturday and a holiday each of which has 5 time intervals You can check information such as Time Schedule code day of the week time interval and current Time Schedule setting A...

Страница 56: ...utton Use the buttons 4 and 6 to move to HOLIDAY SET and press ENT Use the 4 6 2 and 8 buttons to select HOLIDAY CODE and DAY NO and press ENT HOLIDAY CODE 01 10 DAY NO 001 100 Use the numeric buttons to enter 4 digit month day and press ENT If the entry is incorrect the INVALID NUMBER message will appear Repeat steps 3 through 4 to set other holiday schedule codes Upon completion of all holiday s...

Страница 57: ...ENT to store the Holiday Index to the memory Press the F4 SETUP MENU button Use the buttons 4 and 6 to move to HOLIDAY CODE and press ENT Use the buttons 4 and 6 to select Time Schedule and press ENT T S Time Schedule CODE 01 10 Use the numeric buttons to enter 2 digit holiday code HOLIDAY CODE 01 10 If the entry is invalid the INVALID NUMBER message will appear Repeat steps 3 through 4 above to s...

Страница 58: ...r 2 digit code and press ENT T S Time Schedule CODE 00 10 If the entry is incorrect the INVALID NUMBER message will appear The T S Code 00 indicates no Time Schedule is to be applied READER 2 Mode Time Schedule There are 2 reader modes in READER 2 including ID Mode and ID P W Mode Unless otherwise specified all registered users should be authenticated to the reader mode in use However you may allow...

Страница 59: ...e INVALID NUMBER message will appear The T S Code 00 indicates no Time Schedule is to be applied OUTPUT TIME SCHEDULE SETUP You can link a Time Schedule Code to each output The default Time Schedule Code for every output is 00 which means no Time Schedule is applied to them Changing these settings can be very useful when you want to leave the door open during a certain time period Press the F5 SET...

Страница 60: ...ult setting is 00 To enable the cut off check function change the setting to 01 In case of cut off detected at the input while the cut off check enabled the corresponding output signal is given as per Cut Off Output Setup See Page 46 Press the F5 SETUP MENU button Use the buttons 4 and 6 to move to CUT OFF SET and press ENT Use the numeric buttons to enter 00 or 01 for each input 00 The Input Cut ...

Страница 61: ...t setting is USE ID DISPLAY Press the F2 SETUP MENU button Use the buttons 4 and 6 to move to the ID DISPLAY item and press ENT Use the buttons 4 and 6 to select MESSAGE or ID MESSAGE and press ENT MESSAGE Instead of a text message and the user ID the text message of will appear on the screen ID MESSAGE The User ID along with a text message will appear on the screen ÂÂÂÂÂÂÂÂ ACCESS GRANTED MYID 01...

Страница 62: ... reader When it is set to USE the TTL 1 and TTL 2 outputs are disabled except for WIEGAND Outputs VOICE VOLUME SETUP Press the F3 SETUP MENU button Use the buttons 4 and 6 to move to VOICE VOLUME and press ENT When done press ENT to save your settings You can adjust the volume of the voice in 5 levels from 0 mute to 4 maximum Adjust the volume level to 0 to disable voice output If you enter a valu...

Страница 63: ...ard For unregistered cards the authentication process will be attempted repeatedly When another registered card is successfully authenticated within 30 seconds from the first normal authentication by a registered card it is possible to authenticate the first card again not requiring the time lag of 30 seconds NOT USE Continuous re authentication of a registered card is enabled The default setting ...

Страница 64: ...ettings for each output Press the F9 SETUP MENU button Use the buttons 4 and 6 to move to OUTPUT TEST and press ENT Press ENT to turn ON OFF the DOOR RELAY ALARM RELAY TTL 1 TTL 2 BUZZER in sequence DOOR RELAY ON OFF ALARM RELAY ON OFF TTL 1 ON OFF TTL 2 ON OFF BUZZER ON OFF Press any key to move to the parent menu The first two tests verify if the output relays Door Relay and Alarm Relay are worki...

Страница 65: ...T Check the SAMSUNG logo The last date the firmware is amended and the version information is displayed KEYPAD TEST Press the F9 SETUP MENU button Use the buttons 4 and 6 to move to the KEYPAD TEST item and press ENT When the Keypad Test screen appears try to press each key one by one The depressed key will disappear from the screen ESC on the keypad ENT on the keypad 1 2 3 1 2 3 4 LCD TEST LAST UP...

Страница 66: ...TEST Press the F9 SETUP MENU button Use the buttons 4 and 6 to move to the MEMORY TEST item and press ENT Press ENT to start the test Please see the pictures below for the screens when the test has succeeded and failed TEST PASSED PRESS ANY KEY If the test has succeeded If the test has failed TEST FAILED PRESS ANY KEY Press any key to move to the parent menu If the Data Memory has a problem the TE...

Страница 67: ...to start the test Please see the pictures below for the screens when the test has succeeded and failed TEST PASSED PRESS ANY KEY If the test has succeeded If the test has failed TEST FAILED PRESS ANY KEY Press any key to move to the parent menu If the communication is malfunctioning the TEST FAILED message will be displayed If this is the case contact the nearest Service Center for technical suppo...

Страница 68: ...s ENT NO Normal Open open is normal NC Normal Close close is normal EX Exit Button DC Door Open Sensor I 1 Aux Input 1 I 2 Aux Input 2 TP Tamper Input If values other than 00 or 01 are entered the error message of INVALID NUMBER will appear and the values you entered will not be saved Check the operation type of the input device that is connected to the input port If the operation type is set inco...

Страница 69: ...T BAUD RATE 00 99 NOT USE USE NOT USE USE NOT USE USE ALL CLEAR UNIT 1 SEC UNIT 0 1 SEC MESSAGE ID MESSAGE USE NOT USE NOT USE USE F2 button EVENT MEMORY ID DISPLAY TIME UNIT OUTPUT T S ID APB MODE DURESS MODE WIEGAND OUTPUT OPEN ALR TIME Menu Structure of the F1 button You can set Language Date Time and READER modes Menu Structure of the F2 button You can set Event Memory ID Display Time Unit Set...

Страница 70: ...01 10 Weekly INTERVAL 1 5 T S CODE 01 10 HOLIDAY CODE 01 10 HOLIDAY CODE 01 10 DAY NO 001 100 F4 button TIME SCHEDULE HOLIDAY SET HOLIDAY CODE RD1 MODE T S RD2 MODE T S VOICE T S Menu Structure of the F3 button You can set Voice Volume Arm Disarm Two Men Operation One Time Read Number of Users and Name Display Menu Structure of the F4 button You can set Time Schedule Holiday Holiday Code READER 1 ...

Страница 71: ...LARM ARM DISARM OUT DOOR TIME OUT OUTPUT T S INPUT T S CUT OFF SET INPUT TYPE Menu Structure of the F5 button You can set Exit Key Output Door Contact Sensor Aux Input 1 and 2 Tamper Alarm Output Cut Off Output Duress Alarm Output Arm Disarm Output Door Open timeout Output Input Output Time Schedule Input Cut Off Check and Input Type ...

Страница 72: ...S ERROR RD2 ID OK LV1 RD2 ID OK LV2 RD2 ID OK LV3 RD2 ID OK LV4 RD2 ID ERROR RD2 T S ERROR RD2 APB ERROR RD1 APB ERROR Menu Structure of the F6 button You can set Output for Accessible levels for READER 1 and 2 ID READER 1 and 2 ID Error Output READER 1 and 2 Time Schedule Error Output READER 1 and 2 Antipassback Error Output ...

Страница 73: ...T CARD PIN F7 button REGISTRATION ID DELETE ID LIST MASTER ID REG REG ID COUNT EVENT COUNT Menu Structure of the F7 button You can register or delete IDs and register the master ID You can also view the ID list ID count and event count Menu Structure of the F8 button You can initialize the master mode and delete the entire events IDs Master ID and Time Schedules ...

Страница 74: ...munication status NOT USE USE NOT USE USE NOT USE USE F10 button DUAL F P MODE ADAPTIVE MODE IDENTIFICATION FP REG COUNT MODULE VERSION Menu Structure of the F10 button You can set the Dual Fingerprint Mode and ID Modes and check the number of registered fingerprints and the fingerprint module version Menu Structure of the F12 button You can easily register or delete IDs without going through a comp...

Страница 75: ...0 00 11 Input Time Schedule 00 00 00 00 00 12 Cut Off Check 00 00 00 00 00 13 Input Type 00 00 00 00 00 Index No 1 9 The values indicate the operating time of each output for the input signal Index No 10 The values indicate the time schedule code index applied to each output Index No 11 The values indicate the input port 1 Exit Button 5 Tamper S W Each value indicates the code of Time Schedule to ...

Страница 76: ...V4 05 00 00 00 00 5 Reader 1 ID Error 00 03 00 00 00 6 Reader 1 T S Error 00 03 00 00 00 7 Reader 1 APB Error 00 03 00 00 00 8 Reader 2 ID OK LV1 03 00 00 00 00 9 Reader 2 ID OK LV2 05 00 00 00 00 10 Reader 2 ID OK LV3 05 00 00 00 00 11 Reader 2 ID OK LV4 05 00 00 00 00 12 Reader 2 ID Error 00 03 00 00 00 13 Reader 2 T S Error 00 03 00 00 00 14 Reader 2 APB Error 00 03 00 00 00 Index No 1 14 The v...

Страница 77: ...the system will be operating on the normal mode and the screen will display the SAMSUNG logo Date and Time information 3 If the trouble persists after following the procedures above contact a designated service center No problem with accessing by card but cannot access via a manual PIN input 1 Check whether a beep sounds when you press a key If a beep sounds the problem may be wrong settings Proce...

Страница 78: ...cur if the time schedule code is set to value between 01 and 10 and the present time is within the time zone of the selected schedule If the wrong time schedule is selected change it to 00 this can be set by PC software 4 Check the Tamper switch of the unit 5 If the trouble persists after following the procedures above contact a designated service center The communication between the controller an...

Страница 79: ...of batteries in this product Applicable in the European Union and other European countries with separate battery return systems This marking on the battery manual or packaging indicates that the batteries in this product should not be disposed of with other household waste at the end of their working life Where marked the chemical symbols Hg Cd or Pb indicate that the battery contains mercury cadm...

Страница 80: ...63 400 TEL 82 70 7147 8740 60 FAX 82 31 8018 3745 SAMSUNG TECHWIN EUROPE LTD Samsung House 1000 Hillswood Drive Hillswood Business Park Chertsey Surrey UNITED KINGDOM KT16 OPS TEL 44 1932 45 5300 FAX 44 1932 45 5325 SAMSUNG TECHWIN AMERICA Inc 1480 Charles Willard St Carson CA 90746 UNITED STATES Tol Free 1 877 213 1222 FAX 1 310 632 2195 www samsungcctvusa com SALES NETWORK ...

Отзывы: