background image

Web    56

Web

Navigating the Wireless Web

Navigating through menus and Web sites during a web session is easy once 
you've learned a few basics. Here are some tips for getting around:

Softkeys

When browsing the Web, the bottom line of your phone's display contains one or 
more softkeys. These keys are shortcut controls for navigating around the Web, 
and they correspond to the softkey buttons directly below the phone’s display 
screen. Depending on which Web sites you visit, the labels on the softkeys may 
change to indicate their function.

To use softkeys, simply press the desired softkey button. If an additional pop-up 
menu appears when you press the softkey button, select the menu items using 
your keypad (if they’re numbered) or by highlighting the option and pressing 

.

Scrolling

As with other parts of your phone's menu, you have to scroll up and down to see 
everything on some Web sites.

• 

Press the navigation key


up and down to scroll line by line or press the 

volume buttons on the side of the phone to scroll one page at a time.

Navigating Between Web Pages

Once you've learned how to use softkeys and scroll, you can start navigating Web 
sites.

• 

Select on-screen items by using the navigation key to highlight the desired 

item and pressing the desired softkey button (or pressing 

).

You'll find that the left softkey 

 is used primarily for selecting items. This softkey 

is often labeled 

OK

.

• 

If the items on a page are numbered, you can use your keypad (number 

keys) to select an item.

Links, which appear as underlined text, allow you to jump to different Web pages, 
select special functions, or even place phone calls. 

• 

Select links by highlighting the link and selecting the appropriate softkey.

Tip:

 The tenth item in a numbered list can be selected by pressing 


the 

 key on your phone’s keypad, even though the number 0 doesn’t appear 

on the screen.

0

+

Next

M230 BMC Guide.book  Page 56  Thursday, April 9, 2009  11:28 AM

Содержание SPH-m230

Страница 1: ...SPH m230 P O R T A B L E T r i M o d e T E L E P H O N E User Guide Please read this manual before operating your phone and keep it for future reference BMC_UG_m230_03242009_D6 ...

Страница 2: ...compile disassemble or otherwise attempt to create source code from the software No title to or ownership in the Intellectual Property is transferred to you All applicable rights of the Intellectual Property shall remain with SAMSUNG and its suppliers Copyright 2009 Samsung Electronics Canada Inc SAMSUNG is a registered trademark of Samsung Electronics Co Ltd and its related entities Licensed by Q...

Страница 3: ... be liable for any damages of any kind resulting from the purchase or use of the product or arising from the breach of the express warranty including incidental special or consequential damages or loss of anticipated profits or benefits Privacy The privacy and copyright laws of Canada govern the disclosure reproduction and distribution of data media and other content including music and video cont...

Страница 4: ......
Страница 5: ...r Phone Number 12 Making and Answering Calls 12 Entering Text 18 Using Voicemail 20 Using Caller ID 20 Responding to Call Waiting 21 Making a Three Way Call 21 TTY Use With Handset 22 Roaming 23 Understanding Roaming 23 Setting Your Phone s System 23 Menus 24 Menu Styles 24 Viewing the Menus 26 Voice Kit 31 Voice Service 31 Messaging 34 Text Messaging 34 Voicemail 36 Settings 38 Tools 44 Bluetooth...

Страница 6: ...a Phone Number From Call History 53 Prepending a Phone Number From Call History 53 Erasing Call History 54 Air Time 54 Web 55 The Wireless Web 55 Settings 58 Display 58 Sounds 63 Text Entry 67 Call Setup 68 Launch Pad 70 Phone Info 71 More 71 My Downloads 75 Games 75 Ringers 76 Screen Savers 77 Applications 78 Contacts 79 Finding Contacts 79 Adding a New Contact 79 Editing a Contact 80 Speed Dial ...

Страница 7: ...g Phone Data 85 Default Setting 86 Resetting Your Phone 86 Bluetooth 87 Enable 87 Visibility 87 Device Name 88 Device Info 88 Trusted Devices 89 Safety 91 Getting the Most Out of Your Reception 91 Maintaining Safe Use of and Access to Your Phone 92 Caring for the Battery 94 Owner s Record 97 User Guide Proprietary Notice 97 Manufacturer s Warranty 98 Index 101 ...

Страница 8: ...ted Open View of Phone 6 MENU OK 7 TALK Key 8 BACK Key 9 Keypad 5 Softkey Left 4 Navigation Key 13 Battery Strength Indicator 12 Softkey Right 3 Main LCD Display 2 Signal Strength Indicator 1 Earpiece 11 END POWER Key 10 Microphone ...

Страница 9: ...Getting Started 2 Getting Started Closed View of Phone 16 Headset Jack 14 Volume Button 17 Charger Accessories Jack 15 Sub LCD ...

Страница 10: ...ays In standby mode press to access the Menu Press when navigating through a menu to accept the highlighted choice in the menu 7 Talk Key Can be used in several different ways Allows you to place or receive a call In standby mode press the key once to access the Recent Calls log If you press and hold the key down you will initiate the Voice Recognition feature 8 Back Key Deletes characters from th...

Страница 11: ...nu options To mute the ringer during an incoming call press the volume key up or down 15 Sub LCD Allows you to see caller information and the phone s status without opening the phone 16 Headset Jack Allows the other caller to hear you clearly when you are speaking to them 17 Charger Accessories Jack Used to connect any available accessory cables to your phone Viewing the Display Screens Your phone...

Страница 12: ...in your inbox Indicates that the message is locked A locked message is not deleted when Erase All or Auto Delete are used Indicates that your phone is in vibrate mode Indicates that the TTY option is On Indicates that your phone is set to high ringer plus vibrate mode Indicates that the ringer is set at a level between 1 8 or that 1 Beep is selected Indicates Ringer Off Vibrate mode the ringer is ...

Страница 13: ...e Web on page 55 Messaging provides quick and convenient text messaging capabilities See Messaging on page 34 Indicates Whisper mode Indicates Key Mute mode Indicates that an alarm is set on your phone Tells you a call is in progress Means there is no service as your phone cannot find a signal Displays your current signal strength When you are receiving maximum signal strength six bars are shown D...

Страница 14: ...r Service which indicates that your phone is searching for a signal When your phone finds a signal it automatically enters standby mode the phone s standby mode At this point you are ready to begin making and receiving calls If your phone is unable to find a signal after 15 minutes of searching the Power Save mode is automatically activated When a signal is found your phone automatically returns t...

Страница 15: ...d then power off Note Long backlight settings searching for service vibrate mode playing games or using the web affect the battery s talk and standby times Tip Be sure to watch your phone s battery level indicator and charge the battery before it runs out of power Installing or Removing the Battery To install or remove the LiIon battery 1 Make sure the power is off so that you don t lose any store...

Страница 16: ...rom the phone 1 and disconnect it 2 To insert the battery insert the battery into the opening on the back of the phone at an angle 3 making sure the metal contacts on the battery connect with the matching connectors in the phone Press down until the battery snaps into place 4 ...

Страница 17: ...our phone s display screens indicates that the battery is full If the battery charge is getting too low the battery icon blinks and the phone sounds a warning tone A Low Battery Recharge Soon message appears on the phone s display screen Always use a Samsung approved desktop charger travel adapter or vehicle power adapter to charge your battery Warning FOR CONNECTION TO AN ELECTRICAL SUPPLY NOT LO...

Страница 18: ...ndard battery With the Samsung approved LiIon battery you can recharge the battery before it drains completely An animated battery icon is displayed on both the Main LCD screen and the Sub LCD screen The icon indicates whether the battery is being charged or is fully charged Incorrect Correct ...

Страница 19: ... softkey from standby mode Menu items may be selected by highlighting them with the navigation key and pressing You can also press the number corresponding to the menu item on your keypad Making and Answering Calls Making Calls Placing a call from your phone is as easy as making a call from any land line phone Just enter the number and press and you re on your way to clear calls To make a call usi...

Страница 20: ...ng on your phone s settings you can also answer incoming calls by opening the phone or by pressing any number key See Call Answer on page 70 for more information Your phone notifies you of incoming calls in the following ways The phone rings or vibrates unless set to Silence All The backlight illuminates The screen displays an incoming call message If the incoming call is from a number stored in y...

Страница 21: ...more details see Accessibility on page 71 In Call Options Select actions by pressing the right softkey for Options during a call A list of options is displayed that allows you to perform different actions during the course of a call The following options are available To select an option press the corresponding keypad number or highlight the option and press 1 Key Mute or Key UnMute Allows you to ...

Страница 22: ...n store up to 500 phone numbers Contacts entries can store up to a total of five phone numbers and each entry s name can contain up to 20 characters For more information see Adding a New Contact on page 79 To save a number from standby mode 1 Enter a phone number and press 2 Highlight New Entry and press If your Contacts list is empty skip this step and proceed to step 3 3 Select the Type using th...

Страница 23: ...r Options and select Hard Pause or 2sec Pause Hard pauses are displayed as a P and 2 second pauses as a T 3 Enter additional numbers 4 Press to dial the number or Press the right softkey for Options and select Save to save the number in your Contacts When dialing a number with a hard pause press to send the next set of numbers Abbreviated Dialing Abbreviated dialing allows you to set a five or six...

Страница 24: ...entry contains more than one phone number scroll left or right to display the number you wish to call and press to make the call Using One Touch or Two Touch Speed Dialing You can store up to 98 numbers in your phone s speed dial memory to make contacting friends and family as easy as pressing a few buttons With this feature you can dial Speed Dial entries using one key press for locations 2 9 and...

Страница 25: ...see page 20 Number to enter numbers see page 20 Entering Characters Using T9 Text Input T9 Text Input lets you enter text in your phone by pressing keys once per letter To select the mode when entering text see Selecting a Character Input Mode on page 18 T9 Text Input analyzes the letters you enter using an intuitive word database and creates a suitable word The word may change as you type If the ...

Страница 26: ...hen composing a text message press the right softkey for Options and select Alpha 2 Use your keypad to enter the contact s name For example to enter Bill press twice three times three times and then after a brief pause three times again Characters scroll in the following order After a character is entered the cursor automatically advances to the next space after two seconds or when you enter a cha...

Страница 27: ... symbols Using Voicemail All unanswered calls to your phone are automatically transferred to your voicemail even if your phone is in use or turned off For information on configuring and retrieving your voice mail see Voicemail on page 36 Using Caller ID Caller ID allows people to identify a caller before answering the phone by displaying the number of the incoming call If you do not want your numb...

Страница 28: ...two people at the same time When using this feature the normal airtime rates will be charged for each of the two calls To make a Three Way Call 1 Enter a number you wish to call and press 2 Once you have established the connection press the right softkey for Options followed by for 3 Way Call 3 Dial the second number and press 4 When you re connected to the second party press again to begin your t...

Страница 29: ... More 4 Press for Accessibility 5 Press for TTY A brief explanation of TTY will display 6 Press again to continue 7 Press the navigation key up or down to select TTY Off or TTY On and press to save and exit Note In TTY Mode when your headset is plugged in your phone will display the TTY access icon If TTY mode is enabled the headset cannot be used IMPORTANT 911 Emergency Calling We recommend that ...

Страница 30: ... able to access certain features such as web services Setting Your Phone s System Your phone allows you to control your ability to roam Using the Roaming menu option you can determine which signals your phone accepts Choose from two different settings on your phone to control your roaming experience 1 Press for Menu 2 Press for Settings 3 Press for More 4 Press for Roaming 5 Press for Set Mode 6 T...

Страница 31: ...n key in the direction of your desired menu choice The menu choice is highlighted and a text label is displayed Once the desired menu option is highlighted press You can also press the number corresponding to the menu choice For example if you want to view your last incoming call 1 Press for Menu 2 Press for Call History 3 Press for Recent History List Style List style displays all of the menu cho...

Страница 32: ...one s menu style 1 Press for Menu 2 Press if using 3x3 Black style or if using List style for Settings 3 Press for Display 4 Press for Menu Style 5 Press the navigation key up or down to select 3x3 Black or List style and press to save and exit Backing Up Within a Menu To go to the previous menu Press To return to standby mode Press ...

Страница 33: ...xx xxx xxxx 3 Other 3 Preset Messages 1 Can t talk right now Send me a message 2 Call me 3 Where are you 4 Can you pick up 5 Meet me at 6 Let s get lunch 7 The meeting has been cancelled 8 I ll be there at 9 What time does it start 10 I love you 11 20 Empty 4 Edit Signature On Off 5 Message Alerts 1 Alert Volume 1 Voicemail 1 Use Ringer Vol 2 Separate Vol 3 Always Vibrate 2 Text Message 1 Use Ring...

Страница 34: ...e for 3min Hidden 4 Device Name 5 Device Info 5 Call History Not all features are available in your specific phone software 1 Recent History 2 Air Time 1 Last Call 2 Total Calls 6 Web 7 Settings 1 Display 1 Main Screen 1 Screen Saver 1 Preset Image 2 Downloads 2 Foreground 1 Clock Calendar 2 Greeting 3 Incoming Calls 1 With Caller ID 2 No Caller ID 2 Outer Screen 1 Screen Saver 2 Sub Contrast 3 Me...

Страница 35: ...nctive 5 Vibration 2 Volume 1 Ringer 2 Earpiece 3 Headset 4 Speakerphone 5 Advanced 1 Alarms 2 Application 1 Volume 2 Game Vibrate 3 Text Message 4 Voice Mail 3 Alerts 1 Minute Beep On Off 2 Out of Service On Off 3 Connect On Off 4 Signal Fade Call Drop On Off 5 Roam Ringer On Off 6 Power On Off On Off 4 Key Tones 1 Tone Type DTMF Xylophone Voice 2 Tone Volume 3 Tone Length Short Long 3 Text Entry...

Страница 36: ...s Web Voice Service Scheduler Alarms Calculator Display Ringer Type Missed Alerts 2 Down Key Options same as Up key 3 Left Key Options same as Up key 4 Right Key Options same as Up key 6 Phone Info 1 Phone Number 2 Icon Glossary 3 Version 4 Advanced 7 More 1 Accessibility 1 TTY TTY Off TTY On 2 Voice Service 1 Choice Lists 2 Sound 1 Prompts 2 Names 3 About 2 Airplane Mode On Off 3 Headset Mode 1 T...

Страница 37: ... New Screen Savers Applications Get New Applications 9 Contacts Add New Options 1 Edit 2 Erase 3 Contact History 4 Send Contact 5 Settings 1 Speed Dial s 2 Group Setting 3 My Name Card 4 Services In Call Options Menu 1 Key Mute Unmute 2 Turn Speaker On Off 3 Set Cancel Whisper 4 Call History 5 Contacts 6 3 Way Call 7 Messaging 8 Tools 9 Phone Info ...

Страница 38: ...ressing and holding the key 4 Wait for the beep and then say one of the following commands When it recognizes one of these commands the phone launches the associated application If the phone does not hear a command within approximately eight seconds it de activates voice recognition without taking any action Note If you want to use another button to activate voice recognition press for Menu follow...

Страница 39: ... t valid or if the phone still doesn t understand the name on the second try it will not place a call Using Name Lookup Name Lookup lets you retrieve contact information for any person in your Contacts by saying the full name of the person To retrieve information using Name Lookup 1 Activate voice recognition by pressing and holding The phone will prompt you for a command 2 Say Contacts The phone ...

Страница 40: ... Changing Voice Dial Prompts By default your phone provides audio prompts such as Please say a command You can turn these prompts on or off To turn voice dial prompts On or Off 1 Press for Menu followed by for Settings 2 Press for More 3 Press for Accessibility 4 Press for Voice Service 5 Press for Sound 6 Press for Prompts or for Names 7 Press the navigation key up or down to select the appropria...

Страница 41: ... number to send instant text messages from your phone to their messaging ready phone and they can send messages to you When you receive a new message you ll automatically be notified with a one way text message In addition messaging includes a variety of pre set messages such as Where are you that make composing messages fast and easy To send a text message 1 Press for Menu 2 Press for Messaging 3...

Страница 42: ...t entry mode to Alpha Symbol Switches your Text entry mode to Symbol Number Switches your Text entry mode to Number Preset Msg Allows you to add a preset message to your text message Recent Msg Allows you to use a recent message for your text message Emoticons Adds an emoticon image to your text message Text Options To customize your character input mode see Text Entry on page 67 7 Press the left ...

Страница 43: ...sage 4 Use the navigator to highlight the name of the Contact to see their messages and press 5 Press the navigator key to select the message 6 Press the right softkey for Options followed by for Delete To delete more than one message navigate to the list of messages under the Contact name press the right softkey for Options and press for Delete or for Delete All Voicemail Setting Up Your Voicemai...

Страница 44: ...nt When you are roaming off your home network you may not receive notification of new voicemail messages It is recommended that you periodically check your voicemail by dialing 1 area code your phone number When your voicemail answers enter your passcode and press You will be charged roaming rates when accessing voicemail while roaming off your home network Note Your phone service accepts messages...

Страница 45: ...ave and the time of the last voicemail message To view voicemail message details 1 Press for Menu 2 Press for Messaging 3 Press for Voicemail 4 Press for Details Clearing the Message Envelope To clear the message envelope from the display screen 1 Press for Menu 2 Press for Messaging 3 Press for Voicemail 4 Press for Clear Envelope 5 Press the navigation key up to select Yes and press Settings The...

Страница 46: ...s when they become full This allows the new messages to be added to a full mail box without having to manually delete old messages to free up space first Alert Setup If Yes is selected configures the phone to auto connect web alerts when possible Voice Mail Allows you to configure the voicemail number To access the Settings menu 1 Press for Menu 2 Press for Messaging 3 Press for Settings Notificat...

Страница 47: ...access the call back number option 1 In the Settings menu press for Sending Options 2 Press for Call Back 3 Use the navigation key to highlight either None your phone or Other for a custom and press 4 For the custom call back press and hold to erase the existing number Enter the number using the keypad and press to save Preset Messages Preset messages are used to enter common responses to question...

Страница 48: ... your current signature is displayed Press and hold to erase the signature Enter your new signature and press the left softkey for Save You can also edit the existing signature using the keypad Message Alerts The Message Alerts menu allows you to configure the volume and message reminder default settings for voicemail and text messages Alert Volume This option allows you to select the volume level...

Страница 49: ...ht to select Ring Tones Melodies or Downloads 5 Press the navigation key down to preview the first ringer Press left or right to preview the other ringers associated with the ringer group selected When finished press to save the desired ringer Reminder This option allows you to configure how often the reminder for new messages is sounded or displayed on the phone The available options are Off No r...

Страница 50: ...e Inbox being full To turn this option On or Off 1 In the Settings menu press for Auto Erase 2 Press the navigation key up or down to select Yes or No and press to select Alert Setup This option allows the phone to automatically connect to the web where possible when a web alert arrives To turn this option On or Off 1 In the Settings menu press for Alert Setup 2 Press the navigation key up or down...

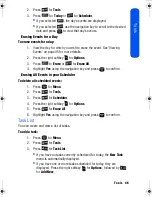
Страница 51: ...ler To add an event to today s schedule 1 Press for Menu 2 Press for Tools 3 Press for Today If you have no events currently scheduled for today the New Event menu is automatically displayed If you have one or more events scheduled for today they are displayed Press the right softkey for Options followed by for Add New 4 Enter the event description using the keypad and press the left softkey for N...

Страница 52: ...or Add New 6 Create your event as described in steps 3 to 5 of To add an event to today s schedule on page 44 Event Alerts There are several ways your phone alerts you of scheduled events By playing the assigned ringer type By illuminating the backlight To select the ringer 1 Press for Menu 2 Press for Settings 3 Press for Sounds 4 Press for Ringer Type 5 Press for Scheduler 6 Press the navigation...

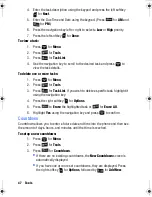
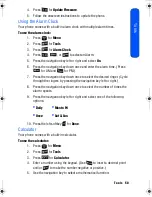
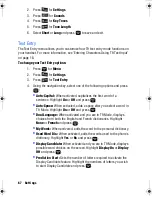
Страница 53: ...hlight Yes using the navigation key and press to confirm Erasing All Events in your Scheduler To delete all scheduled events 1 Press for Menu 2 Press for Tools 3 Press for Scheduler 4 Press the right softkey for Options 5 Press for Erase All 6 Highlight Yes using the navigation key and press to confirm Task List You can create and view a list of tasks To add a task 1 Press for Menu 2 Press for Too...

Страница 54: ... 3 Press for Task List If you wish to delete a specific task highlight it using the navigation key 4 Press the right softkey for Options 5 Press to Erase the highlighted task or for Erase All 6 Highlight Yes using the navigation key and press to confirm Countdown Countdown allows you to enter a future date and time into the phone and then see the amount of days hours and minutes until that time is...

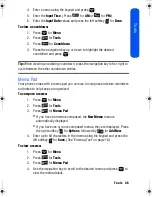
Страница 55: ...Your phone comes with a memo pad you can use to compose and store reminders and notes to help keep you organized To compose a memo 1 Press for Menu 2 Press for Tools 3 Press for Memo Pad If you have no memos composed the New Memo menu is automatically displayed If you have one or more composed menus they are displayed Press the right softkey for Options followed by for Add New 4 Enter up to 64 cha...

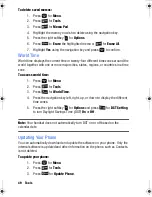
Страница 56: ... or countries in a time zone To access world time 1 Press for Menu 2 Press for Tools 3 Press for World Time 4 Press the navigation key left right up or down to display the different time zones 5 Press the right softkey for Options and press for DST Setting to turn Daylight Savings Time DST On or Off Note Your handset does not automatically turn DST on or off based on the calendar date Updating You...

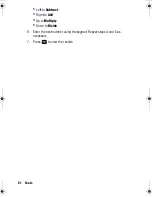
Страница 57: ...avigation key down once to select the desired ringer Cycle through the ringers by pressing the navigation key left or right 8 Press the navigation key down once to select the number of times the alarm repeats 9 Press the navigation key left or right and select one of the following options 10 Press the left softkey for Done Calculator Your phone comes with a built in calculator To use the calculato...

Страница 58: ...51 Tools Left to Subtract Right to Add Up to Multiply Down to Divide 6 Enter the next number using the keypad Repeat steps 4 and 5 as necessary 7 Press to view the results ...

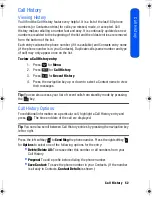
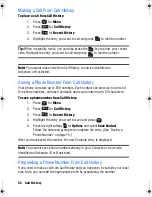
Страница 59: ...all History 3 Press for Recent History 4 Press the navigation key up or down to select a Contact name to view their messages Tip You can also access your list of recent calls from standby mode by pressing the key Call History Options For additional information on a particular call highlight a Call History entry and press The time and date of the call are displayed Tip You can also scroll between C...

Страница 60: ...tal of five phone numbers and each Contact s name can contain up to 20 characters To save a phone number from Call History 1 Press for Menu 2 Press for Call History 3 Press for Recent History 4 Highlight the entry you want to save and press 5 Press the right softkey for Options and select Save Contact Follow the onscreen prompts to complete the entry See Saving a Phone Number on page 15 After you ...

Страница 61: ...dividual Call History entry see Call History Options on page 52 To erase Call History 1 Press for Menu 2 Press for Call History 3 Press for Recent History 4 Press the right softkey for Options and select Delete All 5 Using the navigation key highlight Yes and press Air Time Air time allows you to check the time of the last call or the total air time since your phone was activated on the network Th...

Страница 62: ...tion 1 Press for Menu 2 Press for Web 3 You are connected to the home page provided by your service provider If you had a previous web connection the home page is displayed by default when you launch the web Though the browser is open you are not currently in an active data session that is no data is being sent or received As soon as you navigate to another page the active session will launch Web ...

Страница 63: ...ou have to scroll up and down to see everything on some Web sites Press the navigation key up and down to scroll line by line or press the volume buttons on the side of the phone to scroll one page at a time Navigating Between Web Pages Once you ve learned how to use softkeys and scroll you can start navigating Web sites Select on screen items by using the navigation key to highlight the desired i...

Страница 64: ...back from a previous web page this option is red 3 Mark this page To create a Bookmark 4 My Bookmarks To see your list of Bookmarks 5 Search To type in a keyword and search for it on the web 6 Send Page to To send a web address in an SMS message 7 Go to Web Address To directly jump to a specific web page 8 History To see a list of web pages you have browsed in this session 9 Page Info To refresh t...

Страница 65: ...he desired image is displayed 7 Press the left softkey for Assign To change the Foreground Image 1 Press for Menu 2 Press for Settings 3 Press for Display 4 Press for Main Screen 5 Press for Foreground 6 Press for Clock Calendar 7 Press the navigation key and select Digital Clock Analog Clock or Calendar None Press the navigation key left right up or down until the desired image is displayed 8 Pre...

Страница 66: ... choose to display a custom greeting or display your User Name on the phone s screen To display or change your custom greeting 1 Press for Menu 2 Press for Settings 3 Press for Display 4 Press for Main Screen 5 Press for Foreground 6 Press for Greeting 7 Select Custom using the navigation key and press 8 Press and hold to clear the existing greeting 9 Use the keypad to enter a new custom greeting ...

Страница 67: ...etting and press Changing the Phone s Menu Style Your phone allows you to choose how the menu appears on your display screen To select the display s menu style 1 Press for Menu 2 Press for Settings 3 Press for Display 4 Press for Menu Style 5 Press the navigation key up or down to select 3x3 Black or List style and press to save and exit Changing the LCD Brightness and Contrast You can change the ...

Страница 68: ... 8 seconds or Dim Only 6 Press to save and exit Note Long backlight settings reduce the battery s talk and standby times Changing the Color of your Dialing Font You can adjust the color of your dialing font so that it appears in color or monochromatic To change the dialing font color 1 Press for Menu 2 Press for Settings 3 Press for Display 4 Press for Dialing Font 5 Press for Color 6 Press the na...

Страница 69: ... change the dialing font size 1 Press for Menu 2 Press for Settings 3 Press for Display 4 Press for Dialing Font 5 Press for Size 6 Press the navigation key up or down to select Large Medium or Small and press to save your changes Power Save Mode You can conserve power by controling the brightness of the LCD and keyboard To change the power save mode 1 Press for Menu 2 Press for Settings 3 Press f...

Страница 70: ...ounds Ringer Type Ringer types help you identify incoming calls and messages You can assign ringer types to individual Contacts entries types of calls Scheduler entries and types of messages Ring Tones Include a variety of standard ringer types Melodies Include a variety of standard musical melodies Downloads Ringers include all of the ringtones you have previously downloaded See Downloading Ringe...

Страница 71: ...cemail alarms and applications To adjust the ringer or key tone volume 1 Press for Menu 2 Press for Settings 3 Press for Sounds 4 Press for Volume 5 Press for Ringer for Earpiece for Headset for Speakerphone or for Advanced Ringer Press the navigation key left or right until the desired volume level is selected Press to enable or disable Always Vibrate Press the left softkey for Done to exit Speak...

Страница 72: ... tone is sounded when you are initially connected Signal Fade Call Drop An alert tone is sounded when the signal fades and the connection is lost An alert tone is also sounded when your phone partially loses signal due to network conditions Roam Ringer An alert tone is sounded when you are connected to a network other than your home network Power On Off An alert tone is sounded when your phone is ...

Страница 73: ...unds 4 Press for Key Tones 5 Press for Tone Type 6 Press the navigation key up or down to select the desired tone type 7 Press to save and exit Key Tone Volume To adjust the key tone volume 1 Press for Menu 2 Press for Settings 3 Press for Sounds 4 Press for Key Tones 5 Press for Tone Volume 6 Press the navigation key right to increase or left to decrease the volume 7 Press to save and exit Tone L...

Страница 74: ...light On or Off and press Auto Space When activated adds a space after you select a word in T9 Mode Highlight On or Off and press Dual Language When activated and you are in T9 Mode displays choices from both the English and French dictionaries Highlight None or French and press My Words When activated adds the word to the personal dictionary Used Word Dic When activated adds the words used to the...

Страница 75: ...nswer Allows you to set up how you answer incoming calls Auto Answer Allows you to answer incoming calls automatically with the optional hands free car kit Abbrev Dial Abbreviated dialing allows you to program a five or six digit prefix for commonly used phone numbers When abbreviated dialing is on you can enter the last four or five digits and the handset will prepend the five or six digit prefix...

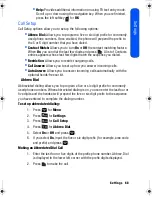
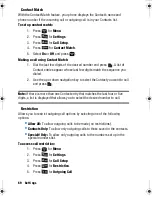
Страница 76: ...the up or down navigation key to select the Contact you want to call and press Note If there is more than one Contact entry that matches the last four or five digits a list is displayed that allows you to select the desired number to call Restriction Allows you to restrict outgoing call options by selecting one of the following options Allow All To allow outgoing calls to be made no restrictions C...

Страница 77: ...t 1 Press for Menu 2 Press for Settings 3 Press for Call Setup 4 Press for Auto Answer 5 Press the navigation key up or down to select Yes or No 6 Press to save and exit Launch Pad You have the option of assigning the navigation key to an often used function The center of the navigation key cannot be changed Pressing the navigation key in standby mode will launch the assigned feature To modify the...

Страница 78: ...y information about your phone 1 Press for Menu 2 Press for Settings 3 Press for Phone Info 4 Press for Phone Number for Icon Glossary for Version or for Advanced 5 When you are finished press the left softkey for Done More Accessibility TTY Mode See To turn TTY Mode on or off on page 22 Voice Service See Voice Service on page 31 Airplane Mode Airplane Mode allows you to use many of your phone s f...

Страница 79: ...lls can be made when the Airplane mode is on Headset Mode Headset Mode directs audio to either the headset exclusively or to both the headset and the phone s speaker There are two options Turbo Button When On allows you to use the Turbo Button on the headset to answer the phone view Recent History and activate Voice Dial Press the Turbo Button on the headset once to answer a call or view Recent Hi...

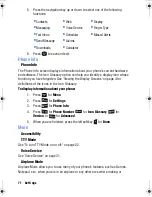
Страница 80: ...t Mode 5 Press for Call alert 6 Select either Speaker Headset or Headset Only and press Location Your phone is equipped with a Location feature for use with location based services that may be available in the future The Location feature allows the network to detect your position Turning Location off will hide your location from everyone except 911 Note Even if the Location feature is enabled no s...

Страница 81: ... or down to select On or Off 6 Press to save and exit When the Location feature is on your phone s standby screen will display the icon When Location is turned off the icon will display Roaming For more information see Roaming on page 23 Restrict and Lock For more information see Locking Your Phone on page 83 Security For more information see Phone Security on page 83 ...

Страница 82: ...s 3 Highlight Games and press 4 Highlight Get New Games and press The web will launch and take you to the Games download menu 5 Use the navigation key to highlight and select a game you wish to download For more information on navigating the Web see Navigating the Wireless Web on page 56 6 Follow the web page instructions to complete your purchase Note You can store a limited number of downloaded ...

Страница 83: ...of downloaded ringers on your phone depending on the file sizes Assigning Downloaded Ringers Downloaded ringers can be assigned directly from the Downloads menu and are also available through the Settings menu To assign a downloaded ringer through the Settings menu see Selecting Ringer Types on page 63 To assign a downloaded ringer through the My Downloads menu 1 Press for Menu 2 Press for My Down...

Страница 84: ...can store a limited number of downloaded Screen Savers on your phone depending on the file sizes Assigning Downloaded Screen Savers Downloaded Screen Savers may be assigned directly from the Downloads menu and are also available through the Settings menu To assign a downloaded Screen Saver through the Settings menu see Changing the Main Screen on page 58 To assign a downloaded Screen Saver from th...

Страница 85: ... Highlight Get New Applications and press The web will launch and take you to the application download menu 5 Use your navigation key to highlight and select an application you wish to download For more information on navigating the Web see Navigating the Wireless Web on page 56 6 Follow the web page instructions to complete your purchase Note You can store a limited number of downloaded applicati...

Страница 86: ...ress the right softkey for Contacts Tip You can also press for Menu and then press for Contacts 2 Enter the first few letters name or scroll down to select the group to locate the desired entry 3 Scroll to highlight the name and press to make the call Adding a New Contact To add a new contact 1 Enter a new phone number and press the right softkey for Options 2 Press for Save 3 Highlight New Entry ...

Страница 87: ...the number press To add a new phone number highlight Add Number and press Once you have entered the number press to select a Label To edit a ringer type highlight the current ringer normally Default Ringer and press Using the navigation key select a Ringer Category and the desired Ringer When you are finished press You can also add an Email address URL Nickname Memo or Image to this contact 7 Pres...

Страница 88: ...Press for Menu 2 Press for Contacts 3 Using the navigation key highlight a contact 4 Press the right softkey for Options and press for Settings 5 Press for Group Setting 6 Highlight the group whose name you want to change and press 7 Using the navigation key select Yes 8 Using the navigation key select a contact name and press Repeat to select other contact names 9 Press the left softkey for Done ...

Страница 89: ...ss for Settings 5 Press for My Name Card Your name card is displayed onscreen You can edit your name card the same as any other Contact For more information see Editing a Contact on page 80 Services This Services menu holds a directory of useful customer service and directory assistance numbers To call customer service or directory assistance 1 Press for Menu 2 Press for Contacts 3 Using the navig...

Страница 90: ... the last four digits of either your Social Insurance Number or Phone Number or try 0000 If none of these work call Customer Service at 1 800 SAMSUNG Using Your Phone s Lock Feature Locking Your Phone When your phone is locked you can only receive incoming calls or make calls to 911 Customer Service or special numbers To lock your phone 1 Press for Menu 2 Press for Settings 3 Press for More 4 Pres...

Страница 91: ...lock mode To place an outgoing call in lock mode To call an emergency number or special number enter the phone number and press To place normal outgoing calls press to display the lock code screen Enter your lock code Enter the desired phone number and press Using Special Numbers You can save up to three special numbers in addition to your Contacts entries the same number may be in both directorie...

Страница 92: ...our lock code 6 Press for Erase 7 Press for Erase Web History This erases the history of recently visited web pages for Erase Web Cache This erases any temporarily downloaded web files for Erase Web Cookies This erases all web tracking cookies for Erase Contacts This erases all the names and phone numbers in your Contacts list for Erase Downloads This option deletes all saved downloaded content fr...

Страница 93: ... Using the navigation key select Yes and press 9 Using the navigation key select Yes again to confirm and press Your phone will reset Resetting Your Phone Resetting the phone restores all the factory defaults including the ringer types and display settings The Contacts Call History Scheduler and Messaging are deleted To reset your phone 1 Press for Menu 2 Press for Settings 3 Press for More 4 Pres...

Страница 94: ...device s Bluetooth functionality is turned off Turning Bluetooth on makes your device discoverable by other in range Bluetooth devices To turn Bluetooth on or off 1 Press for Menu 2 Press for Tools 3 Press for Bluetooth 4 Press for Enable 5 Select On or Off and press Bluetooth Status Indicators The following icons show your Bluetooth connection status at a glance Bluetooth is active Bluetooth is c...

Страница 95: ...vices depending on your Visibility settings To set a Bluetooth name for your phone 1 Press for Menu 2 Press for Tools 3 Press for Bluetooth 4 Press for Device Name 5 Press and hold to clear the current name 6 Use your keypad to enter a new name and press the left softkey for Save Tip Give your handset an easily recognized name so other people can select your handset quickly in environments where m...

Страница 96: ...ftkey for Options and press for Add new 6 Select Search and press Your phone will search for nearby devices and then display a list of discovered in range Bluetooth devices at the end of the search 7 Select the device you wish to pair with and press the left softkey for Add to list 8 Enter the passkey and press The default passkey is 0000 9 Pairing Successful will display if the device is connecte...

Страница 97: ...eft softkey for Add new Otherwise press the right softkey for Options and press for Add new 6 Select Wait for request and press 7 Select Always visible or Visible for 3min and press 8 Follow the on screen prompts to enter your passkey and press The default passkey is 0000 ...

Страница 98: ...ne is basically a radio transmitter and receiver When it s turned on it receives and transmits radio frequency RF signals When you use your phone the system handling your call controls the power level This power can range from 0 006 watts to 0 2 watts in digital mode Knowing Radio Frequency Safety The design of your phone complies with updated NCRP standards described below In 1991 92 the Institut...

Страница 99: ...hone Failure to follow the instructions outlined may lead to serious personal injury and possible property damage Using Your Phone While Driving Talking on your phone while driving or operating the phone without a hands free device is prohibited in some jurisdictions Laws vary as to specific restrictions Remember that safety always comes first When using your phone in the car Get to know your phon...

Страница 100: ...k with the manufacturer regarding any equipment that has been added to your vehicle Consult the manufacturer of any personal medical devices such as pacemakers and hearing aids to determine if they are adequately shielded from external RF signals Note Always turn off the phone in health care facilities and request permission before using the phone near medical equipment Turning Off Your Phone Befo...

Страница 101: ...that contains your phone or its accessories Restricting Children s Access to your Phone Your phone is not a toy Children should not be allowed to play with it because they could hurt themselves and others damage the phone dial 911 by mistake or make calls that increase your phone bill Caring for the Battery Protecting Your Battery The guidelines listed below help you get the most out of your batte...

Страница 102: ...LiIon battery Acknowledging Special Precautions and Industry Canada Notice Cautions Any changes or modifications to your phone not expressly approved in this document could void your warranty for this equipment and void your authority to operate this equipment Only use approved batteries antennas and chargers The use of any unauthorized accessories may be dangerous and void the phone warranty if s...

Страница 103: ... handset The SAR value of a phone is the result of an extensive testing measuring and calculation process It does not represent how much RF the phone emits All phone models are tested at their highest value in strict laboratory settings However when in operation the SAR of a phone can be substantially less than the level reported to the FCC This is because of a variety of factors including its pro...

Страница 104: ...User Guide Proprietary Notice CDMA Technology is licensed by QUALCOMM Incorporated under one or more of the following patents 4 901 307 5 109 390 5 267 262 5 416 797 5 506 865 5 544 196 5 657 420 5 101 501 5 267 261 5 414 796 5 504 773 5 535 239 5 600 754 5 778 338 5 228 054 5 337 338 5 710 784 5 056 109 5 568 483 5 659 569 5 490 165 5 511 073 T9 Text Input is licensed by Tegic Communications and ...

Страница 105: ...mited Warranty does not cover any battery if i the battery has been charged by a battery charger not specified or approved by SAMSUNG for charging the battery ii any of the seals on the battery are broken or show evidence of tampering or iii the battery has been used in equipment other than the SAMSUNG phone for which it is specified What are SAMSUNG s Obligations During the applicable warranty pe...

Страница 106: ...ING INCIDENTAL SPECIAL CONSEQUENTIAL OR SIMILAR DAMAGES OR LOSS OF ANTICIPATED PROFITS OR BENEFITS OR FOR DAMAGES ARISING FROM ANY TORT INCLUDING NEGLIGENCE OR GROSS NEGLIGENCE OR FAULT COMMITTED BY SAMSUNG ITS AGENTS OR EMPLOYEES OR FOR ANY BREACH OF CONTRACT OR FOR ANY CLAIM BROUGHT AGAINST PURCHASER BY ANY OTHER PARTY SOME JURISDICTIONS DO NOT ALLOW THE EXCLUSION OR LIMITATION OF INCIDENTAL OR ...

Страница 107: ...ddealers ofSAMSUNG are not authorizedto make modifications to this Limited Warranty or make additional warranties binding on SAMSUNG Accordingly additional statements such as dealer advertising or presentation whether oral or written do not constitute warranties by SAMSUNG and should not be relied upon Samsung Electronics Canada Inc 2009 Samsung Electronics Canada Inc SAMSUNG is a registered trade...

Страница 108: ... 21 Caller ID 20 D Display 58 Displaying Your Phone Number 12 E Entering Text Alpha Mode 19 Selecting a Character Input Mode 18 Symbols and Numbers 20 T9 Text Input 18 Erase Downloads 85 F Font Changing the color 61 Changing the size 62 G Greeting 59 I Icon Glossary 4 71 K Key Tone 66 L Locking Your Phone 83 M Mail Kit Erasing All Messages 36 Message Setup Options 38 Making Calls 12 Menus Diagram ...

Страница 109: ...ecial Numbers 84 Speed Dialing 17 T T9 Text Input 18 Text Messaging 34 Three Way Calling 21 Tools 44 TTY Use 22 Turning Your Phone On and Off 7 U Unlocking Your Phone 83 V Voice Dial Changing Voice Dial Prompts 33 Voice Recognition 31 Voicemail 36 Clearing 38 Notification 37 Retrieving 37 Setting Up 36 Volume 64 W Wireless Web Downloading Items 75 Games 75 Launching the Web 55 Navigating 56 Ringer...

Отзывы: