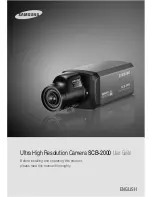
COLOR CCD CAMERA
User Guide
12
COLOR CCD CAMERA
User Guide
13
•
Coaxial Communications System
•
OSD Control method
1. Please take off the CCD protection cap
and C-mount adaptor.
C-mount adaptor
CCD protection cap
CS-mount adaptor
When using a CS-Mount lens
• Please use the specified lens connection parts as shown in the picture below.
The use of the wrong sized parts may cause damage to the inside of the camera or
result in poor fitting.
• Use of a lens which is too heavy affects the balance of the
camera and may cause a malfunction. Please use a lens
that weighs less than 450g.
• Please select Av mode if possible when adjusting the
automatic light control (ALC) of an auto lens. Use of PK
mode may cause hunting.
Notes
C-mount lens : 10 mm or less
CS-mount lens : 5 mm or less
2. Please attach the CS-Mount lens to the
camera by screwing it in clockwise.
Installation
Connecting to the Monitor
Please connect the video output terminal located on the back of the camera to the monitor.
CCD Camera
Monitor
• The connection method varies depending on the type of monitor and accessories. Please
refer to the user's manual for each instrument.
• Please turn off the power when connecting.
Using Coaxial Communications
Distance
Recommended Cable Specification
300m
3C2V(RG-59/U)
450m
5C2V(RG-6/U)
600m
7C2V(RG-11/U)
•
Video Cable
The camera's video output port is connected to the monitor with a BNC coaxial cable,
shown below : If the distance between the camera and the monitor exceeds the
recommended maximum, please use an auxiliary video amp.
• It is recommended that pure copper coax cable is used and not copper coated steel, as
this will cause issues with the communication over the coaxial cable.
Notes
CAMERA
DVR
CONTROLLER
SET
MENU/ENTER
OSD KEY
UP
UP KEY
JOYSTICK UP
DOWN
DOWN KEY
JOYSTICK DOWN
LEFT
LEFT KEY
JOYSTICK LEFT
RIGHT
RIGHT KEY
JOYSTICK RIGHT
DVD
DVR
•
: BNC
• ---- : RS-485


