COLOR CCD CAMERA
User Guide
10
COLOR CCD CAMERA
User Guide
11
Overview
The lens is not supplied with this camera. Purchase a lens suitable for your environment.
This camera accepts the auto iris lens and both C-and CS-mount lens.
• To use the functions of this camera effectively it is recommended that a DC type Auto Iris
lens is used.
• Keep the lens surface clean, if it becomes contaminated with dirt or fingerprints the
picture quality suffers.
Notes
Installation
Installation
LENS
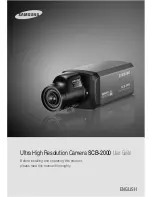
When Using Auto Iris Lens
When using a C-Mount lens
1. Strip the insulation of the auto iris lens
cable 8mm from the end.
2. Strip the insulation of the core of the auto
iris lens cable to expose a 2mm length.
8mm
2mm
3. Remove the cover of the auto iris lens connector plug and solder the lens cable to the
connector pin of the plug.
No.3 Pin
No.1 Pin
Connector
Lens cable
No.4 Pin
No.2 Pin
LENS
Pin No.
DC
VIDEO
No.1 Pin Damping -
Red (power)
No.2 Pin D
NC
No.3 Pin Drive +
White (video signal)
No.4 Pin Drive -
Black (GND)
4. Please replace the auto iris lens connection plug cover and take off the CCD protection
cap, and then attach the auto iris lens to the camera by
screwing it in clockwise.
5. Please insert the connection plug that is connected to
the auto iris lens cable into the auto lens connector,
which is located on the side of the camera.
Please take off the CCD protection cap and attach the C-Mount lens to
the camera by screwing it in clockwise.
C-mount adaptor
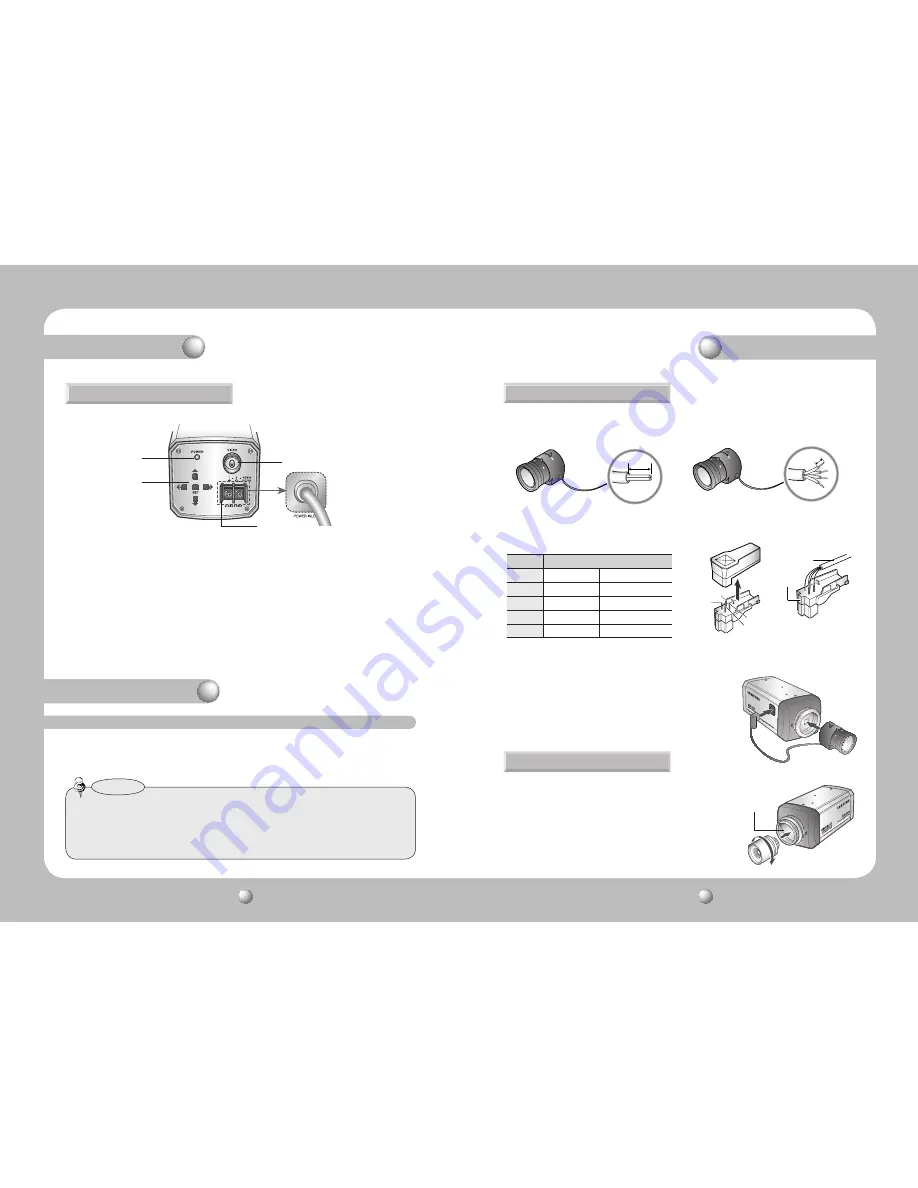
Rear View
❿
*High Voltage Type
7
……
Power lamp
: Lights up when the correct power is supplied to the camera.
8
……
Function Setup Button
•SETUP button : Displays the menu on the screen and uses enter sub menu.
•Up&Down button : Used to move the cursor up or down in the menu screen.
•Left&Right button : Used to move the cursor left or right in the menu screen.
9
……
Video output terminal
:
Sends video signal and connects to the video input terminal of the monitor.
❿
…
Power input terminal
: Connects to the power appropriate to each model.
9
7
8


