Operating Instructions
11-39
Samsung Electronics
ENGLISH
85
85
PictBridge
TM
function works only in <M.Player> mode. page 19
By connecting the Camcorder to printers with PictBridge support (sold separately), you can send images from the
Memory Card directly to the printer with a few simple operations.
With the PictBridge Support, you can control the printer directly through your Camcorder in order to print out stored
pictures. For direct printing of your stored pictures using the PictBridge function, you must connect your Camcorder to a
PictBridge printer using a USB cable.
Connecting To a Printer
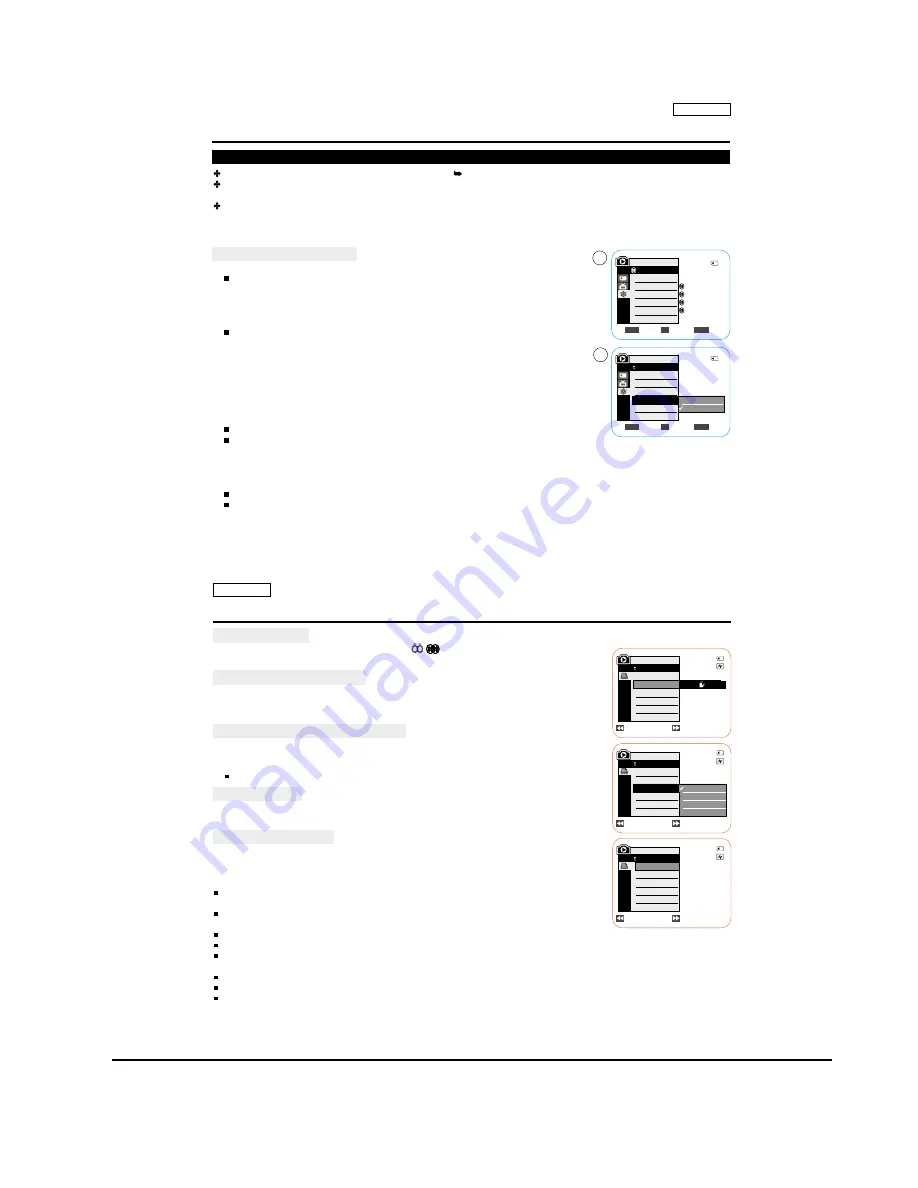
1. Turn your printer power off.
Turn your Camcorder on by setting the [Power] switch to [PLAYER].
2. Set the [Mode] switch to [MEMORY CARD].
3. Press the [MENU] button.
The menu list will appear.
4. Move the
[Zoom] lever
to the
up or down
to select <System>, then press the
[OK]
button
.
5. Move the
[Zoom] lever
to the
up or down
to select <USB Connect>, then press the
[OK]
button
.
6. Move the
[Zoom] lever
to the
up or down
to select <Printer>, then press the
[OK] button
.
<Computer> : Connect to a computer.
<Printer> : Connect to a printer. (To use the PictBridge function, connect to a printer.)
7. Connect your Camcorder to the printer using the provided USB cable.
8. Turn your printer power on.
The PictBridge menu screen appears automatically after a short period.
The cursor highlights <
>.
PictBridge
TM
(SC-D363/D364/D365/
D366
only)
Printing Your Pictures — Using the PictBridge
TM
Move
Select
Exit
MENU
OK
ZOOM
Computer
Printer
6
4
M.Player Mode
System
Clock Set
Remote
Beep Sound
USB Connect
Language
On
On
Computer
English
Move
Select
Exit
MENU
OK
ZOOM
2/46
2/46
M.Player Mode
Back
Clock Set
Remote
Beep Sound
USB Connect
Language
ENGLISH
PictBridge
TM
(SC-D363/D364/D365/
D366
only)
Selecting Images
1. In the <PictBridge> settings menu, press the [
ÏÏ
/
(REV/FWD)] buttons to select
an image to print.
Setting the Number of Prints
2. Move the
[Zoom] lever
to the
up or down
to select <Copies>, then press the
[OK] button
.
3. Move the
[Zoom] lever
to the
up or down
to set the number of prints, then press the
[OK]
button
.
Setting the Date/Time Imprint Option
4. Move the
[Zoom] lever
to the
up or down
to select <Date/Time>, then press the
[OK] button
.
5. Move the
[Zoom] lever
to the
up or down
to select the Date/Time display type, then press the
[OK] button
.
Date/Time display type: <Off>, <Date>, <Time>, <Date&Time>
Printing Images
Move the
[Zoom] lever
to the
up or down
to select <Print>, then press the
[OK] button
,
and selected image files will be printed.
Canceling the Printing
To cancel the image printing, press [OK] button again.
The message Cancel appears and the image printing will be canceled.
[ Notes ]
The Date/Time Imprint Option may not supported by all printers. Check with your printer
manufacturer. The <Date/Time> menu cannot be setup if the printer does not support this option.
The PictBridge
TM
is a registered trademark of CIPA (Camera & Imaging Products Association), an
image transfer standard developed by Canon, Fuji, HP, Olympus, Seiko Epson, and Sony.
PictBridge supporting printers are commercially available.
Use the USB cable provided with the Camcorder.
Use the AC power adapter for your Camcorder during PictBridge Direct Printing.
Turning your Camcorder off during the printing might damage data on the Memory Card.
Printing
photo
images is supported. Moving images are not available for printing.
You can set various printing options depending on the printer.
Please refer to the user s manual of the printer for details.
Previous
Next
Previous
Next
M.Player Mode
Back
Copies
Date/Time
Off
Date
Time
Date&Time
Previous
Next
M.Player Mode
Back
Copies
Date/Time
Num. 02
2/46
2/46
2/46
M.Player Mode
Back
Print
Copies
Date/Time
100-0002
100-0002
100-0002
Содержание SC-D263
Страница 14: ...Product Specification 2 6 Samsung Electronics MEMO ...
Страница 48: ...4 18 Disassembly and Reassembly Samsung Electronics MEMO ...
Страница 70: ...Exploded View and Parts List 5 22 Samsung Electronics MEMO ...
Страница 91: ...Samsung Electronics 8 1 8 Wiring Diagram ...
Страница 92: ...Wiring Diagram 8 2 Samsung Electronics MEMO ...
Страница 102: ...PCB Diagrams 9 10 Samsung Electronics MEMO ...
Страница 168: ...Operating Instructions 11 46 Samsung Electronics MEMO ...
Страница 180: ...Troubleshooting 12 12 Samsung Electronics MEMO ...
Страница 200: ...Circuit Operating Description 13 20 Samsung Electronics MEMO ...


