background image

50

Motion Control

Screen Menu

 > 

Smart Features

 > 

Motion Control

Motion Control

Motion Control


On

Animated Motion Guide 

Off

Pointer Speed 

Medium

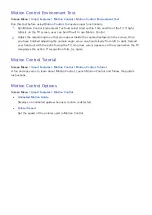
Motion Control Environment Test

Motion Control Tutorial


"

The picture may vary depending on the models.


"

May not be available, depending on your regions, models and country.


"

This function is not available without connecting to the Internet.

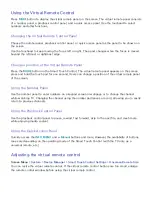
Use Motion Control to change the channel, adjust the volume, move the pointer, and control other TV 
functions.

Some applications may not support Motion Control.

When the 

Voice Recognition

 is running, the 

Motion Control

 is not available.

Operating Environment

Make sure that the TV camera is connected to the TV before using motion controls.

Users should be located between 1.5m and 4m from the camera. The actual recognition range may 
vary depending on the camera angle and other factors.

Motion Control relies on the TV camera and therefore will not function if the camera is pointed up or 
down. Adjust the camera to the correct angle. Do not point the camera directly at the sun or any other 
light source or obstruct its view.

In order for the camera to recognise movement, the user has to stand out from the background.

The appropriate ambient brightness is between 50 to 500 lux.

Avoid direct sunlight when using Motion Control.

Run 

Motion Control Environment Test

 to assess the camera's recognition range before using Motion 

Control.

Содержание F6400

Страница 1: ...E MANUAL Thank you for purchasing this Samsung product To receive more complete service please register your product at www samsung com register Model______________ Serial No ______________...

Страница 2: ...ls 17 Add Channels 17 Remove Channels 18 Rearrange the Favourites Channels List 18 Rename a Favourites Channel List 18 Copy a Favourites Channels List Networking 19 Wired Network 21 Wireless Network 2...

Страница 3: ...48 Operating Environment 49 Enabling Voice Recognition 49 Basic Voice Recognition Use 49 Voice Recognition Settings Motion Control 50 Operating Environment 51 Motion Control Environment Test 51 Motio...

Страница 4: ...Quality 82 Applying the Current Picture Quality Setting to Another Input 82 Picture Size 83 Picture Size and Input Signal 83 Screen Position 83 4 3 Screen Size Advanced Settings Picture Options 87 Pic...

Страница 5: ...ications 117 Apps Management 117 Edit My Apps 118 Deleting Applications 118 Managing Application Folders 118 Application Lock Unlock 118 Fitness 119 Web Browser 119 Social Networks 119 Linking Service...

Страница 6: ...te now 143 Auto update 143 Usage Mode 143 Support Info Anti theft Kensington Lock Display Resolution 144 IBM 144 MAC 145 VESA DMT Subtitle and Media Contents file formats and Codec 146 Subtitle 146 Ex...

Страница 7: ...Touch Control Press the or button on the scroll bar at the right edge of the screen Drag or flick up or down the line on either the left or right edge of the touch pad Place the focus on the or butto...

Страница 8: ...d in the current section select Try Now Pressing the E MANUAL button on standard remote control or e Manual on Virtual Remote Panel opens the e Manual and displays the related section This feature may...

Страница 9: ...ure that you do not bend the cable However an aerial connection is not necessary if you are using a cable box or satellite receiver Video Device Connections This SMART TV has a wide range of connector...

Страница 10: ...se an HDMI cable with a thickness of 14 mm or less Using a non certified HDMI cable may result in a blank screen or a connection error Some HDMI cables and devices may not be compatible with the TV du...

Страница 11: ...ponent Connection Refer to the diagram and connect the AV cable to the TV s component input connectors and the device s component output connectors Make sure the cable colours match the connector colo...

Страница 12: ...AV Connection Refer to the diagram and connect the AV cable to the TV s external input onnectors and the device s AV output connectors Connect the video cable to the Y connector...

Страница 13: ...s digital audio output connector and the device s digital audio input connector Connecting the device using an optical cable does not automatically turn off the TV speakers To turn off the TV speaker...

Страница 14: ...LED F5500 series and below not support This SMART TV supports 3D and ARC Audio Return Channel functions via an HDMI cable ARC enables digital sound to be output using just an HDMI cable However ARC i...

Страница 15: ...r to the TV Refer to the computer input signal reference table for information on the resolution settings supported by the TV HDMI Connection Refer to the diagram and connect the HDMI cable to the TV...

Страница 16: ...cable for example you can change Edit Name to PC With a computer connected to the TV s HDMI DVI port via an HDMI to DVI cable for example you can change Edit Name to DVI PC With an AV device connecte...

Страница 17: ...Tuning 222 Select Start when prompted with a message This initiates the Auto Tuning function The process can take up to 30 minutes to complete If Starting the Auto Tuning function when there is an ex...

Страница 18: ...ect the Search When scanning has finished a channel is updated in the channel list Analogue Channel Tuning Scans for a Analogue channel 111 Select the New 222 Set the Programme Colour System Sound Sys...

Страница 19: ...the regular remote s TOOLS button to access the following options Sorting Digital channels only Change the list ordered by name or number Aerial Select the desired signal source However the Aerial is...

Страница 20: ...control b Lock Unlock Lock a channel so that the channel cannot be selected and viewed Delete You can delete the channel you selected by pressing it on the remote control Select All Deselect All You c...

Страница 21: ...ord This locks the selected channels Channel Unlock Unlock locked channels Navigate to the Edit Channels screen select the locked channels you wish to unlock press b button and then enter the password...

Страница 22: ...iver a sound echo may occur due to the decoding speed difference between the main speaker and the audio receiver In this case use the TV Speaker function Audio Format option may differ depending on th...

Страница 23: ...edit favourites channel lists From the Edit Favourites screen select the Virtual Remote panel s or the regular remote s TOOLS button to access the following options Add Channels Add a channel to a fa...

Страница 24: ...select the Virtual Remote panel s or the regular remote s TOOLS button to display the list Select Rename Favourites from the list 222 Rename the list in the popup window The new name can be up to 20 c...

Страница 25: ...MART TV to a network gives you access to online services such as the Smart Hub as well as software updates Wired Network There are three ways to connect the TV to a Local Area Network LAN External Mod...

Страница 26: ...needs to access the Internet so they do not have to be entered manually Most home networks use a dynamic IP address If the network requires a static IP address enter the IP address subnet mask gatewa...

Страница 27: ...ity system you need to create a security key using characters and numbers This security key is then needed to connect to the wireless network Wireless Network Precautions This SMART TV supports the IE...

Страница 28: ...er on the top of the TV s back using an adhesive tape Network Security Protocols The TV only supports the following wireless network security protocols and is unable to connect to non certified wirele...

Страница 29: ...the models Automatic Wired Network Setup The TV s wired network connection is automatically configured when it is connected to a network that supports DHCP 111 Set Network Type to Wired and then selec...

Страница 30: ...r ISP Refer to the Dynamic versus Static IP Addresses for more information 111 Set Network Type to Wired and then select Connect Network Settings Select your network type Network Type Wired Connect Pl...

Страница 31: ...en select OK IP Settings IP setting Enter manually IP Address 0 0 0 0 Subnet Mask 0 0 0 0 Gateway 0 0 0 0 DNS setting Enter manually DNS Server 0 0 0 0 OK Cancel 444 The TV attempts to connect to the...

Страница 32: ...e to connect to the network Check the following 111 Check the IP Settings settings 222 Ensure that the DHCP server is enabled on the router and unplug and then plug the router back in 333 If this does...

Страница 33: ...ss router s configuration screen 111 Setting Network Type to Wireless automatically displays a list of available wireless networks 222 Select the network SSID you wish to connect to If the desired wir...

Страница 34: ...ork Type Wireless Wireless network AP0000 AP0001 Add Network You can connect your TV to the internet Please select which wireless network to use Refresh WPS PBC 222 Select the network SSID you wish to...

Страница 35: ...en select OK IP Settings IP setting Enter manually IP Address 0 0 0 0 Subnet Mask 0 0 0 0 Gateway 0 0 0 0 DNS setting Enter manually DNS Server 0 0 0 0 OK Cancel 666 The TV attempts to connect to the...

Страница 36: ...ection is established Select OK to proceed Failed Wireless Connection Wireless network connection failed or no wireless router selected Go to Network Settings and select the correct router Unable to c...

Страница 37: ...for more information Connected to a local network but not to the Internet 111 Make sure that the Internet LAN cable is connected to the router s external LAN port 222 Check the DNS settings under IP...

Страница 38: ...ars on the mobile device 222 Select the device from the list to initiate a connection If a connection request is made by the TV a permission message appears on the mobile device and vice versa Accept...

Страница 39: ...n the positive and negative ends correctly 333 Align the battery cover with the back of the remote control and press down along the edges until it is cleanly attached to the remote control Connecting...

Страница 40: ...pairing button can be accessed by removing the Smart Touch Control s battery cover Pressing the pairing button automatically reestablishes the connection between the control and the TV Low Battery Pow...

Страница 41: ...Buttons and Descriptions The product colour and shape may vary depending on the model...

Страница 42: ...Use the touchpad to select numbers and buttons Touch pad Drag your finger on the touchpad as you would on the touchpad of a laptop to move the focus displayed on the screen To select item press the t...

Страница 43: ...TV to display CH List on the screen In addition you can press and hold the touchpad for 2 seconds or more while an application is running to access the application s hidden features Not available with...

Страница 44: ...Touch Control Try Now For PDP F5500 Series LED F6400 and above series Drag Drag on the touchpad in the desired direction Move the focus or the pointer in the direction the finger is dragging Press Pre...

Страница 45: ...e with all applications Pressing and Dragging Press the touchpad drag and release This moves the selected web item in a webpage or your current location on a map Scrolling Up Down Scroll up down the l...

Страница 46: ...ut window on the screen Use your finger to enter the number for the channel you want to watch The recognised number is displayed on the screen and the TV switches to the corresponding channel However...

Страница 47: ...top of the screen Refer to Status and Notification banner for more information History This displays an interactive list of recently accessed channels media content and applications Deleting History D...

Страница 48: ...he virtual remote panel of the screen Using the Number Panel Use the number panel to enter numbers on a keypad screen or webpage or to change the channel while watching TV Changing the channel using t...

Страница 49: ...he IR EXTENDER CABLE and the external device as the illustration shows Face the IR EXTENDER CABLE toward the external device s remote control signal receiver Note that it should be no obstacle between...

Страница 50: ...corresponding connector Registered External Device Management From the Universal Remote Setup screen select a registered external device The following options are available Source Setup Change the TV...

Страница 51: ...cess the following features Language Switch Chinese or English May not be available depending on your regions and country Recommended Text Enable disable the Recommended Text feature Enabling the Reco...

Страница 52: ...V Other USB ports are not supported for this purpose Precautions Face Recognition This product saves thumbnail images of users faces for use during the Face Login Logging into the Smart Hub via face r...

Страница 53: ...n experience we recommend that you use a Smart Touch Control Voice Recognition is not available in all languages dialects or regions The performance varies depending on the language chosen voice volum...

Страница 54: ...n If this is the case press VOICE and then say the command word phrase 10cm to 15cm away from the microphone on the remote control Commands may not be recognized if you speak too softly or loudly The...

Страница 55: ...ent state is shown With the list displayed on the screen say Other Commands This displays other list of voice commands available in the current state All Voice Commands Press the VOICE button say Show...

Страница 56: ...able Operating Environment Make sure that the TV camera is connected to the TV before using motion controls Users should be located between 1 5m and 4m from the camera The actual recognition range may...

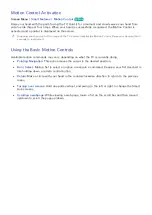
Страница 57: ...u have finished adjusting the camera angle wave one hand slowly from left to right Spread your hand out with the palm facing the TV An arrow cursor appears on the screen when the TV recognizes the act...

Страница 58: ...ing the Basic Motion Controls Available motion commands may vary depending on what the TV is currently doing Pointing Navigation This action moves the cursor to the desired position Run Select Make a...

Страница 59: ...off Changes the channel Check the recommended programme information and aerial times Select a programme from the list to view detailed information about that programme Launch Smart Hub Enter a channe...

Страница 60: ...m On TV Changes the channel However this can only be used from On TV Return to the previous menu Check the recommended programme information and aerial times Select a programme from the list to view d...

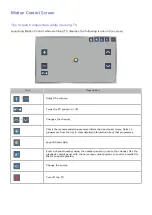
Страница 61: ...mart Hub the icons will disappear automatically after two seconds of inactivity To retrieve the icons move the pointer to one of the three edges shown below marked in blue and then hold it there for 1...

Страница 62: ...ending on the camera angle and other factors The appropriate ambient brightness is 50 to 500 lux 100 Lux Bathroom 400 Lux Living Room Face Recognition can recognize up to 5 different users at a time T...

Страница 63: ...he checkbox beside I want to enter a password as well for increased security With the checkbox selected the user must enter the password when logging in using face recognition 444 Select Save to finis...

Страница 64: ...nect a keyboard to the TV for easier text entry To use a USB keyboard plug the keyboard cable into the TV s USB port With a Bluetooth keyboard pair it using the TV s Bluetooth function Select Keyboard...

Страница 65: ...o the TV s USB port To use a Bluetooth mouse pair it using the TV s Bluetooth function Select Mouse Designate which mouse to use Only one mouse may be used at a time Try Now Add Bluetooth Mouse View a...

Страница 66: ...The Programme Info may vary depending on the type of incoming signal and may not be available at all for certain programmes Tap on the touchpad while the programme information screen is shown to start...

Страница 67: ...display the detailed information screen Select Schedule Viewing from the detailed information screen to set up a Schedule Viewing Schedule Viewing is only available for programmes that haven t aired...

Страница 68: ...ist screen appears The Channel List screen icons indicate the following An analogue channel A favourites channel A locked channel Change Channels Select a channel to jump to it right away To quickly s...

Страница 69: ...ange the signal source immediately Press the right arrow button on the remote and select a broadcasting signal This will change the signal source immediately For LED 4500 6300 PDP 5200 Series Change t...

Страница 70: ...menu Digital Channel Schedule Viewing Schedule Viewing for programmes on digital channels can be set up through the following two options Guide Programme Info Guide From Guide select a programme you w...

Страница 71: ...ing to process 222 Specify that programme s Aerial Channel Repeat and Start Time and then select OK to finish Cancel a Schedule Viewing To cancel a Schedule Viewing for a specific programme select the...

Страница 72: ...ng Recorded TV of the On TV or Photos Videos Music Precautions To set up a Schedule Recording you must first set the TV s clock Set the Clock from System Time Clock Recordings are DRM protected and th...

Страница 73: ...in progress at the specified time and turn off after the recording has ended Dedicated Recording Device Setup After connecting an external storage device it must be configured as a dedicated Recorded...

Страница 74: ...ice uses a system compatible for video recording Device Performance Test Test the external storage device to see if it supports the recording and Timeshift functions Default Recording Device If there...

Страница 75: ...digital channels Specified Time and Date 111 Run Schedule Manager and then select Schedule A popup menu will appear Select Schedule Recording to proceed 222 Specify the programme s Aerial Channel Repe...

Страница 76: ...ding to the selected viewing mode Filtered View Select Filter at the top of the list and then select a filter Only the recorded programmes corresponding to the selected filter will be listed Playlist...

Страница 77: ...rward Press You can change the playback speed by a factor of up to 7 To restore normal playback speed press Alternatively press while paused to reduce the playback speed 1 8 1 4 1 2 Slow playback does...

Страница 78: ...re Mode setting Sound Mode Select the Settings on screen button and then select Sound Mode Select the Sound Mode setting Audio Language Select the Settings on screen button and then select Audio Langu...

Страница 79: ...must be performed on the USB storage device connected to the TV before the Timeshift function can be used Device Performance Test can be initiated from Smart Hub On TV or Photos Videos Music Recorded...

Страница 80: ...t right on the touchpad Scan 10 seconds backward or forward Press while viewing a Time Shifted segment to return to real time Press while in real time viewing mode to deactivate the Time Shift functio...

Страница 81: ...the screen We also recommend sitting with your eyes level with the screen Precautions Carefully read the health and safety information concerning 3D viewing before viewing the TV in 3D Refer to the 3...

Страница 82: ...s case change the desired 3D mode for watching Select a 3D mode from the available 3D modes depending on the input signal Available 3D modes may vary depending on the input signal Off Deactivates 3D v...

Страница 83: ...rning off the TV while PIP is active automatically deactivates PIP PIP Activates deactivates PIP Aerial Before your television can memorize the available channels you must select your TV s signal sour...

Страница 84: ...e signal or reduce noise to clear up the picture Fine Tune Screen Menu Broadcasting Channel Settings Fine Tune Try Now Clear up shaky pictures Fine tune the pictures until they are clear and then sele...

Страница 85: ...btitles will be displayed when you choose a broadcast that supports subtitles Switches subtitles On or Off Subtitle Mode Try Now Sets the subtitle mode Subtitle Language Try Now Sets the subtitle lang...

Страница 86: ...ure Mode Try Now Picture Picture Mode Standard Backlight 14 Contrast 100 Brightness 45 Sharpness 50 Colour 50 Tint G R G50 R50 The displayed image may differ depending on the model Choose the optimal...

Страница 87: ...ext time the source is selected When connected to a computer via an HDMI to DVI cable neither the Colour or Tint G R adjustment options can be chosen Backlight Adjusts the brightness of individual pix...

Страница 88: ...ions of Picture Size may vary depending on the regions and country Auto Wide Automatically adjusts the picture size to the 16 9 aspect ratios 16 9 Set the picture to the 16 9 wide screen format Wide Z...

Страница 89: ...ze Zoom Position Try Now The screen position can be adjusted if Picture Size is set to Wide Zoom Zoom 111 To adjust the screen position select Zoom Position and then Zoom Position from the popup windo...

Страница 90: ...White Balance and Gamma can be adjusted Dynamic Contrast Off Low Medium High Automatically adjusts the screen contrast Use this option to achieve the optimal contrast setting Try Now Black Tone Off Da...

Страница 91: ...attern This function is only not available on the LED F5300 F5500 series and PDP F5500 series Displays picture calibration patterns on the screen without using a separate pattern generator or filter P...

Страница 92: ...Auto Visualisation Reduces static and ghosting caused by weak signals This feature is only available for ATV channels Selecting Auto Visualisation displays the signal strength on the screen Green ind...

Страница 93: ...ng films LED Clear Motion Removes drag from fast scenes with a lot of movement to provide a clear picture Reset Reset the custom settings to the factory defaults Analogue Noise Reduction Reduce diagon...

Страница 94: ...o optimize results Sound Mode Sound Effect 3D Audio Speaker Settings Additional Settings Reset Sound Sound Settings Screen Menu Sound Sound Sound Mode Standard Sound Effect 3D Audio Low Speaker Settin...

Страница 95: ...speakers only Standard This is the normal sound mode Music This mode emphasizes normal music instead of voices Movie This mode is calibrated to provide the best sound for movies Clear Voice This mode...

Страница 96: ...inema or concert hall Try Now DTS TruDialog Emphsaise voice while maintaining background sound levels Try Now Equaliser Adjusts the speaker balance and makes bandwidth adjustments Select Reset to rese...

Страница 97: ...es the external speakers only Using the external speakers only disables the volume button and the mute function In addition certain Sound options will be disabled Auto Volume Screen Menu Sound Speaker...

Страница 98: ...s operating manual for more information on pairing Add New Device Enables disables SoundShare Connection signals from new devices are ignored if they are set to Off Samsung Audio Device List Displays...

Страница 99: ...s digital devices such as a DVD player Audio Format You can select the Digital Audio output SPDIF format The available Digital Audio output SPDIF format may differ depending on the input source Audio...

Страница 100: ...must be reset every time the power is disconnected Setting the Time Screen Menu System Time Clock Try Now Set the clock manually or automatically This option may not be available depending on regions...

Страница 101: ...of the week Time Specifies the on time Volume Specifies the volume when the TV turns on Source Selects a signal source from the list Specify a channel or source to be displayed when the TV turns on T...

Страница 102: ...ected Always use different folder names for multiple USB devices Use a USB memory stick or multi card reader On Timer may not work with certain battery powered USB devices MP3 players or PMPs because...

Страница 103: ...tomatically adjusts the TV s brightness level based on the ambient light level to reduce the TV s power consumption If the Eco Sensor has adjusted the screen s brightness level you can manually adjust...

Страница 104: ...l Shift Time setting allows you to Programme the time between movements of the picture in minutes This feature is only available for PDP TVs Pixel Shift Using this function you can set the TV to move...

Страница 105: ...or symbols on the screen especially when you displayed a still image on the screen for a long time Try Now The after image removal function has to be executed for a long time approximately 1 hour to e...

Страница 106: ...s SMART TV requires a password to lock out channels and to reset its settings to the factory default Change Password Screen Menu System Change PIN Try Now Change the TV s password 111 Run Change PIN a...

Страница 107: ...a wired network connection during Setup make sure you ve connected a LAN cable to your TV See page 15 for instructions If you want to configure a wireless network connection during Setup make sure yo...

Страница 108: ...ss the standard remote control buttons in the following sequence in Standby mode which resets the PIN to 0 0 0 0 MUTE M 8 2 4 POWER on If you use Smart Touch Control please press MUTE Volume up RETURN...

Страница 109: ...s u d l r button or drag on the touch pad to select the date you want 222 Press the middle place of your remocon touch pad or E button on ordinary remocon to open the note editor then select the appro...

Страница 110: ...l information it will pop up after user handles the onscreen menu for searching channels If the note is very long it will display at the end The number of note entries must not exceed 100 Otherwise Th...

Страница 111: ...n before using Game Mode Precautions and Restrictions Game Mode cannot be used for normal TV viewing Connect the gaming console before enabling Game Mode Otherwise the picture quality may suffer Game...

Страница 112: ...available depending on the models Menu Transparency Screen Menu System General Menu Transparency Try Now Adjust the menu screen s transparency Sound Feedback Screen Menu System General Sound Feedback...

Страница 113: ...ble depending on regions and modes Anynet HDMI CEC Screen Menu System Anynet HDMI CEC Allows you to control all connected Samsung devices that support anynet with your Samsung TV s remote control For...

Страница 114: ...ou and your friends video posts on Facebook and Twitter You can also make video calls to friends by connecting the TV to a camera sold separately Apps Download and install applications such as WebBrow...

Страница 115: ...irmation button to finalize the Samsung account setup process Creating a Samsung Account Using a Facebook Account May not be available depending on your regions and country Screen Menu Smart Features...

Страница 116: ...ur Facebook account as well Log into your Samsung account and select to view a list of applications that require login information Register Service Account Select an application select Register and th...

Страница 117: ...n search many apps and their contents on the TV as well as the Web Keyword Search Press the HISTORY SEARCH button The list appears at the bottom of the screen the screen Press the HISTORY SEARCH butto...

Страница 118: ...be available depending on your regions and country Enable disable the status and notification banner s Motion Control functions Samsung Account Configuration Select My Account from the notification ba...

Страница 119: ...inked to your Samsung account Social Settings Screen Menu Smart Features Social Settings Checking the Application Certain applications need to be installed on the TV in order to use the Social feature...

Страница 120: ...end to call Only available in Hongkong area Select Video Call at the bottom of the Social screen This launches Skype and displays a list of friends Select a friend to call Filters Only available in Ho...

Страница 121: ...ty are subject to change without prior notice Samsung Electronics takes no legal responsibility for any interruption of the Smart Hub service caused by the service provider for any reason Application...

Страница 122: ...various free and paid news sports weather and gaming applications Samsung Apps lets you search for applications and install them directly on your TV Read and agree to the terms and conditions of use a...

Страница 123: ...My Apps screen select the applications you wish to remove and then move them to the first or last row of the My Apps list An X will appear at the top or bottom of the icons of the selected applicatio...

Страница 124: ...ct Options to rename the folder or move applications to that folder Application Lock Unlock When the application require to update to the latest version select Apps and then select More Apps On the Mo...

Страница 125: ...Social TV displays social network services on a single screen You can even post messages and comments in the same manner as you would using a computer You must first link your Samsung account to the r...

Страница 126: ...een installed on your TV you will need to install it first Push Notifications Screen Menu Smart Features Apps Settings Push Notification Settings Enable disable push notifications from applications Pu...

Страница 127: ...movies and TV shows will be shown in the Recommendation list Try the custom recommendations list which makes custom recommendations based on the contents accessed through Movies TV Shows Watching Cont...

Страница 128: ...inds of devices must be connected directly to the TV s USB port The TV may not be able to recognise the USB device or read the files on the device if it is connected to the TV via a USB extension cabl...

Страница 129: ...hen the USB device that contains the files Select the USB device from the Source screen A popup window will appear Select the type of media you want to play USB Device Removal Press SOURCE to access t...

Страница 130: ...age and play the media files Use a Smartphone to send a request to the TV to play the media files stored on a computer or use a computer to request playing the media files stored on a Smartphone Log i...

Страница 131: ...mpted AllShare AllShare makes it easy to retrieve and enjoy media files from computers and DLNA enabled devices However computers need to be installed with AllShare PC and mobile devices need to suppo...

Страница 132: ...the Options list located at the top of the screen select Play Selected specify all the video files you wish to play and then select Play This creates a playlist If the list is displayed in Folder vie...

Страница 133: ...e Search Scene function Select the Search on screen button and then select Search Time Bar This will take you to a time frame in the video Select the Search on screen button and then select Search Tit...

Страница 134: ...n button and then select Audio Language Select an audio language However this option is only available with streaming videos that support multiple audio formats Information Select the Settings on scre...

Страница 135: ...les you want to play and then select Play This creates a playlist If the list is displayed in Folder view mode only the files contained in the current folder can be selected To select files from other...

Страница 136: ...he Sound Mode on screen button Select a sound mode Information Select the Virtual Remote panel s INFO button from the playlist to view detailed information about the selected file Additional Function...

Страница 137: ...e Slide show From the Options list located at the top of the screen select Slide Show You can view all photos in the list as a slide show Press from the list Press or select the Start Slide Show on sc...

Страница 138: ...wish to deselect and select Deselect All This cancels all selected photo files Cancel Cancel the selection you do Opening a Different File Press the middle place of your remocon touch pad button choo...

Страница 139: ...ate on screen button This rotates the photo Receiver Select the Receiver button and then power on the AV receiver Picture Mode Select the Settings on screen button and then select Picture Mode Select...

Страница 140: ...ol may not function under certain circumstances In this case select the Anynet device again Anynet HDMI CEC only works with external devices that support Anynet HDMI CEC and only when those devices ar...

Страница 141: ...sing the Anynet HDMI CEC You can operate external devices using just the TV remote control Switching between Anynet Devices 111 Select the Virtual Remote panel s or the regular remote s TOOLS button t...

Страница 142: ...he DVD menu is shown Connected Device Tools Display a list of frequently used functions that are available for the device If the target device is a DVD player the DVD playback menu is shown Some exter...

Страница 143: ...Select Snapshot tool and press on screen button Capture to take a Snapshot of the screen in real time You can select Save to save the picture to the USB device which has been connected to the TV or sh...

Страница 144: ...roring is only available with mobile devices that support AllShare Cast For more information visit the mobile device manufacturer s website Depending on the network condition screen or voice dropouts...

Страница 145: ...let Samsung Electronics diagnose your TV remotely You will need to read and agree to the service agreement before using this feature A Samsung Electronics technician will then diagnose repair and upd...

Страница 146: ...rvice your TV is really pretty simple Call Samsung Contact Centre and ask for remote support Open the menu on your TV and go to the Support section Select Remote Management and Provide the Pin to the...

Страница 147: ...formation Reset The options may vary depending on the models or areas Picture Test Screen Menu Support Self Diagnosis Picture Test Try Now The Picture Test displays a high definition picture to examin...

Страница 148: ...nt Check Screen Menu Support Self Diagnosis Motion Control Environment Check Try Now Test the ambient noise and brightness levels to see if they are suitable for SMART Interaction use Signal Informati...

Страница 149: ...evice Insert the USB device into the TV s USB port and run the upgrade Do not remove the USB device until the upgrade is complete Auto update Screen Menu Support Software Update Auto update Try Now Th...

Страница 150: ...or each TV model Refer to the Kensington Lock manual for more information Display Resolution You can also select one of the standard resolutions listed in the Resolution column The TV will automatical...

Страница 151: ...00 800 x 600 46 875 75 000 49 500 1024 x 768 48 363 60 004 65 000 1024 x 768 56 476 70 069 75 000 1024 x 768 60 023 75 029 78 750 1152 x 864 67 500 75 000 108 000 1280 x 720 45 000 60 000 74 250 1280...

Страница 152: ...File Extension MPEG 4 Timed text ttxt SAMI smi SubRip srt SubViewer sub Micro DVD sub or txt SubStation Alpha ssa Advanced SubStation Alpha ass Powerdivx psb Internal Name Container Xsub AVI SubStatio...

Страница 153: ...s File Extension Type Codec Comments mp3 MPEG MPEG1 Audio Layer 3 m4a mpa aac MPEG4 AAC flac FLAC FLAC Supports up to 2 channel ogg OGG Vorbis Supports up to 2 channel wma WMA WMA WMA 10 Pro supports...

Страница 154: ...720p 59 94 60 1920 x 1080i 59 94 60 1920 x 1080p 23 98 24 29 97 30 59 94 60 3D Format Frame Packing Resolution Frequency Hz 1280 x 720p 59 94 60 1920 x 1080i 59 94 60 1920 x 1080p 23 98 24 29 97 30 Co...

Страница 155: ...ontainer Video Codec Resolution Frame rate fps Bit rate Mbps Audio Codec avi Divx 3 11 4 5 6 mkv asf MPEG4 SP ASP 1920x1080 30 wmv mp4 AVI MKV H 264 BP MP HP AC3 LPCM 3gp vro ASF MP4 Motion JPEG 640x4...

Страница 156: ...hly because of data transmission speeds Some USB digital camera devices may not be compatible with the player Video Decoders Supports up to H 264 Level 4 1 does not support FMO ASO RS VC1 AP L4 is not...

Страница 157: ...general wear sunglasses protective goggles etc Some viewers may experience discomfort such as dizziness nausea and headaches while viewing 3D TV If you experience any of these symptoms stop viewing th...

Страница 158: ...ning the product do not spray water or cleaner directly onto the surface of the product Spraying water or cleaner directly onto the glasses may result in fire or electric shock damage to the product s...

Страница 159: ...if you have already provided this to Samsung your name address and contact telephone number your original receipt invoice or sales slip for the purchase of the product as new your Warranty Claim Numbe...

Страница 160: ...CE OF SAMSUNG UNLESS SUCH LIMITATION OR EXCLUSION IS PERMITTED BY APPLICABLE LAW 888 WITH THE EXCEPTION OF SAMSUNG S LIABILITY WHICH CANNOT BE EXCLUDED OR LIMITED BY LAW SAMSUNG SHALL NOT BE LIABLE FO...

Страница 161: ...setup menu Go to vod divx com for more information on how to complete your registration Covered by one or more of the following U S patents 7 295 673 7 460 668 7 515 710 7 519 274 Manufactured under...

Страница 162: ...tion Multimedia Interface and the HDMI Logo are trademarks or registered trademarks of HDMI Licensing LLC in the United States and other countries This licence is available only with PDP 5500 series a...

Страница 163: ...ngs Motion Plus Blur for LED TV If you find that there is a blur or ghost shadow to the images on your television screen you might be able to correct the issue using Motion Plus Picture Picture Option...

Страница 164: ...nd digital channels The colour is wrong or missing If you re using a Component connection make sure that the component cables are connected to the correct jacks Incorrect or loose connections may caus...

Страница 165: ...example you may need to change your cable box s audio option to HDMI if the box connected to your TV is using an HDMI cable If you are using a DVI to HDMI cable a separate audio cable is required If...

Страница 166: ...en you are not using them If you leave the 3D glasses on the battery lifespan is shortened Aerial Air Cable Satellite Connection There is something wrong with the TV Try this The TV is not receiving a...

Страница 167: ...o output setting on your PC If you are using a DVI to HDMI cable a separate audio cable is required Networking There is something wrong with the TV Try this The wireless network connection failed Make...

Страница 168: ...not select the Subtitle menu if you have selected a source connected to the TV via HDMI or Component The external device s Subtitle function must also be activated The TV smells of plastic This smell...

Страница 169: ...ts and high levels of electrical current and depending on the brightness level being used may seem slightly noisier than a conventional TV Your TV has undergone strict quality control procedures that...

Страница 170: ...View TV from the Anynet menu Select a non Anynet device from Source The message Connecting to Anynet device or Disconnecting from Anynet device appears on the screen You cannot use the remote control...

Страница 171: ...t only appears in English How can I change the language The application content language may be different from the user interface language The ability to change the language depends on the service pro...

Страница 172: ...h to Pointer Browsing to activate this 1111 Only a limited number of fonts are supported Certain symbols and characters may not be displayed properly 1111 The response to remote commands and the resul...

Страница 173: ...SmartTV Bookmark 2222 If Clock System Time Clock Set has not been enabled the browsing history will not be saved 2222 The browsing history is saved in the order of latest to oldest with the oldest ent...

Отзывы: