8
English
Instal
lation
Location
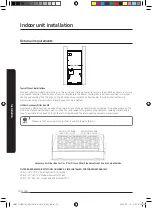
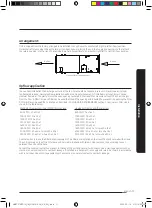
Access for servicing is an important factor in the location of any air handler. Provide a minimum of 30 inches in front of the
appliance for access to the control box, heating elements, blower and air filters. This access may be provided by a closet
door or by locating the appliance so that a wall or partition is not less than 30 inches from the front access panel. Location
is usually predetermined. Refer to figure below. Check with owner’s or dealer’s installation plans. If location has not been
decided, consider the following in choosing a suitable location.
1. Select a location with adequate structural support, space for service access, and clearance for return and supply duct
connections.
2.
Normal operating sound levels may be objectionable if the air handler is placed directly over or under some rooms such as
bedrooms, study, etc.
3. Caution should be taken to locate the unit so that supply and return air ducts are about the same length causing even air
distribution of supply and return air to and from the living spaces.
4. Locate appliance where electrical supply wiring can be easily routed to main electrical panel and where electrical wiring will
not be damaged.
5. Locate appliance where control wiring can be easily routed to the controller and where the wiring will not be damaged.
6. Locate appliance where refrigerant lines can be easily routed from the evaporator coil to the system.
7. Locate the appliance where condensate lines can be easily routed to an available drain. Be sure to route condensate drain
piping so as not to obstruct access to the air filter.
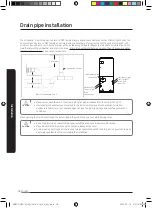
8. The coil is installed in a draw-thru application and will create a negative pressure situation in the condensate drain system.
To prevent condensate from being drawn into the blower it is recommended to trap the primary (Main) and secondary
(Overflow) drain line. Refer to Drain Pipe and Drain Hose section in these instructions. If the secondary drain is not used,
it must be capped. This unit has a connection terminal for drain system monitoring. Refer to Wiring Work section for
information regarding connection of field-provided condensate overflow devicesin these instructions.
9. The draw-thru design will cause exterior surface of cabinet to sweat when unit is installed in a non-conditioned space
such as an attic or garage. Installer must provide protection such as full size auxiliary drain pan on all units installed in a
non-conditioned space to prevent damage from condensation runoff. Some states, cities and counties require additional
insulation to be installed on the exterior casing of the air handler to prevent sweating. Refer to the state, city, county or local
code for insulation requirement to be sure the installation is in compliance. It is recommended that air handlers installed in
non-conditioned spaces be insulated on the exterior of the entire cabinet, including the front access panel with one (1) inch
thick fiberglass with the vapor barrier on the outside.
10.
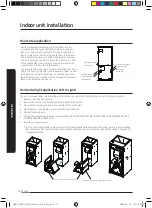
Ensure sufficient space for the bottom of the product (H dimension) so that a downward slope of 1/100 can be maintained for
drain piping, as described for the intake duct installation and in “
Drain pipe installation
”.
H
H
Clearance - Access for service
30" minimum
Right side of unit
Vertical installation
Horizontal installation
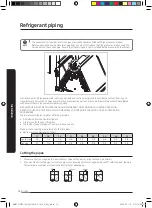
Refrigerant pipe work must be done before installing the indoor unit.
Indoor unit installation
AM072TNZDCH_IM_DVM V-AHU_AA_EN_.indd 8
2020-02-14 오전 10:33:30
Содержание AM0 SERIES
Страница 45: ...45 English Appendix Memo AM072TNZDCH_IM_DVM V AHU_AA_EN_ indd 45 2020 02 14 오전 10 33 41 ...
Страница 46: ...AM072TNZDCH_IM_DVM V AHU_AA_EN_ indd 46 2020 02 14 오전 10 33 41 ...
Страница 91: ...45 Français Annexe Note AM072TNZDCH_IM_DVM V AHU_AA_FR_ indd 45 2020 02 14 오전 10 35 49 ...
Страница 92: ...AM072TNZDCH_IM_DVM V AHU_AA_FR_ indd 46 2020 02 14 오전 10 35 49 ...


