1-7
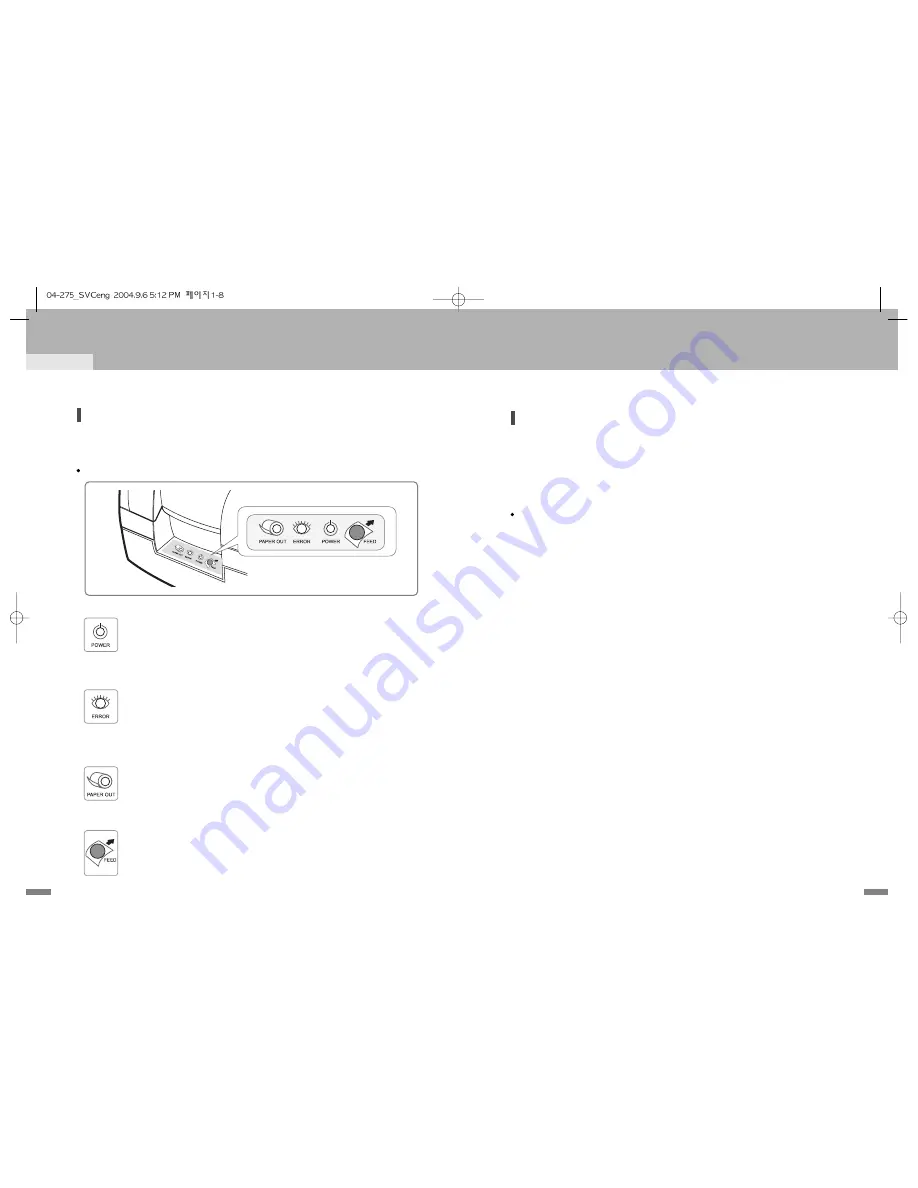
1.9 Using the operation panel
Most of the functions of this printer are governed by software, but you can monitor the printer s status by
looking at the lights on the operation panel and for some procedures you will use the buttons.
This indicator light is on when the power is turned on. It blinks when the printer is in the self
test printing standby state. Always wait until this indicator light stops blinking before you start
using the printer and before you turn it off.
operation panel
- POWER LED (Green Color)
When this indicator light is on (but not blinking), it means that the printer is out of paper or
almost out of paper or the printer covers are open. When this light blinking, there is an error.
(See "ERROR LED blinking pattern" (2.1) in Chapter 2.) If you see this light blinking, turn off
the printer for a few seconds and then turn it back on. If the light is still blinking, call your
supervisor or a service person.
- ERROR LED (Red Color)
When this indicator light is on, it means that the paper near end. Replace the new paper roll.
When ERROR and PAPER OUT indicator lights are on it means paper end.
Install the paper roll.(See"Installing paper roll"(1.5)in Chapter 1.)
- PAPER OUT LED (Red Color)
Use this button to feed paper or to start self test and for hexadecimal dump mode.
(See the instructions "Self test" (1.7) in this chapter for self test.)
(See the instructions "Hexadecimal dump" (2.6) in Chapter 2 for hexadecimal dump mode.)
- FEED button
Setting up the printer
CHAPTER 1
1-6
1.9 Self test
The self test lets you know if your printer is operating properly. It checks the print quality, ROM version,
DIP Switch settings, memory switch settings and statistic data.
The test is independent of any other equipment or software, so it is a good idea to run it when you first set
up the printer or if you have any trouble. If the self test works correctly, the problem is in the other
equipment or the software, not the printer.
Running the self test
1) Make sure the printer is turned off and the printer cover is closed properly.
2) While holding down the FEED button, turn on the printer and continue to hold until the paper begins to
feed. The self test prints the printer DIP Switch settings and memory switch settings.
And cuts the paper and pauses. (The power light blinks.)
3) Press the FEED button to continue printing the statistic data.
4) Press the FEED button to continue printing the rolling ASCII pattern.
5) The self test mode terminates after printing the rolling ASCII pattern automatically.
Содержание 2 COLOR THERMAL PRINTER SRP-275
Страница 1: ...printed in korea 2004 09 ELECTRO MECHANICS ...
Страница 2: ...Operator s manual POS impact dot matrix printer SRP 275 ELECTRO MECHANICS ...
Страница 26: ...4 5 4 4 4 5 4 4 Page 3 PC860 Portuguese Code table CHAPTER 4 4 3 Page 2 PC850 Multilingual ...
Страница 27: ...4 7 4 6 4 7 4 6 Page 5 PC865 Nordic Code table CHAPTER 4 4 5 Page 4 PC863 Canadian French ...
Страница 28: ...4 9 4 8 4 9 4 8 Page 17 PC866 Russian Code table CHAPTER 4 4 7 Page 16 WPC1252 Latin1 ...
Страница 29: ...4 11 4 10 4 11 4 10 Page 19 PC858 Euro Code table CHAPTER 4 4 9 Page 18 PC852 DosLatin2 ...
Страница 30: ...4 13 4 12 4 13 Code table CHAPTER 4 4 12 Page 22 PC864 Arabic 4 11 Page 21 PC862 Israel ...
Страница 31: ...4 15 4 14 Code table CHAPTER 4 4 14 Page 24 WPC1253 Greek 4 13 Page 23 Thai character code 42 ...
Страница 32: ...4 16 4 17 Code table CHAPTER 4 4 16 Page 26 WPC1257 Baltic 4 15 Page 25 WPC1254 Turkish ...
Страница 33: ...4 19 4 18 Code table CHAPTER 4 4 17 Page 27 Farsi 4 18 Page 28 WPC1251 Russian ...
Страница 34: ...4 21 4 20 Code table CHAPTER 4 4 19 Page 29 PC737 Greek 4 20 Page 30 PC775 Baltic ...
Страница 35: ...4 22 Code table CHAPTER 4 4 21 International character code table ...


