


15
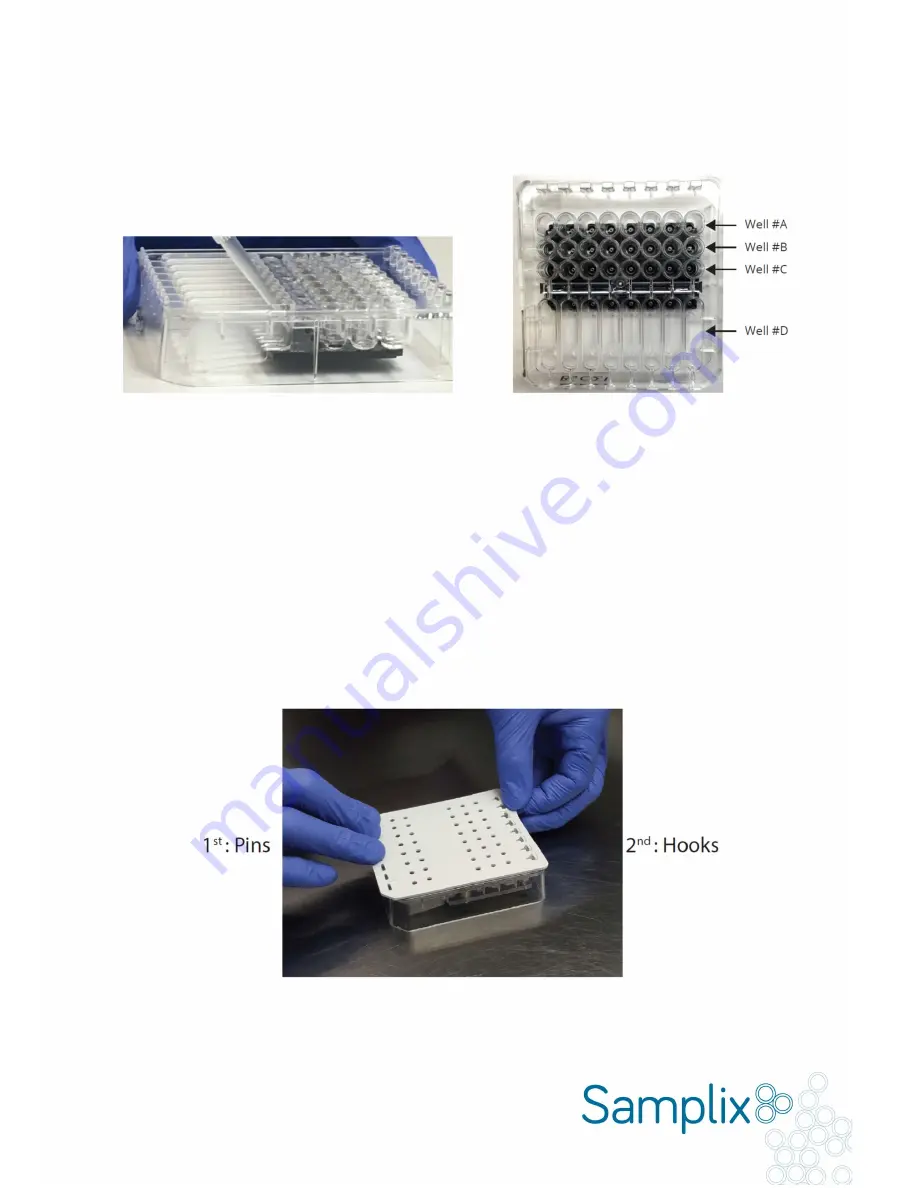
Fig. 3.2.
Loading of the dPCR cartridge. Left: Avoid introducing air bubbles by pipetting on the side of the wells. Right: dPCR cartridge
top view with wells marked.
6.
Load 300 μl 1x dPCR buffer in the first well (#A). It is important to load the cartridge in the order described
here and avoid air bubbles by pipetting carefully on the side of the well (Fig. 3.2).
7.
Load 40 μl 1x dPCR buffer to the shelf of the outlet well #D (Fig. 3.2).
8.
Load 40 μl dPCR reaction mix including primers and sample DNA into well #C.
9.
Load 100 μl dPCR oil
●
into well #B.
10.
Notice that the order of loading is:
300 μl 1x dPCR buffer in the well #A.
40 μl 1x dPCR buffer to the shelf #D.
40 μl 1x dPCR reaction mix in well #C.
100 μl dPCR oil
●
in well #B.
11.
Add a gasket to the top of the cartridge. Orient the gasket to the cartridge using the angled corner. Attach to
the pins first and then to the hooks (Fig. 3.3).
Fig. 3.3.
Cover cartridge with the gasket by orienting it correctly (angled corner on the gasket to
angled corner on cartridge), then attach first the pins then pull gently to attach hooks.