Salicru SLC ADAPT Series Скачать руководство пользователя страница 59

59

8.  MAINTENANCE, WARRANTY AND SERVICE.

This chapter introduces the maintenance of the UPS, including 

the maintenance instructions for the power modules, moni-

toring of the Bypass module and method used to replace the 

dust filter.

8.1.  PRECAUTIONS.

Only qualified maintenance personnel can maintain the power, 

control and bypass units.

1. 

The power unit must be disassembled from top to bottom to 

prevent tilting of the cabinet.

2. 

To ensure safety prior to power and control unit 

maintenance, use a multimeter to measure the voltage 

between the operational parts and earth to ensure that it is 

not dangerous. For example, make sure that the DC voltage 

is less than 36 V DC, and the maximum AC voltage is less 

than 30 V AC.

3. 

Hot swapping is not recommended in the control and bypass 

units. These units can only be deactivated when the UPS is 

in maintenance Bypass mode or when it is completely shut 

down.

4. 

After removing the power unit from the cabinet, wait 

10 minutes before opening the cover.

8.2.  POWER MODULE MAINTENANCE INSTRUCTIONS.

Confirm that the UPS is operating in Normal mode and that the 

Bypass is operating normally before removing the power unit 

to be repaired.

1. 

Make sure that the remaining power modules will not 

overload.

2. 

Turn off the power unit:
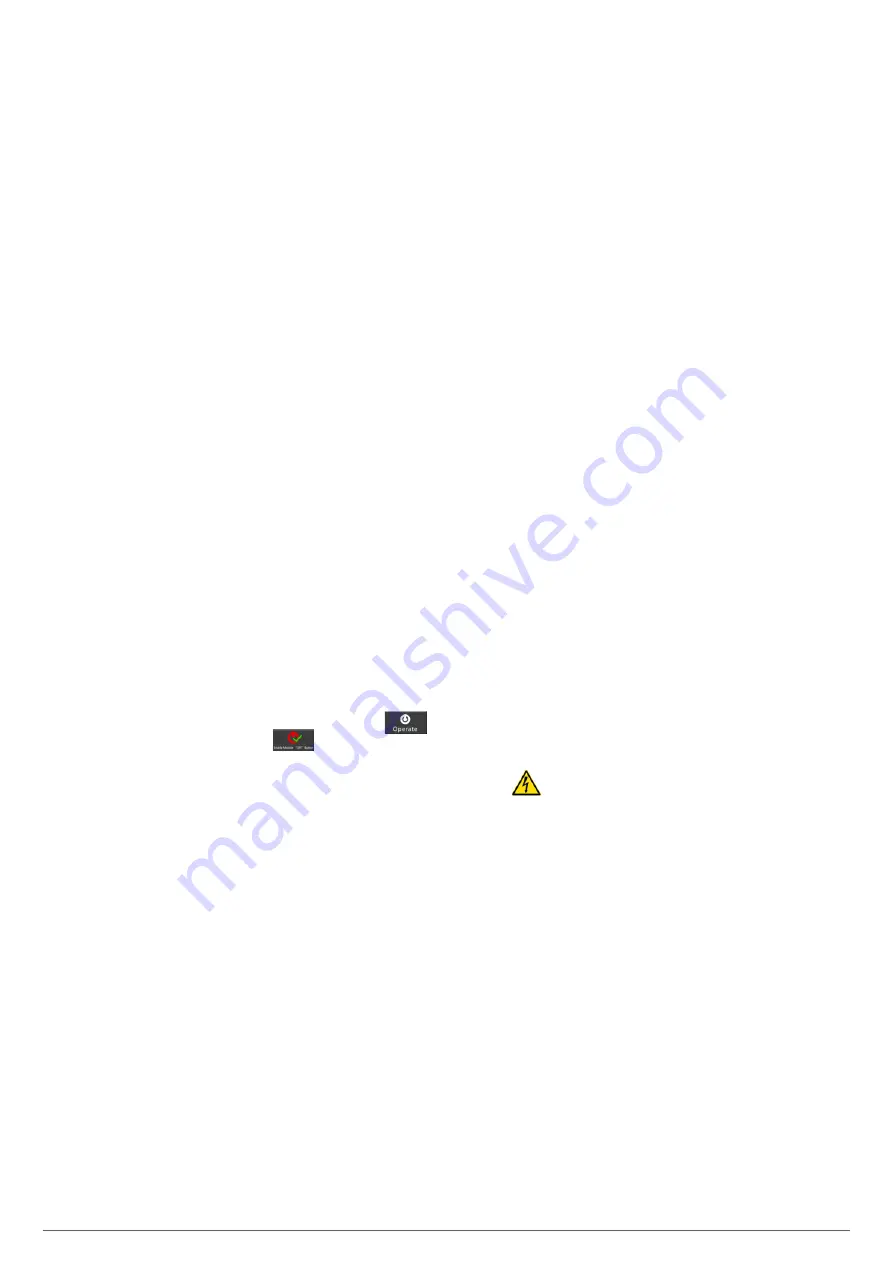
a. 

Activate the LCD panel 

→ 

Operate menu 


Activate the ‘OFF’ icon 

 on the power module.

b. 

Press the ‘OFF’ button on the power unit panel for 

3 seconds. The power unit exits the system.

3. 

Remove the mounting screws on both sides of the front of 

the power unit and remove it using two people.

4. 

Wait 10 minutes before removing the cover for repair.

5. 

After the repair, reinstall the power unit in the cabinet, it 

will join the system automatically.

8.3.  MAINTENANCE INSTRUCTIONS.

8.3.1.  CONTROL AND BYPASS UNIT MAINTENANCE 

INSTRUCTIONS.

Confirm that the UPS is operating in Normal mode and the By-

pass is operating normally.

1. 

Transfer the system to Bypass mode using the LCD control 

panel (see chapter 6.3.4), the load is now powered by the 

maintenance Bypass.

a. 

For 6-slot cabinets (180 kVA), the control module and 

the Bypass module form a single module, remove it 

directly after removing the screws that secure it to the 

cabinet structure.

b. 

For 10-slot cabinets (300 and 500 kVA), the control 

module and the Bypass module are separated, remove 

them directly one after another after removing the 

screws that secure them to the cabinet structure.

2. 

Once maintenance is finished, reinsert the modules and 

tighten the fixing screws.

3. 

Transfer the UPS from maintenance Bypass mode to Normal 

mode (see chapter 6.3.5).

8.4.  BATTERY MAINTENANCE.


Pay attention to all of the safety instructions concerning 

batteries indicated in section 1.2.3 of the EK266*08 manual.


The service life of the batteries directly depends on the 

ambient temperature and other factors such as the number 

of charges and discharges, as well as their depth. Their 

service life is designed to be between 3 and 5 years if the 

ambient temperature to which they are exposed is between 

10 and 20 °C. Different types of battery with different 

service lives are available upon request.


SLC  ADAPT series UPSs require minimum upkeep. The 

batteries used in the standard models are lead acid, sealed, 

valve regulated and maintenance free, or lithium. The only 

requirement is to charge the batteries regularly to extend 

their life expectancy.

While the UPS is connected to the mains supply, whether or 

not it is running, it will keep the batteries charged and also 

offer protection from overcharging and deep discharge.

8.4.1.  Notes for the installation and replacement of the 

battery.


If it is necessary to replace any connection cables, 

original materials can be purchased through our 

T.S.S.

 or 

authorised distributors. Using inappropriate cables can lead 

to overheating in connections, resulting in a fire hazard.


Inside the device, there are permanent dangerous 

voltages even without mains supply present through 

its connection to the batteries and especially in UPSs where 

the electronics and batteries share a box.

Also take into consideration that the battery circuit is not 

isolated from the input voltage, so there is a risk of discharge 

with dangerous voltages between the battery terminals and 

the earth terminal, which is in turn connected to earth (any 

metal part of the device).

Repair and/or maintenance work must be carried out by our 

T.S.S.

 except for the replacement of batteries, which can 

be performed by qualified personnel familiar with them. No 

other person should handle them. 

8.5.  REPLACE DUST FILTER (OPTIONAL).

There are 3~4 dust filters behind the front door of the UPS (see 

Fig. 90). Each filter is held in place by staples on each side. The 

procedure to replace the filters is as follows: 

1. 

Open the front door and locate the filters at the back.

2. 

Remove the support.

3. 

Remove the old dust filters and replace them with clean 

ones.

4. 

Replace the support.

SLC ADAPT

 UNINTERRUPTIBLE POWER SUPPLY (UPS)

USER'S MANUAL        

Содержание SLC ADAPT Series

Страница 1: ...SLC serie ADAPT 180 300 y 500 kVA UNINTERRUPTIBLE POWER SUPPLY UPS USER S MANUAL...

Страница 2: ...Unpackingandtransportationtothesite 5 1 3 1 Unpackingthepowermodule 5 1 4 Siting immobilisingandconsiderations 5 1 5 Roomforthebatteries 5 2 CABINETPOSITIONING 5 2 1 180to300kVAdevices 5 2 2 500kVAdev...

Страница 3: ...hscreen 7 3 MAINMENU 7 3 1 Cabinet 7 3 2 Powermodule 7 3 3 Settings 7 3 3 1 Date Timesetting 7 3 3 2 Languagesetting 7 3 3 3 Communicationsprotocolsetting 7 3 3 4 Usersettings 7 3 3 5 Batterysettings...

Страница 4: ...ied personnel Although no effort has been spared to ensure that the in formation in this user manual is complete and accurate we accept no liability for any errors or omissions that may exist The imag...

Страница 5: ...nd startup operations to be performed in a simple and organised manner without any doubts whatsoever Finally once the equipment is installed and operating it is recommended to save the documentation d...

Страница 6: ...ments for UPSs used in areas accessible to operators EN50091 1 1 IEC62040 1 1 AS 62040 1 1 Electromagnetic compatibility EMC requirements for UPSs EN50091 2 IEC62040 2 AS 62040 2 C3 Method for specify...

Страница 7: ...ot 300 kVA and 500 kVA devices Because the product is constantly evolving however slight discrepancies or contradictions may arise If in any doubt the labelling on the device itself will always prevai...

Страница 8: ...8 SALICRU 19 8 LCD 4 98 Fig 2 Front view of 30 kVA module 20 kVA for 3x208 V AC voltages Touch display Fig 3 Front and rear view of 6 slot cabinet 180 kVA 120 kVA at 3x208 V with closed doors...

Страница 9: ...pass marking Free slot for Bypass module Bypass input A B C N Output A B C N Input A B C N Batteries N SPD option Relay interface Communications interface Power module connector Fig 5 Front and rear v...

Страница 10: ...10 SALICRU Fig 6 Front and rear view of 10 slot cabinet 300 kVA 200 kVA at 3x208 V with closed doors...

Страница 11: ...marking SPD option Relay interface Module display Free slot for Bypass module Communications interface 30 kVA power modules Power module connector Fig 7 Front and rear view of 10 slot cabinet 300 kVA...

Страница 12: ...12 SALICRU Fig 8 Front view of 10 slot cabinet 500 kVA 300 kVA at 3x208 V with closed doors...

Страница 13: ...13 Fig 9 Rear view of 10 slot cabinet 500 kVA 300 kVA at 3x208 V with closed doors SLC ADAPT UNINTERRUPTIBLE POWER SUPPLY UPS USER S MANUAL...

Страница 14: ...ut UPS output Manual bypass Cold Start Module display Bypass module 50 kVA power modules Communications interface UPS input disconnector UPS output disconnector Manual Bypass disconnector Bypass input...

Страница 15: ...0 kVA module 30 kVA for 3x208 V AC voltages Bypass input A B C Input A B C N Output A B C N Batteries N PE Fig 13 Rear view of 10 slot cabinet 500 kVA with open doors SLC ADAPT UNINTERRUPTIBLE POWER S...

Страница 16: ...tem will be indicated 0 Devices prepared for standard backups B1 Subrack cabinet with external batteries S Ambient temperature sensor C Subrack mounted on box type BATT MOD batteries supplied factory...

Страница 17: ...y charger modules are available to be installed solely with the 30 kVA SLC ADAPT modules As many charging modules as considered appropriate can be installed but this will be to the detriment of the to...

Страница 18: ...ailable power ratings The SLC ADAPT series has two different power modules 30 and 50 kVA as can be seen in Fig 2 Fig 4 Fig 10 and Fig 12 4 3 2 2 Static bypass Static transfer switch In the event of in...

Страница 19: ...float or quick voltage PFC rectifier AC DC BAT DC DC DC Battery Charger Inverter DC AC Static bypass Manual bypass Batteries AC input Bypass AC input Rectifier AC output Connection strips between pha...

Страница 20: ...terminals version B are live even if all modules are switched off It is recommended in this operating mode Remove the fastening screws of all power control and bypass modules Slightly pull the handle...

Страница 21: ...ity Weight 180 kVA 374 kg 300 kVA 560 kg 500 kVA 1350 kg Tab 1 Weight of the UPS including power modules 5 1 1 Reception unpacking and contents Reception Check that The data on the label affixed to th...

Страница 22: ...e treated as individual device for battery recharging and there fore no additional connection is required 5 1 3 Unpacking and transportation to the site The packaging of the device consists of wooden...

Страница 23: ...n system to force the cooling air flow The modules are equipped with three internal speed regu lated fans The air flow is channelled from the front to the rear Do not block the ventilation holes or ob...

Страница 24: ...t and the other by means of anchor bolts for its final permanent installation 55 86 5 349 55 86 5 10 971 10 55 522 55 47 105 687 Front door Back door Front door Rear door Anchor bolt L shaped plates W...

Страница 25: ...attery branch The voltage at the battery terminals is greater than 200 V DC Follow the safety instructions to avoid electric shock Make sure that the positive negative and neutral are cor rectly conne...

Страница 26: ...ing a sequence from bottom upwards to prevent dangerous tilting of the cabinet due to the high centre of gravity The steps to install the power modules are as follows taking as an example a 10 slot ca...

Страница 27: ...the cabinet can be made from the top or bottom Regarding the 10 slot cabinet the upper cable entry is standard while the entry at the bottom requires optional parts to be added The different cable en...

Страница 28: ...entry for 500 kVA devices Cable entry can be made from the top or bottom Fig 36 10 slot cabinet installation with cable entry at the top rear view Fig 37 10 slot cabinet installation with cable entry...

Страница 29: ...power cable connectors Type Port Connection Bolt Tightening torque 180 kVA 300 kVA 500 kVA Input Crimped cables Ring terminal M16 96 Nm Bypass input Crimped cables Ring terminal M16 96 Nm Battery inp...

Страница 30: ...ction terminals for 500 kVA devices The operations described in this section must be per formed by electricians or qualified technical personnel If difficulties arise contact our head office or local...

Страница 31: ...as shown in Fig 39 and Fig 40 Startup from batteries Cold Start Parallel interface Smart slot SNMP card Relay interface USB RS 232 RS 485 Fig 39 Relay and communication interface of 180 and 300 kVA mo...

Страница 32: ...y interface signal J9 1 ALARM_NC Normally closed NC contact GENERAL ALARM relay interface signal J9 2 ALARM_NO Normally open NO contact GENERAL ALARM relay interface signal J9 3 GND Common for GENERAL...

Страница 33: ...Off switch J6 2 BCB_CONT Status of the BCB switch Its normally closed NC auxiliary contact can be connected between this pin and the GND J7 1 GND 24 V ground reference J7 2 BCB_ONL Not useful Not impl...

Страница 34: ...gram of the ports is shown in Fig 47 and a description in Tab 7 UTILITY_FAIL_NC UTILITY_FAIL_NO UTILITY_FAIL_GND J10 Fig 47 Diagram of the relay interface of mains failure warnings Port Name Function...

Страница 35: ...Red Load Green Bypass Green State Red Tab 16 Inverter startup 7 The UPS transfers from bypass to inverter once the inverter stabilises LED indicator states are shown in Tabla 8 Indicator State Indicat...

Страница 36: ...rom Normal mode to Bypass mode 1 Enter the Operation menu click on the transfer to bypass icon and the system will transfer to Bypass mode 2 Press the BYP button on the control panel for more than two...

Страница 37: ...Q3 then close the input circuit breaker Q1 and finally close the bypass input circuit breaker Q4 The system will start up 1 The static bypass connects 30 seconds after the display illuminates and the...

Страница 38: ...reconnect it When the EPO is tripped the load stops being powered by the UPS Pay attention when using the EPO function EPO button Fig 54 EPO button 6 6 INSTALLATION OF THE PARALLEL SYSTEM The UPS syst...

Страница 39: ...r DC AC inverter DC DC charger DC DC charger DC DC charger Battery Battery Battery Load Manual bypass Manual bypass Manual bypass MBS OS1 OS OS2 OS3 IS1 IS2 IS3 Static bypass Static bypass Static bypa...

Страница 40: ...500 kVA devices 6 6 2 Jumper settings for parallel operation The settings of the jumpers of the parallel cards will be dif ferent depending on whether it is a 2 UPS or 3 UPS system 6 6 2 1 Case of 2 U...

Страница 41: ...e parallel system 6 6 4 Connection of parallel cables The control cables for parallel operation must connect all de vices in a ring as shown in Fig 64 Fig 64 Ring parallel connection of 3 devices 6 6...

Страница 42: ...ame way always checking that the remaining capacity of the system can support the connected loads 2 Transfer from the parallel system of Normal mode to Bypass mode Taking again the example of the 3 UP...

Страница 43: ...1 sec Situation none of the above Tab 20 Status and failure combinations 7 1 2 Operation and control buttons The operation and control buttons include FUNC buttons and behaviour OFF buttons a The FUNC...

Страница 44: ...lure 113 Input current unbalanced 55 Overload 115 Overvoltage in DC bus 57 Overload time exceeded 117 Rectifier soft start failure 59 Overtemp in inverter 119 Relay open 61 Inverter inhibited 121 Rela...

Страница 45: ...ack of the door to activate it INV Long press transfer to inverter MUTE Long press to activate or deactivate the audible alarm Tab 24 Functions of the control and operation buttons When the frequency...

Страница 46: ...e Information display Operating status Submenu Version information Fig 72 Cabinet screen This menu includes the following parts title operating status version information submenu and information displ...

Страница 47: ...ent Hz Output frequency PF Power factor Loads kVA Sout Apparent power kW Pout Active power kVar Qout reactive power Load percentage of UPS load Batteries V Battery positive negative voltage A Battery...

Страница 48: ...d show the current operating status a Green indicates that the module is working normally b Black indicates that the module is invalid c Red indicates the absence or failure of the module For example...

Страница 49: ...e selected Outlet temperature C Outlet temperature of power module selected Code S Failure code For maintenance personnel Tab 26 Description of each Module submenu 7 3 3 Settings Press icon at the bot...

Страница 50: ...n 140 and 180 elements The end of backup voltage will be 360V and the highest voltage 620 V Battery capacity setting The user can adjust the capacity value of a battery element For example if the syst...

Страница 51: ...Tab 27 Current limit per power module Temperature compensation setting This setting is optional and requires the connection of an NTC temperature sensor to contact J2 The UPS will adjust the charging...

Страница 52: ...battery If N Cpm 0 2C the extra charger module charging cur rent setting should not exceed 0 2C Ccm M Service settings The user can select the system s work mode If the system is configured in parall...

Страница 53: ...e configured by the startup per sonnel c For the Batteries and Service options a second level authentication is necessary and the settings must be configured by the personnel responsible for device op...

Страница 54: ...wn Bypass fan failure 20 Bypass module overload Bypass current above pre set limit If bypass current below 135 of rated current only one alarm is generated in UPS 21 Bypass overload Tout Overload stat...

Страница 55: ...out 39 UPS inhibition Prevents system from transferring from bypass to UPS inverter Check 1 If capacity of power module is sufficient for load 2 If rectifier is ready 3 If bypass voltage is normal 40...

Страница 56: ...imit Check 1 If rectifier diodes are damaged 2 If PFC or IGBT are damaged 3 If PFC diodes are broken 4 If SCR or IGBT drivers are abnormal 5 If soft start resistors or relays are abnormal 72 Relay con...

Страница 57: ...there is an event and it has been deleted Yellow there is a warning Red there is a failure 7 3 5 Operate menu Press icon at the bottom of the screen to access the Operate menu Fig 88 Operation menu Th...

Страница 58: ...tem enters the Charts menu Fig 89 Charts menu Users can see the output voltage output current and bypass voltage waveforms by touching the corresponding icon on the left side of the interface The size...

Страница 59: ...hem to the cabinet structure 2 Once maintenance is finished reinsert the modules and tighten the fixing screws 3 Transfer the UPS from maintenance Bypass mode to Normal mode see chapter 6 3 5 8 4 BATT...

Страница 60: ...regulatory procedures for the intervention of T S S in the event of a fault 8 6 2 Exclusions The company will not be bound by the warranty if the defect in the product is considered to not exist or t...

Страница 61: ...2 x 22 2 x 11 MODEL SLC ADAPT TECHNOLOGY On line double conversion three level PWM DSP control INPUT 3 x 380 400 415 V AC 3 x 208 220 V AC MODULES AVAILABLE kVA kW 30 27 50 45 20 18 30 27 Charging vo...

Страница 62: ...7 180 162 1100 x 600 x 1600 199 369 SLC 20 ADAPT 200 A 3 x 208 3 x 220 V 1 to 10 20 18 200 180 1100 x 600 x 1600 199 369 SLC 30 ADAPT 300 3 x 380 3 x 400 3 x 415 V 1 to 10 30 27 300 270 1100 x 600 x 2...

Страница 63: ...yristor a 4 layer semiconductor device that works as an almost ideal switch THD Total harmonic distortion Harmonic distortion occurs when the output signal of a system does not equal the signal that e...

Страница 64: ...64 SALICRU...

Страница 65: ...65 SLC ADAPT UNINTERRUPTIBLE POWER SUPPLY UPS USER S MANUAL...

Страница 66: ...any salicru salicru_SA Product Range Uninterruptible Power Supplies UPS Lighting Flow Dimmer Stabilisers DC Power Systems Static Inverters Photovoltaic Inverters Voltage stabilisers The Technical Serv...

Отзывы: