14.
DEPTH ADJUSTMENT
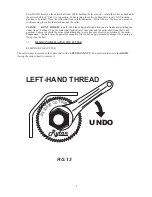
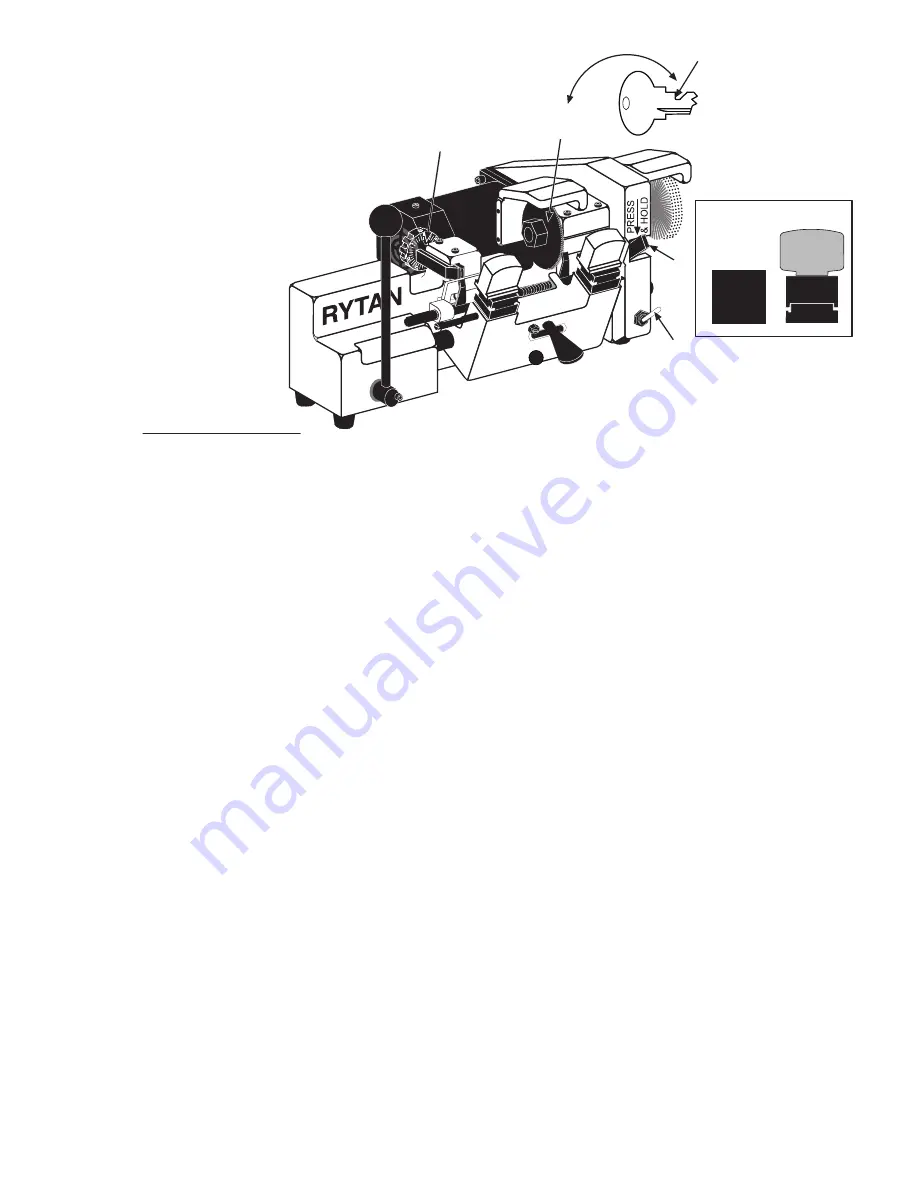
Depth is adjusted at the back end of the stylus.
To adjust the depth you will need.
Piece of writing paper cut to approximately 1” x 4”.
Two identical key blanks – measure blade width with micrometer or dial calipers and select two that match.
Before you begin please make sure that both vise jaws are in the standard “A” configuration.
Depth is adjusted by moving the stylus forward or backward by means of an adjustment dial located at
the back of the stylus.
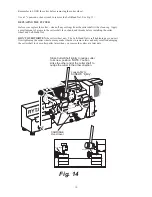
Secure the two matched key blanks - one in each vise jaw. Please note: Clamp the keys into the vise jaws with
about 1/32” gap between the bottom shoulder of the key and the left-side edge of the vise jaws.
DO NOT
bottom shoulder the keys into the vises - there may be a small radius in the corner of the key blank’s blade
and the bottom shoulder area. Clamping in this area may ANGLE the key blank in the vise and throw off your
adjustment by cutting to shallow near the key head.
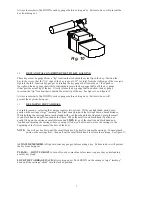
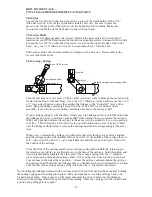
With the keys clamped in the vises and with the stylus adjusted forward about 1 turn - carefully release the carriage
and position it so the key in the left vise jaw LIGHTLY contacts the stylus about in the middle of the key blank’s
blade.
CU
T STRAIGHT
New Cutter will cut
straight on left side
of key cut
Adjustable Stylus
(.0005”) one-half
thousanth INCH
NEW 4-WAY VISES
CLAMPS MORE KEYS
2-WAY
3-WAY
1-
W
AY
4-
W
AY
Cutter
Shaft
LOCK
Power Switch
UP - ON
Down - off
Fig. 15
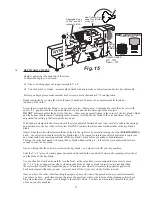
Observe that the cutter wheel missed the key blank in the right vise by carefully turning the cutter
BACKWARDS
by
hand - the cutter teeth should miss the key blank blade. The reason for turning the cutter backwards is to prevent
any cutter teeth from removing material off the key blank’s blade before you make your adjustments.
Turning the cutter backwards will bump the key blank without cutting it - if the stylus was not adjusted forward
enough to miss the key blank.
Upon verifying that the cutter wheel misses the key blank – you may switch ON your key machine.
Take the 1” x 4” piece of writing paper you made earlier and hold one end of it between the spinning cutter wheel
and the blade of the key blank.
Use your hand to slowly and carefully turn the Dial – at the same time we recommend that you slowly move
the 1” x 4” piece of paper from side to side along the blade of the key blank to assist you in detecting when
the cutter wheel’s teeth first contact the paper. When the cutter wheel first contacts the paper the paper will
be shaved almost without any sound – you must back off the stylus very slowly for this to work.
Once you have the cutter wheel touching the paper you may slow down the procedure to very small increments,
1 number at a time - each time moving the piece of paper from side to side in front of the spinning cutter wheel.
Stop when the piece of paper is cut through to the last few fibers. You have now accurately adjusted the depth
of cut on your key machine.
11


