background image

Operation


29 


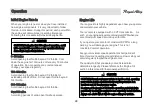
Engine Warm-Up 

After engine start, allow the engine to come up to 

operating temperature by idling the engine for at least 1 

minute and then using mild acceleration during the first 

3 minutes of operation.   
While the engine is warming up, sit on the scooter and 

adjust the rear-view mirrors to be able to see clearly 

behind you from both the right and left sides. 

Riding 

After engine warm up, you are ready to ride. Be sure 

you have completed the pre-ride checklist before each 

ride. Review safety recommendations on pages 4-6. 
Use the throttle for controlling the general speed of your 

vehicle. 
Use the brakes for slowing and stopping your vehicle. 
Use the handlebars to control the direction of the 

vehicle. 
Rider inputs will determine the behavior of the vehicle.  

Make sure you consider the weather, riding surface, 

traffic and all other circumstances that may alter the 

amount of time it will take to accelerate, stop and turn 

your vehicle.   

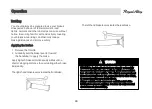
Hold the rear brake lever and push the vehicle forward off 

the center stand.


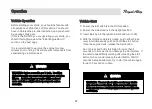
Throttle 

Gradually turn the throttle to accelerate.   

A)


Turning the throttle toward your body will 

increase your speed.   

B)


Turning the throttle away from your body will 

decrease speed. 

Speedometer 

Throttle Direction


Содержание GP300S

Страница 1: ......

Страница 2: ...the labels applied to your scooter You should always keep this owner s manual in your vehicle and it should be considered a permanent part of the vehicle If you have any questions please ask your dealer for assistance Safety symbols and notes Please observe the following FailuretofollowinstructionswithaWARNINGsymbolcouldresultinseriousinjuryordeath Precautionary measures are required CAUTION Impor...

Страница 3: ...e most important in the life of your scooter Proper break in during this time will ensure maximum life Please refer to the break in section for specific break in procedures prior to riding You should always use original Royal Alloy OEM parts for all maintenance and repairs as they have been designed specifically for your vehicle Genuine Motor Oil is the official lubricant of Royal Alloy vehicles G...

Страница 4: ...ctionandAdjustment 19 20 PRE RIDE INSPECTION CONTINUED Throttle Inspection and Adjustment 21 Engine Oil Type Level Check and Fill 22 Tire Inspection and Pressure Adjustment 23 Cable Inspection and Lubrication 24 Vehicle Center and Side Stand Assembly Check 24 Fuel Lighting Switches and Loading 25 OPERATION Vehicle Operation Engine Starting 26 Engine Run in Engine Life 27 Engine Warm up Riding Thro...

Страница 5: ...nt laws and regulations Only use accessories that have been approved by Royal Alloy for this scooter Motorcycle Noise Regulation TAMPERING WITH NOISE CONTROL SYSTEM PROHIBITED Federallawprohibitsthefollowingactsorthecausingthereof 1 Theremovalorrenderinginoperativebyanypersonother thanfor purposesofmaintenance repair orreplacementof anydeviceor element of design incorporated into any new vehicle f...

Страница 6: ...ual for more information Carbon Monoxide Gas The exhaust gasses from this vehicle contain carbon monoxide a colorless odorless and highly toxic gas An enclosed area such as a garage can quickly fill up with carbon monoxide gas Do not run the engine in enclosed areas that are poorly ventilated Move the vehicle outdoors before operation WARNING WARNING Not performing a pre ride inspection altering y...

Страница 7: ... riding your scooter Make Yourself Visible Wear bright reflective apparel to make yourself more visible to fellow drivers Position yourself on the road where other drivers can easily see you Use your turn signals hand signs horn and other methods to help others locate you and understand your driving actions WARNING Know Your Limits Ride within the boundaries of your own skill at all times Do not r...

Страница 8: ...is locatedontheVINplate 1 or on the lower portion of the frame 2 Record your Vehicle Identification Number The Engine Serial Number ESN is located on the rear left side of the engine 3 Record your Engine Serial Number _________________________________________ ...

Страница 9: ...oved from the ignition switch 3 Turn handlebars fully to the left steering stop With the key in the OFF position 2 press key inward toward front of the scooter and turn key left to LOCK position 4 to lock the handlebars as a theft deterrent The fork is now locked and cannot be turned The key can be removed from the ignition switch in the LOCK position Insert and rotate the key clockwise from the L...

Страница 10: ...es green when turn signal button is pressed to the left or right and signal is on 5 ABS Indicator Illuminates orange if there is an ABS problem 6 High Beam Indicator Illuminates blue when high beam switch is selected 7 Check Engine Indicator Illuminates orange if there is an engine problem 8 Oil Level Indicator Illuminates when oil level is low Please check oil level immediately 9 Speedometer Curr...

Страница 11: ... in the glovebox The button is used to change between odometer and trip odometer It is also used to change between mph and kmh units Odometer Trip Odometer Selection To change between odometer and trip odometer 1 Press the dashboard mode selector button once to change between odometer and trip odometer ...

Страница 12: ...eter history Miles Kilometers Unit Selection There are two options for unit selection 1 Distance measured in miles and speed measured in miles per hour mph 2 Distance measured in kilometers km and speed measured in kilometers per hour km h To change from current unit option to the other unit option hold the dashboard mode selector button for 5 seconds ...

Страница 13: ...Switch Press up to turn on HAZZARD flashing turn signals Press down to turn OFF flashing turn signals 5 Emergency Stop Switch Press switch right to select RUN position to operate vehicle In an emergency press switch left to STOP to stop the engine 6 Engine Start Button Press button in with the ignition key in ON position and at least one brake lever engaged in to START the engine 1 4 2 5 3 6 CAUTI...

Страница 14: ...out 13 Front Rear Brake Controls Extend your fingers over the brake lever Pull lever toward the grip to actuate brake The brake lever will slow the vehicle with firm pressure REAR BRAKE LEVER FRONT BRAKE LEVER 11 ...

Страница 15: ...ed to prevent spillage and subsequently a potential hazard for other motorists Fuel Fill Location Raise the seat forward toward the handlebar to expose the fuel cap Return the seat to rest on the body panel and press down firmly on the rear of the seat to securely close it There are several suction cups underneath the seat to keep it locked ...

Страница 16: ...o use the center stand when parking the bike To engage the center stand the user must put full body weight on the foot anchor and simultaneously pull the bike to the rear Glovebox Storage The glovebox is located under the ignition switch and the bag hook Use the ignition key to open the glovebox by inserting key into the glovebox lock cylinder and turning to the right After the glovebox is open re...

Страница 17: ... or higher Take special care not to overfill fuel tank USB Charging Your scooter is equipped with a USB Charging Port located in the glovebox compartment Remove protective cover to expose USB charging port This port is designed to charge small consumer electronics such as a cellular phone After use cover the charging port with the protective rubber cover to prevent moisture and debris from enterin...

Страница 18: ...e boiling coolant to surge out of the tank Hot coolant will cause injuries and burns and it is very important to only open the coolant tank cap when the scooter is cool Rear Rack The rear rack is located on the rear portion of the main body behind the seat The rear rack can be used as a handle when propping the scooter onto the center stand It can also be used to carry items with a maximum load of...

Страница 19: ...le cable if necessary Check throttle free play Adjust throttle cable tension if necessary LUBRICANTS Check the engine oil level before each ride If the engine oil level is low refill with JASO MA 2 5W 40 engine oil TIRES Check tire pressure in both the front and rear tire add air if necessary Inspect tires CABLES Check operation of all cables Lubricate cables and adjust tension as necessary CENTER...

Страница 20: ...l tension then check the lever free play 10 20mm Front Brake lever free play 10 20mm If the brake lever has no free play or is too loose there is a potential brake system fault Inspect brake system thoroughly Front Brake Fluid Check all joints along the brake hose for any fluid leaking from the joint or the brake cylinder Leakage has occurred if you see wet or oxidized fluid sludge Check brake flu...

Страница 21: ...ability can occur Rear Brake The rear brake is a hydraulic disk type Inspect the brake system prior to each ride Properly functioning brake systems are vitally important to your personal safety Check for fluid leaks fluid level brake pad wear and rotor condition Also check lever free play frequently Pull the brake lever lightly until you feel tension then check the lever free play 10 20mm Rear Bra...

Страница 22: ...l sight glass at base of lever to determine brake fluid level Fluid should be above the bottom half of the sight glass Add brake fluid if necessary Brake Fluid specification DOT4 Rear Brake Disc and Pads Inspect the brake disc for wear glazing and or warping Inspect the brake pads to ensure the pad thickness is not beyond the wear limit Brake Pad Wear Limit 2mm If the brake pad wears entirely befo...

Страница 23: ...nsure proper free play Lubricate throttle cable tube and cable ends to ensure ease of operation Throttle Adjustment Slide the protective rubber cover 1 to expose the throttle adjustment screw Loosen the lock nut 2 on the throttle cable Turn the adjustment screw 3 until the throttle free play is within the proper range of movement Measure throttle free play again by opening the grip slightly until ...

Страница 24: ... severely damage your engine and void any warranty All JASO rated oils will display the JASO oil classification on the bottle within an outlined border like the example above Many oils claim to meet or exceed JASO ratings but are not verified to meet these standards If an oil does not have a 10 character oil code and the JASO rating prominently displayed on the label then the oil has not been veri...

Страница 25: ...ire groove This is the Tread Wear Indicator Replace tire when tread wear indicators come in contact with the road surface Inspect the tire for foreign material such as nails screws glass or other objects that may have become lodged in the tire Visit a Royal Alloy dealer for tire replacement if necessary Tire Pressure Perform tire pressure checks while the tires are cold Remove the valve stem caps ...

Страница 26: ...surethe mountingboltssecurelyfastenthestandstotheframeand both standsarenotloose Checkspringtensiontoensurestandswillremaininstowed position when riding Assembly Check all assemblies to ensure they are fastened tightly This includes both a visual and physical inspection Visually inspect the engine fork assembly rear shock absorber wheel assemblies handlebar and other critical components Apply pres...

Страница 27: ...visible to other drivers reducing the possibility of an accident Check the front and rear turn signal indicators head light tail light brake light speedometer backlighting and all indicator lights to assure they are in proper working order Make sure all lenses are clean of dirt and debris Switches Check the function of all switches for lighting signals horn etc Repair as necessary Loading Load you...

Страница 28: ... With the throttle completely closed pull in either brake lever simultaneously push and hold the start button Once the engine starts release the start button Do not press and hold start button for more than 5 seconds at a time as this can damage the start system If the vehicle has difficulty starting after pressing the start button for 5 seconds release the start button Wait 10 seconds between att...

Страница 29: ...hrottle Cool down the engine for 10 minutes after every 30 minutes of operation Do not operate at a constant speed change your speed regularly 100 300miles Avoid opening the throttle beyond 1 2 throttle for extended periods of time Do not open throttle beyond 3 4 throttle 300 500miles Avoid opening the throttle beyond 3 4 throttle Over 500 miles Avoid long periods of wide open throttle operation E...

Страница 30: ...ty recommendations on pages 4 6 Use the throttle for controlling the general speed of your vehicle Use the brakes for slowing and stopping your vehicle Use the handlebars to control the direction of the vehicle Rider inputs will determine the behavior of the vehicle Make sure you consider the weather riding surface traffic and all other circumstances that may alter the amount of time it will take ...

Страница 31: ...braking Braking You should always be prepared to use your brakes Unexpected behavior of fellow motorists road debris animals and other obstacles can arise without notice Becoming familiar with and actively covering your brakes while riding can drastically reduce braking distances and improve safety Applying the brakes 1 Release the throttle 2 Gradually pull the brake lever s toward the handlebar t...

Страница 32: ...on under all normal vehicle operation Use the kill switch for emergency engine stops Parking Parkyourvehiclewiththeexhaustfacingawayfromany pedestrian traffic Placevehicleonthecenterstandwheneverpossible forthe moststability Ifpossible parkinfrontoflargervehiclessotheycanvisibly see your parked vehicle Considerthefirmnessoftheparkingsurfaceandany inclinethatmaycauseyourvehicletofallover ...

Страница 33: ...s will result in damage to the engine and other critical vehicle components If you are not technically skilled enough to perform any specific maintenance task you should have the maintenance completed by an authorized Royal Alloy dealer Items marked with a symbol are recommended to be completed by an authorized Royal Alloy dealer Periodic Maintenance Table The following two pages contain a periodi...

Страница 34: ... 48000 km 33 500 miles 54000 km 37 300 miles 60000 km Torque driver pins L L L L L Safety fasteners I I I I I I Plastic sliders in variator cover I R I R I R I R I R Clutch bell C C C C C C C C C C Variator rollers I R I R I R I R I R Driving belt I R I R I R I R I R Variator front movable half pulley I I I I I Air filter C C C C C C C C C C Transmission cover air duct filter I I I I I Engine oil ...

Страница 35: ...00 miles 30000 km 22 300 miles 36000 km 26 000 miles 42000 km 29 800 miles 48000 km 33 500 miles 54000 km 37 300 miles 60000 km Brake fluid I I I I I I Coolant level I I I I I I Headlight aiming adjustment A A A A A Spark plug R R R R R Vehicle road test I I I I I I Throttle control A A A A A A Radiator I C I C I C I C I C I C I C I C I C I C I C Wheels tyres I I I I I I I I I I I Suspension I I I...

Страница 36: ...rque specification 3 Fill with SAE 80W 90 GL 5 Use fill cap level indicator to measure oil level 4 Reinsert fill screw 1 and tighten to torque specification 5 Inspect for leaks on the shaft seals inside the transmission and on the output shaft near the rear wheel If there is a leak you will notice a build up of oil and dirt Resolve any leak immediately to prevent damage to the gearbox Transmission...

Страница 37: ...nce Standard spark plug NGK CR8EK Inspectthesparkplugelectrode Replaceifyousee damageorextremeweartotheelectrode Brake Check Actuate each brake for inspection Observe the grooves in the pads If the groove is gone or nearly gone your brakepadsneedtobereplaced 1 Visually determine if the brake pads are worn to the bottom of the groove or measure the pad thickness If pad thickness is less than 2mm re...

Страница 38: ...efluidimmediatelywith cleanwater Brakefluidwillerodepainted surfaces and or plastic 4 Ifanyproblemsarenoticedwiththefluidcolor volume leakingoranyotherproblemwiththe brake system have your Royal Alloy dealer inspect immediately Suspension Suspension is very important in vehicle stability Malfunctioning suspension can cause your vehicle to behaveinanunpredictablemanner Checkregularly 1 Checktheinne...

Страница 39: ...unction Ifthe new fuse burns immediately contact your authorized Royal Alloy dealer for service Battery Maintenance Atrickle maintenancechargerishighlyrecommendedifyou donotuseyourvehicle daily The batterywill depleteover timeifthevehicleisnotrunonaregularbasis Your Royal Alloy dealer can recommend and install an appropriate charging device Youwillbeunabletostartthevehiclewithyourelectricstart but...

Страница 40: ...ressure and turn them over every couple of weeks This helps prevent flat spots from forming 4 Prevent rusting in the cylinder by removing the spark plug and pouring a tablespoon of clean engine oil into the cylinder Cover the spark plug hole with a piece of cloth and crank the engine several times to distribute the oil Reinstall the spark plug back into the cylinder Use a clean cloth and avoid any...

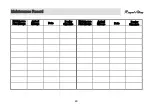
Страница 41: ...Maintenance Record 40 Maintenance Plan Mileage Actual Mileage Date Dealer Signature Maintenance Plan Mileage Actual Mileage Date Dealer Signature ...

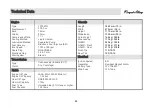
Страница 42: ...ction EFI GAWR Front 123 kg 271 lb Idle Speed 1700 100 rpm GAWR Rear 217 kg 478 lb Spark Plug NGK CR8EK Front Tire 110 70 12 Electrode Gap 0 6 0 7 mm Rear Tire 120 70 12 Start System Electric Electrical Transmission Type Clutch Continuously Variable CVT Dry Centrifugal Ignition System EFI Generator Flywheel Magnet Stator Battery Type 12V 7Ah MF Fluids Engine Oil Type Engine Oil Capacity Gear Oil T...

Страница 43: ...reet SW Washington DC 20590 You can also obtain other information about motor vehicle safety from http www safercar gov WARRANTYINFORMATION Your vehicle is covered by a manufacturer s Limited Warranty an EPA Emissions Control System Warranty and In California a California Emissions Control System Warranty Detailed warranty information can be found in your warranty booklet supplied separately from ...

Страница 44: ......

Отзывы: