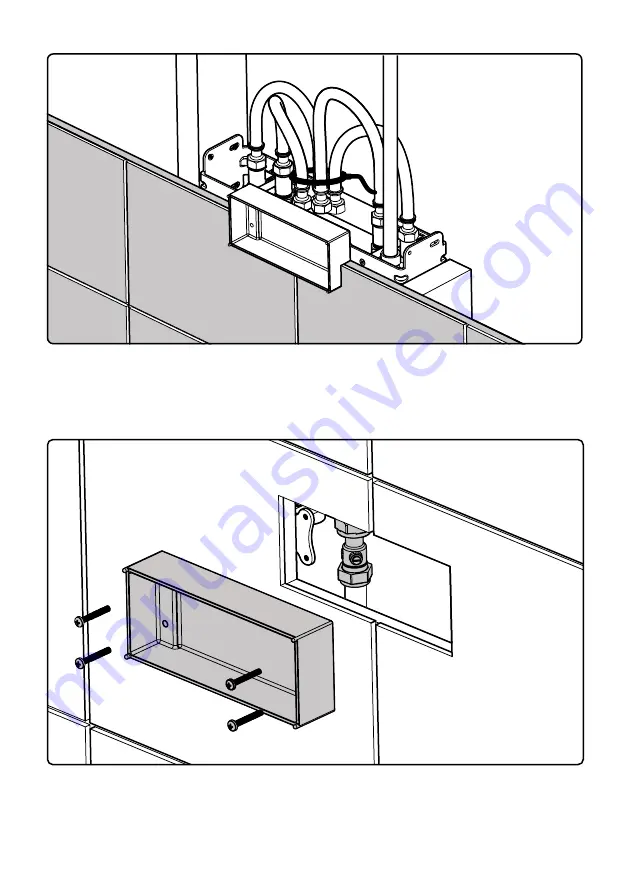
9. Once a hole has been cut in the plasterboard, secure it to the stud. The tile guide should pass
through the hole in the plasterboard. Tile up to the edges of the tile guide to ensure the correct size
access hole. Failure to do so may mean the cover plate does not form a water-tight seal in later
installation stages.
10. Remove the tiling guide, allowing access to the pipework behind the tiled wall. Keep these screws
safe as they will be used to mount the valve. From this position the isolation valves should be visible
and accessible through the access hole.
Figure 8
Figure 9


