


1. Getting Started
29
Filling Ink
Installing ink cartridges for the first time after purchase requires two SOL INK cleaning cartridges.
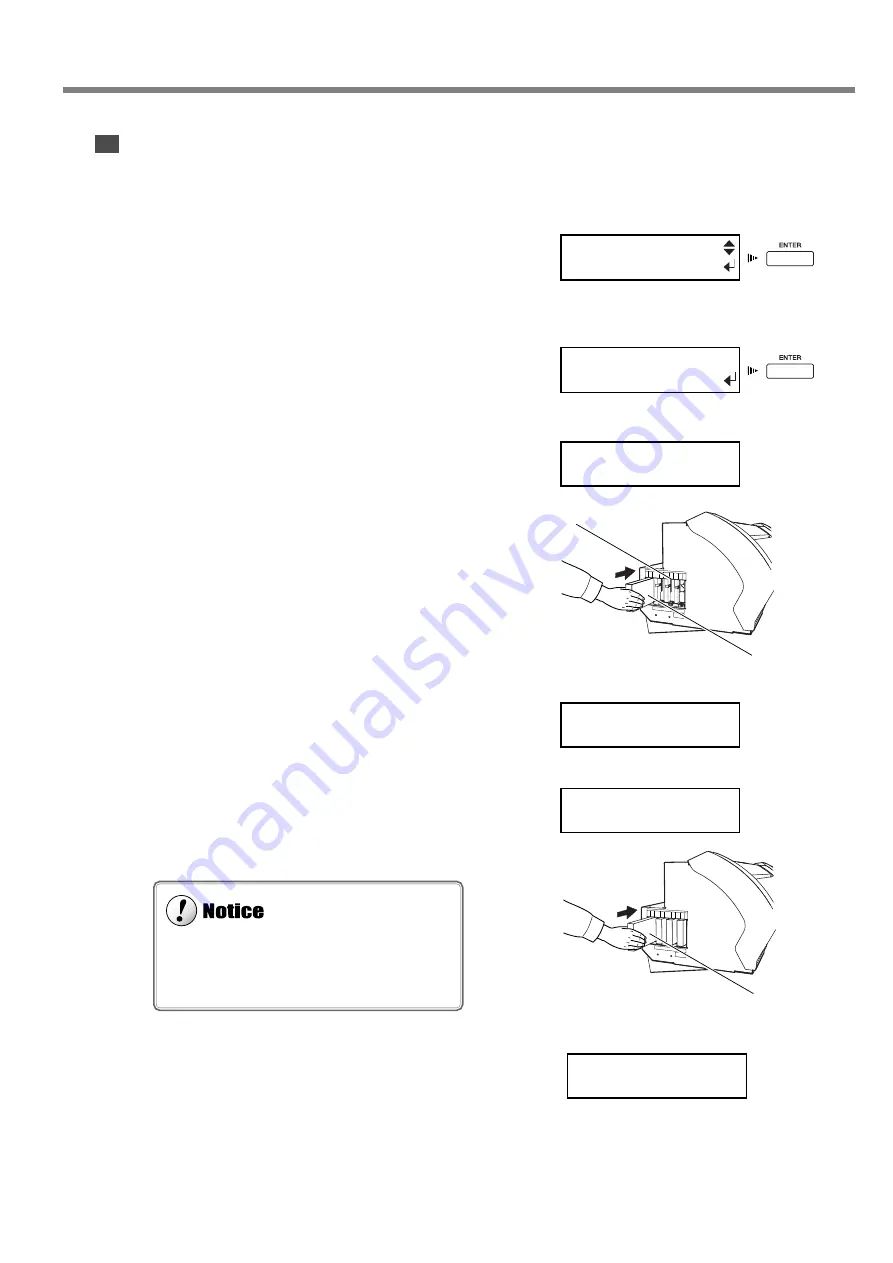
1
After check the settings for the voltage switches,
the screen shown in the figure appears. After
check it, then press the [ENTER] key.
2
The following screen appears. Make sure the
drain bottle is installed at the bottom of the
machine, then press the [ENTER] key.
3
Insert the SOL INK cleaning cartridges into the
ink-cartridge ports shown by flashing on the dis-
play. Insert the two cartridges firmly, as far as
they will go.
Cleaning starts. Cleaning may take some time. The car-
tridges are inserted and removed while the operation is
in progress. Follow the messages on the display to carry
out the procedure.
4
When cleaning ends, the following screen ap-
pears. Remove the cleaning cartridges.
5
Gentry shake the ECO-SOL INK cartridges for
each of the colors and firmly insert them as far
as they will go.
Ink filling starts.
6
When ink filling ends, the following screen ap-
pears.
1-3 Assembling and Installing
SELECT INK TYPE
ECO-SOL 4COLOR
INSERT
DRAIN BOTTLE
SET SOL CL-LIQUID
1 2
REMOVE SOL CL
3 4
SET SOL CRT.
1 2 3 4
Ink cartridge ports
SOL INK cleaning cartridge
ECO-SOL INK cartridge
Gently shake,
then insert.
When cutting is performed after printing, the cap
tip of the blade holder may scratch the printed sur-
face. If this is the case, increase the amount of blade
extension.
SETUP SHEET
Содержание SP-300
Страница 48: ...46 2 Basic Operation MEMO ...
Страница 58: ...56 3 Performing Output MEMO ...
Страница 93: ...91 6 About the Menus This chapter provides detailed item about the operation menus ...
Страница 109: ...107 8 Appendix ...
Страница 115: ...R3 031201 ...


