background image


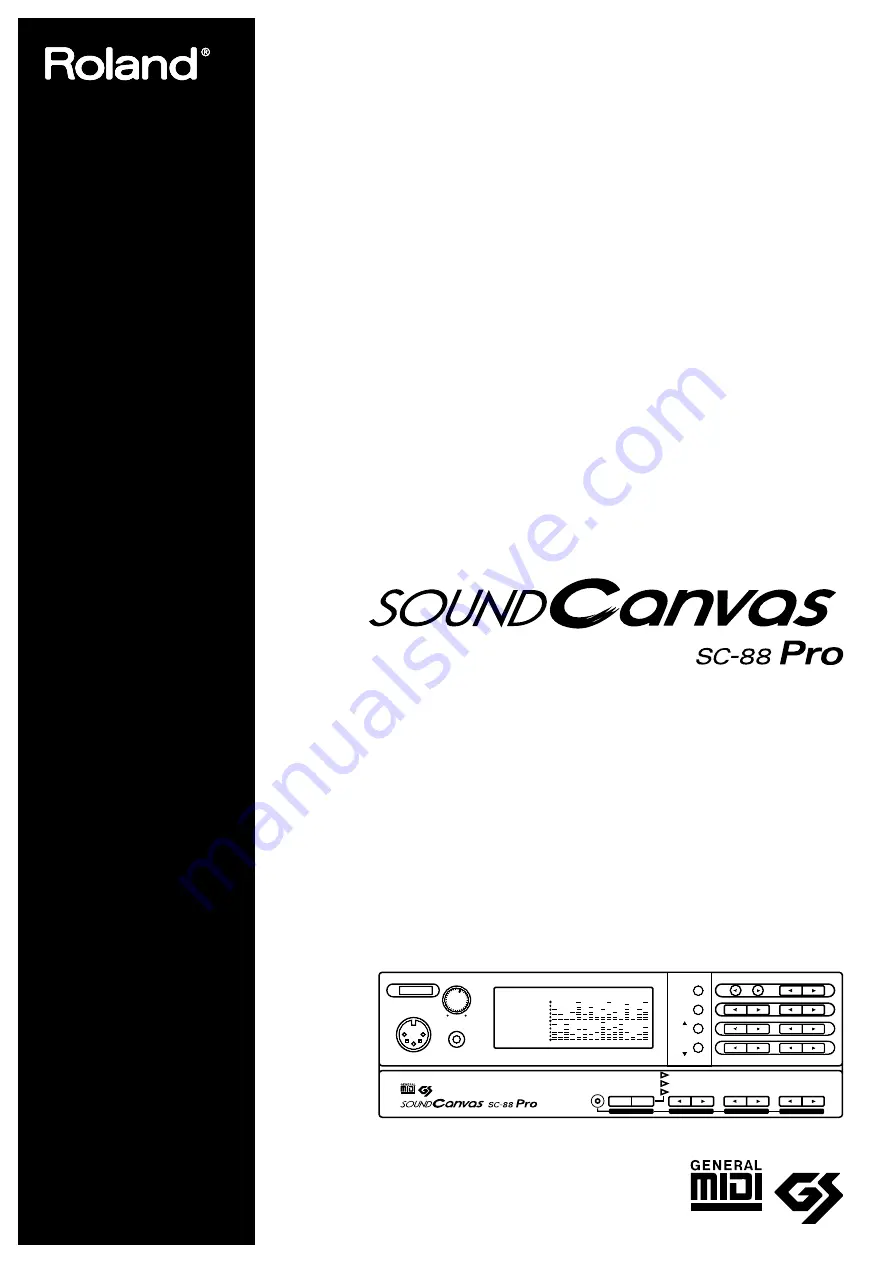
MIDI SOUND GENERATOR 

OWNER'S MANUAL

MIDI IN B

POWER

VOLUME

PHONES

INSTRUMENT

PART

LEVEL

PAN

REVERB

CHORUS

KEY SHIFT

MIDI CH

SELECT

EFX

EFX

ON/OFF

ON/OFF

USER

INST

VIB RATE

ATTACK

VIB DEPTH

CUTOFF 

DECAY

VIB DELAY

RESONANCE

RELEASE

DELAY

PREVIEW (PUSH)

EFX V

EFX VALUE

ALUE

EFX P

EFX PARAM

ARAM

EFX 

EFX TYPE

TYPE

ALL

MUTE

SC-55

MAP

SC-88

MAP

PART

INSTRUMENT

PART

REVERB

CHORUS

LEVEL

PAN

MIDI CH

K SHIFT

DELAY

ALL

 64

127

± 0

 64

  0

A--

- SOUND Canvas -

1   2   3   4   5   6   7   8   9  10 11 12 13 14 15 16

Содержание SoundCanvas SC-88 Pro

Страница 1: ...ON OFF ON OFF USER INST VIB RATE ATTACK VIB DEPTH CUTOFF DECAY VIB DELAY RESONANCE RELEASE DELAY PREVIEW PUSH EFX V EFX VALUE ALUE EFX P EFX PARAM ARAM EFX EFX TYPE TYPE ALL MUTE SC 55 MAP SC 88 MAP...

Страница 2: ...y only of the type described in the operating instructions or as marked on the product 1 2 3 4 5 6 7 8 9 10 11 A B C D E The power supply cord of the product should be unplugged from the outlet when l...

Страница 3: ...plugging into or unplugging from an outlet Before moving the unit disconnect the power plug from the outlet and pull out all cords from external devices Before cleaning the unit turn off the power and...

Страница 4: ...buttons p 11 31 Audio input jacks with input level adjustment allow you to connect another sound source and output it from the audio output jacks mixed with this unit s own sound Two sets of audio ou...

Страница 5: ...e have the battery replaced with a fresh one as soon as possible to avoid the loss of all data in memory To have the battery replaced consult with your dealer or qualified Roland service personnel Bat...

Страница 6: ...om the menu 26 What each parameter does 27 Part parameters for sound editing 31 Procedure 31 What each parameter does 32 Setting parameters common to all Parts 34 Procedure 34 How each parameter works...

Страница 7: ...computer connector 120 Connections with MIDI connectors 122 MIDI data transfer with the computer 123 Connecting another MIDI sound source to the unit 125 Using MIDI messages to select sounds 126 Using...

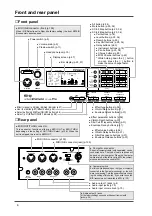
Страница 8: ...red indicator p 97 User Inst button p 97 Effect button p 56 Select button p 56 Effect ON OFF button p 56 Select p 31 Effect ON OFF indicator p 56 Effect type buttons p 56 Vibrato Rate buttons p 31 Env...

Страница 9: ...Chapter 1 Try out the unit Quick start Chapter 1...

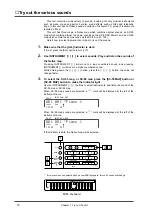
Страница 10: ...other devices always turn down the vol ume and turn off the power on all devices before making any connections Set the Computer select switch located on the back of this unit to MIDI At the factory se...

Страница 11: ...wer off check the following points Make sure that the volume of your amp speaker system and this unit is turned down 2 Turn off each device in the following order Audio devices this unit and MIDI devi...

Страница 12: ...tive map Pressing INSTRUMENT l will move to a lower numbered sound and pressing INSTRUMENT r will move to a higher numbered sound While holding down the r l button press the l r button the value will...

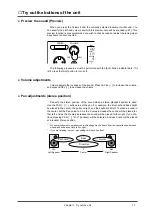
Страница 13: ...sition of the sound when a stereo playback system is used Use the PAN l r buttons to set the pan For example the drum set and bass might be placed in the center the guitar at right and the keyboard at...

Страница 14: ...tting will be displayed and when you press the KEY SHIFT buttons the key shift setting will be dis played If the display indicates a plus or minus value the key shift setting is being dis played p 13...

Страница 15: ...the chorus depth and pressing CHORUS r increases the chorus depth Adjust the amount of delay Delay is an effect that delays the sound to create echoes Also you can add a short delay to the original so...

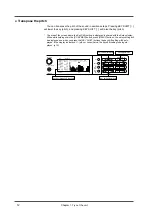
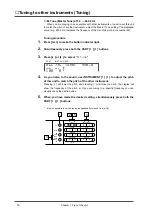
Страница 16: ...As you listen to the sound use INSTRUMENT l l l l r r r r to adjust the pitch of this unit to match the pitch of the other instrument Pressing l will lower the pitch and pressing r will raise the pit...

Страница 17: ...t jacks of other MIDI sound sources to these jacks The audio signal that is input here will be mixed with this unit s sound and output from the audio output1 jacks If the signal input to this unit is...

Страница 18: ...Chapter 1 Try out the unit 16...

Страница 19: ...Chapter 2 Parts and parameters Chapter 2...

Страница 20: ...h contains original sounds an SC 55 map which contains almost the same sounds as the SC 55 SC 55mkII and an SC 88 map which contain the same sounds as the SC 88 p 21 154 Here s how to select instrumen...

Страница 21: ...ll be displayed in front of that Instrument name To select Part sounds or Drum Sets from another MIDI device refer to p 126 Some of the sounds in this unit cannot be played above or below a certain pi...

Страница 22: ...buttons You will return to normal mode the Instrument number is displayed In this condition pressing INSTRUMENT l or r will change the instrument number Some Variation numbers are not consecutive If...

Страница 23: ...ment number is displayed Variation number is displayed PART INSTRUMENT A01 100 0 LEVEL PAN 001 Piano 1 SC 88 sounds Hard FM EP Harpsi o Piano 1d St FM EP Harpsi w Lasergun Piano 1w Detuned EP 2 Couple...

Страница 24: ...nged Be careful 2 Use the PART l l l l r r r r buttons to select the Part whose channel you wish to change When you press the PART l r buttons the Part number will change as A01 A16 B01 B16 If you sel...

Страница 25: ...B B05 with the factory settings Be aware that the way in which the data is sent from the two MIDI IN jacks to the various Parts will depend on the setting of the System parameter Receive Connection In...

Страница 26: ...es legato enabled sounds that are ideally suited to legato playing and which can realistically simulate this instrumental performance technique To understand this feature consider how most string inst...

Страница 27: ...dicator is dark If it is lit press the ALL button to turn it off If you wish to change the volume for example of all Parts simultaneously press the ALL but ton to make the indicator light and continue...

Страница 28: ...LFO Rate CAf LFO Pch Channel Aftertouch LFO Pitch CAf LFO TVF Channel Aftertouch LFO TVF CAf LFO TVA Channel Aftertouch LFO TVA CC1 Range CC1 Range CC1 Cutoff CC1 Cutoff CC1 Amp CC1 Amplitude CC1 LFO...

Страница 29: ...button is pressed to turn on the indicator the sound of the currently selected Part will change to be almost the same as the SC 55 55mk II At this time will be displayed in front of that Instrument n...

Страница 30: ...a Strongly played notes will have a higher velocity value The Velo Depth and Velo Offset parameters determine the relation between the force of your keyboard playing and the loudness of the sound that...

Страница 31: ...OUT 1 The sound from OUTPUT 2 is output at a fixed volume unaffected by the position of the volume knob S Tune C B Scale Tuning C B 64 63 Scale Tuning is a parameter which makes fine adjust ments to...

Страница 32: ...change With a setting of 0 there will be no pitch change For some sounds the pitch may not rise as high as specified by the Range setting Cutoff Cutoff frequency 64 63 These parameters specify how th...

Страница 33: ...3 Press the SELECT button to select the parameter vibrato filter enve lope you wish to edit and use the corresponding set of l l l l r r r r buttons to modify the value 4 Simultaneously pressing both...

Страница 34: ...lue Chapter 2 Parts and paramters 32 Vibrato Rate 64 63 This parameter adjusts the speed frequency of the pitch modulation Positive settings make the pitch modulation faster and negative settings make...

Страница 35: ...pet is played lightly and softly the attack will be softer In order to adjust the attack of a sound we can modify the Attack Time of the enve lope By modifying the values of the envelope we can simula...

Страница 36: ...to make settings independently for each Part press the ALL button to turn off the indicator and use the following procedure p 25 2 Use the front panel parameter buttons to make settings 3 With the LEV...

Страница 37: ...l Parts the pitch of the Drum Part will not be affected MUTE All Mute On Off If you press the MUTE button to turn the indicator on All Mute will be on and the sound of all Parts will be muted Mute can...

Страница 38: ...UT Mode System Output Mode Assign Lock Output Assign Lock P Load Init Patch Load Initialize switch Procedure 1 Simultaneously press u u u u and d d d d 2 Press either u u u u or d d d d to select the...

Страница 39: ...he peak level indi cator will move downward if the Display parameter explained above is set to Type 3 4 7 or 8 Off The peak level will not be held Type1 After holding the peak level the peak level dot...

Страница 40: ...n if System Mode Set messages are received If Rx Sys Mode is turned On the mode will change p 137 Sys OUTMode System Output Mode Sel Fix This determines whether the OUT Asgn Output Assign setting p 29...

Страница 41: ...ll be fixed for Part A01 and Part A02 By playing song data on the Part Group B while you play the Part Group A Patches from a keyboard etc you can enjoy solo playing while adding unique effects Some s...

Страница 42: ...nge the Patch Be aware that with the factory settings the settings of Part A03 and following will be initialized when you load a Patch If you do not want the settings of Part A03 and following to be i...

Страница 43: ...the MIDI channel For example suppose that the MIDI channels of the Patch and Part were set to the same value In this case an incoming program change on channel 1 C0H 01H will select Patch 02 MILD OD...

Страница 44: ...lay send level Assign group Drum Sets you create can be stored in internal memory p 102 Settings between the Normal Part and the Drum Part are made in Part mode p 27 Drum editing procedure 1 Make sure...

Страница 45: ...ld of the display LEVEL l r set the volume of each instrument PAN l r set the pan of each instrument REVERB l r set the reverb send level of each instrument CHORUS l r set the chorus send level of eac...

Страница 46: ...IDI message is received to play another instrument in the same Assign Group the first instrument will be turned off first This is a useful way to prevent two instruments from sounding simultaneously t...

Страница 47: ...Chapter 3 System Effects Chapter 3...

Страница 48: ...s the type of effect that modifies the sound itself and is able to give it a completely different character You can specify for each Part whether or not it will pass through the effect Since only one...

Страница 49: ...f Equalizer On Off Level Part group A Part A1 A16 Part group B Part B1 B16 OUTPUT L R Reverb Level Chorus Level Reverb Send Level Chorus Send Level Reverb Send Level Chorus Send Level Double Module Mo...

Страница 50: ...band equalizer high range low range An equalizer lets you boost or cut specified frequency ranges of a sound to adjust the tone For each range high and low you can specify the frequency and the amoun...

Страница 51: ...y the amount of boost or cut gain for the high frequency range high and the low frequency range low Positive settings will boost and negative settings will cut With a Gain setting of 0 the equalizer w...

Страница 52: ...L indicator is dark If it is lit press the ALL button to turn it off 2 Use the PART l l l l r r r r buttons to select the Part you wish to modify 3 Press the button of the effect you wish to adjust RE...

Страница 53: ...arameters 4 Use INSTRUMENT l l l l r r r r to set the value 5 When you finish making settings simultaneously press both PART l l l l r r r r buttons to end the procedure Delay cannot be used when Doub...

Страница 54: ...in a more mellow reverberation Rev Level Reverb Level 0 127 This parameter sets the amount of the reverberant sound Higher values result in louder reverberation Rev Time Reverb Time 0 127 This parame...

Страница 55: ...arameter sets the amount of the chorus sound Higher values will cause the chorus sound to be loud er ChoFeedback Chorus Feedback Level 0 127 This parameter sets the level at which the chorus sound is...

Страница 56: ...Dly Time C Delay Time Center 0 1ms 1 0s The delay effect of this unit allows you to set three delay times center left and right when listening in stereo Delay Time Center sets the delay time of the d...

Страница 57: ...Chapter 4 Insertion Effects Chapter 4...

Страница 58: ...arameters will be initialized If you wish to save your parameter values it is convenient to use a User Effect p 99 It takes awhile until the sound can be heard after you change the Patch If a monaural...

Страница 59: ...2 0 Thru 00H 00H No Effect will be applied When a GM System On or GS Reset messages p 133 is received 0 Thru will be selected for Insertion Effect Effects that modify the tone color filter type 1 Ster...

Страница 60: ...ain 12 12 17 Adjust the gain of the low frequency range Hi Gain 12 12 18 Adjust the gain of the high frequency range Level Output level 0 127 20 Adjust the output level 4 Humanizer 01H 03H This adds a...

Страница 61: ...producing a twisting modulation that creates spaciousness and depth Manual 100 8 0k 1 Adjust the basic frequency from which the sound will be modulated Rate 0 05 10 0 2 Adjust the frequency period of...

Страница 62: ...rotor Low Accl Low frequency acceleration 0 15 3 Adjust the time it takes for the low frequency rotor to reach the newly selected speed when switching from fast to slow or slow to fast speed Lower val...

Страница 63: ...nd begins until the processed sound is heard Rate 0 05 10 0 2 Adjust the rate of modulation Depth 0 127 3 Adjust the depth of modulation Feedback Feedback level 98 98 4 Adjust the amount of the proces...

Страница 64: ...t sound Sustain 0 127 2 Adjust the time over which low level sounds are boosted until they reach the specified volume Increasing the value will shorten the time When the value is modified the level wi...

Страница 65: ...ound values of 100 Low Gain 12 12 17 Adjust the low frequency gain Hi Gain High gain 12 12 18 Adjust the high frequency gain Level Output level 0 127 20 Adjust the output level 17 Tremolo Chorus 01H 4...

Страница 66: ...und D or E on the display respectively means D direct sound or E effect sound values of 100 Low Gain 12 12 17 Adjust the gain of the low frequency range Hi Gain High gain 12 12 18 Adjust the gain of t...

Страница 67: ...tively means D direct sound or E effect sound values of 100 Low Gain 12 12 17 Adjust the gain of the low frequency range Hi Gain High gain 12 12 18 Adjust the gain of the high frequency range Level Ou...

Страница 68: ...0 127 7 Adjust the volume of right delay sound HF Damp 315 8k Bypass 8 This adjusts the frequency at which the high range is cut when the Center Delay sound is returned to the input If you do not wis...

Страница 69: ...will be cut If you do not wish to cut the high frequencies of the feedback set this parameter to Bypass EFX Pan Effect output pan L63 0 R63 5 Adjust the stereo location of the processed sound L63 is f...

Страница 70: ...r delay sound begins Dly Tm L Delay Time Left 0m 500m 2 Adjust the time from the original sound until when the left delay sound begins Dly Tm R Delay Time Right 0m 500m 3 Adjust the time from the orig...

Страница 71: ...just the volume balance between the direct and the processed sound D or E on the display respectively means D direct sound or E effect sound values of 100 Low Gain 12 12 17 Adjust the gain of the low...

Страница 72: ...e sound quality Pre Filter Pre Filter Type 1 6 1 Specify the type of filter that will be applied before the sound passes through the Lo Fi effect Lo Fi Type 1 9 2 Degrade the sound quality The sound q...

Страница 73: ...w frequency range Hi Gain High gain 12 12 18 Adjust the gain of the high frequency range Pan Mono Output Pan Mono L63 0 R63 19 When Mono mode is used adjust the stereo loca tion of the output sound L6...

Страница 74: ...t the low frequency gain Hi Gain High gain 12 12 18 Adjust the high frequency gain Level Output level 0 127 20 Adjust the output level 37 OD Delay Overdrive Delay 02H 02H This effect connects an overd...

Страница 75: ...f D 0 E the distortion sound which passes through the chorus will be output D or E on the display respectively means D direct sound or E effect sound values of 100 Low Gain 12 12 17 Adjust the low fre...

Страница 76: ...you do not wish to cut the high frequencies of the feedback set this parameter to Bypass Dly Bal Delay balance D 0E D 0 E 10 Adjust the volume balance between the sound which passes through the delay...

Страница 77: ...nnects an enhancer and a delay in series EH Sens Enhancer Sensitivity 0 127 1 Adjust the sensitivity of the enhancer EH Mix Enhancer Mix level 0 127 2 Adjust the ratio with which the overtones generat...

Страница 78: ...ns until the flanger sound is heard FL Rate Flanger rate 0 05 10 0 2 Adjust the modulation speed of the flanger effect FL Depth Flanger depth 0 127 3 Adjust the modulation depth of the flanger effect...

Страница 79: ...tput level 0 127 20 Adjust the output level Effects that connect three or more types of effect in series series 3 series 4 series 5 47 Rotary Multi 03H 00H This connects Overdrive OD 3 band equalizer...

Страница 80: ...el will also change Cmp Level Compressor Level 0 127 3 Adjust the volume of the compressor sound Cmp Sw Compressor Switch Off On 4 Turn the compressor on off OD Overdrive Distortion OD Sel OD Select O...

Страница 81: ...center frequency for the equalizer mid range EQ M Q EQ Mid Q 0 5 1 0 2 0 4 0 9 0 12 Adjust the width of the area centered at the EQ M Fq setting in which the gain will be affected The area affected wi...

Страница 82: ...t Negative values will invert the phase In the case of Chorus this will have no effect CF Mix 0 127 16 Adjust the volume of the chorus or flanger sound Dly Delay Dly Time Delay Time 0m 635m 17 Adjust...

Страница 83: ...Auto wah AW Filter Auto wah Filter Type LPF BPF 1 Select the type of filter for the auto wah LPF The wah effect will be produced over a broad frequency range BPF The wah effect will be produced over...

Страница 84: ...ion OD Sel ODSelect Odrv Dist 5 Select either bass guitar Overdrive or Distortion OD Drive OD Drive 0 127 6 Adjust the depth of distortion The volume will change together with the depth of distortion...

Страница 85: ...il when the chorus or flanger sound is heard CF Rate 0 05 6 40 11 Adjust the modulation speed CF Depth 0 127 12 Adjust the modulation depth CF Fb CF Feedback Level 98 98 13 Adjust the amount of the fl...

Страница 86: ...center frequency at which the phaser sound will be modulated PH Rate Phaser Rate 0 05 6 40 13 Adjust the modulation speed of the phaser PH Depth Phaser Depth 0 127 14 Adjust the modulation depth of t...

Страница 87: ...R63 is far right Dly Level Delay level 0 127 19 Adjust the volume of the delay sound Level Output level 0 127 20 Adjust the output level 57 FL Delay Flanger Delay 11H 01H This effect connects a flang...

Страница 88: ...until the flanger sound is heard FL Rate Flanger rate 0 05 10 0 7 Adjust the modulation speed of the flanger effect FL Depth Flanger depth 0 127 8 Adjust the modulation depth of the flanger effect FL...

Страница 89: ...ortion OD Sel OD Select Odrv Dist 1 Select either Overdrive or Distortion OD Drive OD Drive 0 127 2 Adjust the depth of overdrive or distortion The vol ume will change together with the depth of disto...

Страница 90: ...elect Odrv Dist 1 Select either Overdrive or Distortion OD Drive OD Drive 0 127 2 Adjust the depth of distortion The volume will change together with the depth of distortion OD Amp OD Amp Simulator Ty...

Страница 91: ...duce a wah effect in a narrower area around the center frequency AW Rate Auto wah Rate 0 05 10 0 10 Adjust the modulation speed of the auto wah AW Depth Auto wah Depth 0 127 11 Adjust the modulation d...

Страница 92: ...o the speci fied speeds RT L Slow parameter RT H Slow parameter values Fast Speed up the rotation to the specified speeds RT L Fast parameter RT H Fast parameter values RT Pan RT Output Pan L63 0 R63...

Страница 93: ...the auto wah sound L63 is far left 0 is center and R63 is far right AW Level Auto wah Level 0 127 19 Adjust the volume of the auto wah sound Level Output level 0 127 20 Adjust the output level When u...

Страница 94: ...e val ues in realtime EFX C Src1 2 Effect Control Source 1 2 EFX C Dep1 2 Effect Control Depth 1 2 Setting procedure 1 Press ALL to make the button indicator light 2 Simultaneously press PART l l l l...

Страница 95: ...ontrollers Here are some examples of how effect controllers can be used In these examples MIDI messages are used to modify the settings but these settings can also be controlled from the front panel p...

Страница 96: ...Depth 2 address 40H 03H 1EH to 100 7FH F0 41 10 42 12 40 03 1E 7F 20 F7 Modifying the value The Feedback parameter changes in 2 steps with 40H as the center For the correspondence between hexa decima...

Страница 97: ...Chapter 5 Convenient functions Chapter 5...

Страница 98: ...User Instrument parameter settings For example if the Vibrato Rate is set to 20 by the Part parameters and to 5 by the User Instrument para meters the vibrato rate of the sound that is actually heard...

Страница 99: ...parameters p 31 4 Press the SELECT button and select the parameter you wish to modify Use the appropriate parameter edit buttons l l l l r r r r to modify the value For an explanation of parameters an...

Страница 100: ...t to save and restore User Instrument data PART INSTRUMENT A16 100 0 LEVEL PAN Write UI 64 032 Variation number in which to store Instrument number in which to store INSTRUMENT PART LEVEL PAN REVERB C...

Страница 101: ...ite U EFX 01 Use INSTRUMENT l r to select the number 01 to 64 where you wish to store the data 4 To store the data press ALL To cancel without storing press MUTE 5 Press EFX to turn off the indicator...

Страница 102: ...PART l l l l r r r r to move the selected character location The blinking area will move 5 Press INSTRUMENT l l l l r r r r and the displayed character will change Select the desired character and ret...

Страница 103: ...User Patch that was stored use the following procedure 1 Press the ALL button to make the indicator light 2 Press INSTRUMENT r to select 128 EPILOGUE 3 Once again press INSTRUMENT r and the User Patch...

Страница 104: ...to move the cursor where you wish to input a character The blinking area will move 4 Use INSTRUMENT l l l l r r r r to select the desired character Then repeat from step 3 Each time you press ALL the...

Страница 105: ...t the ALL indicator is dark If it is lit press ALL to turn it off 3 Simultaneously press SELECT and EFX TYPE l l l l The display will show the Part Group p 23 Part Mode p 27 Drum Set number Note name...

Страница 106: ...fy the Note Name and the User Drum Set number 65 66 into which the data will be stored When you simultaneously press the INSTRUMENT l r buttons the cursor will move between the Note Name and the Drum...

Страница 107: ...mber 65 66 into which the data will be stored 5 To store the data press ALL To quit without storing press MUTE PART INSTRUMENT AD1 100 0 LEVEL PAN Write U DRUM 65 The User Drum set number into which t...

Страница 108: ...2 Use INSTRUMENT l r to select the copy destination Part B Initialize While pressing SELECT press LEVEL r The display will ask Clear A01 C Exchange While pressing SELECT press PAN l The display will a...

Страница 109: ...ay will ask Dump ALL Sure and the data is now ready to be transmitted 5 Use INSTRUMENT l l l l r r r r to select the type of data you wish to transmit All all parameters of this unit Including User pa...

Страница 110: ...the indicator 2 Simultaneously press the PART l l l l and r r r r buttons 3 Use u u u u d d d d to select the parameter you wish to transmit While holding SELECT you can press u d to jump parameters 4...

Страница 111: ...lect p 136 is set to THRU It is also possible to transfer data to a computer via the computer connector without using the MIDI connectors p 120 SELECT EFX ON OFF USER INST VIB RATE ATTACK VIB DEPTH CU...

Страница 112: ...MUTE turn the dot off dark CHORUS l r shrink dots expand dots LEVEL l r move the displayed picture down picture up PAN l r move the displayed picture left right INSTRUMENT l r to transmit the screen d...

Страница 113: ...characters appear in synchronization with the music When screen data is received as a MIDI Exclusive message the screen data in this unit will be overwritten and lost For this procedure you will need...

Страница 114: ...MAP and SC 55MAP but tons p 127 When compared with SC 88 the map structure in SC 88 compatibility mode differs only in that the SC 88 compatible map can be used and the structure is identical in all o...

Страница 115: ...it has three sound maps These can be accessed as follows Type of data Map for playback Map setting GM GS data Native map Default setting SC 55 map SC 55MAP ON SC 88 map SC 88MAP ON Data for SC 88 LSB0...

Страница 116: ...se the same sounds as the SC 55 55mk II press SC 55 MAP button 1 While holding down SELECT press INSTRUMENT l l l l The display will ask Init CM 64 Sure 2 Press ALL and the CM 64 sound map will be sel...

Страница 117: ...e CM 64 so they differ from what they are called on this unit Settings for all Parts LEVEL PAN REVERB CHORUS KEY SHIFT 127 0 64 64 0 Differences between the CM 64 and the unit When the CM 64 sound map...

Страница 118: ...r A or B can be set independently for Part Groups A or B Use the PART l r buttons to move between groups A and B 3 To return to Single Module Mode while holding down the SELECT but ton press KEY SHIFT...

Страница 119: ...ble Module Mode two groups are provided for the following parameters Master Level p 35 Master Pan p 35 Master KEY SHIFT p 35 Master Tune p 14 Reverb Type p 52 Reverb Character p 52 Reverb Pre LPF Reve...

Страница 120: ...The beginning of song data carrying the GM GS logo contains data which requests the sound source to initialize itself General MIDI System On GS Reset p 133 This means that if you are playing back the...

Страница 121: ...Chapter 6 Using the unit with a personal computer Chapter 6...

Страница 122: ...er MPU etc If you use this unit s computer connector you can use a special cable to connect it directly with the computer but your software must be able to correspond to the serial port If you wish to...

Страница 123: ...pes of computer cable Macintosh series RSC 15APL IBM PC AT series RSC 15AT This is a 9 pin cable If you need a 25 pin cable refer to the wiring diagram on p 149 and purchase an appropriate cable 3 Con...

Страница 124: ...T IBM Apple Macintosh Macintosh IIci Modem Port MIDI interface adapter MIDI interface board Roland Super MPU AT OUT THRU IN B IN A MIDI Mac PC 1 PC 2 MIDI COMPUTER INPUT L R OUTPUT1 L R INPUT VOLUME T...

Страница 125: ...to be on Data received at MIDI IN B will not be sent to the computer connector but will be passed directly to the sound generator section The number of sound generator Parts that can be controlled us...

Страница 126: ...MIDI IN B Front MIDI IN B Rear MIDI IN A COMPUTER MIDI OUT THRU Part group A GM GS Sound generator Part A1 A16 Part group B GM GS Sound generator Part B1 B16 MIDI IN B Front MIDI IN B Rear MIDI IN A...

Страница 127: ...A will be transmitted just as it is from MIDI OUT THRU Data received at MIDI IN B will not be passed THRU even if THRU is selected Regardless of the Input Mode setting In mode p 137 data from MIDI IN...

Страница 128: ...ot change Refer to the instrument table on p 154 when selecting sounds When creating MIDI messages on a sequencer or personal computer and transmit ting them use the following procedure 1 The value of...

Страница 129: ...panel SC 55 MAP button is lit SC 55 map will be selected If the front panel SC 88 MAP button is lit SC 88 map will be selected If the button is dark Native map will be selected 01H SC 55 map will be...

Страница 130: ...esses 40 00 00 and 50 00 00 However it is also possible for this unit to receive exclusive data for all 32 Parts at a single MIDI IN In this case it is necessary to use address 50 00 00 For example th...

Страница 131: ...Chapter 7 Chapter 7 MIDI and the unit...

Страница 132: ...pecific data to be selected out of a large amount of data The con cept is similar to the idea of TV channels By chang ing the channel of a TV receiver you can view the programs of different stations B...

Страница 133: ...d the program change message for each Part will be ignored Control Change These messages control parameters such as mod ulation and pan The function of the message is determined by its Control Change...

Страница 134: ...previously played note RPN LSB MSB control change number 100 101 Data Entry control change number 6 38 Since the function of the RPN Registered Parameter Number is defined in the MIDI specifica tion...

Страница 135: ...rers most exclusive messages cannot be used between devices of different types or different manufactur ers In order to recognize the device for which the data is intended Roland exclusive messages con...

Страница 136: ...y different types of device to be connected but in some cases there will be types of message which cannot be conveyed meaningfully For example if you wish to use keyboard aftertouch to control the sou...

Страница 137: ...r r r r to set the value 4 When you have set the value simultaneously press u u u u and d d d d to end the procedure 5 Turn on the power again Except when you have selected Rx Sys Mode How each parame...

Страница 138: ...IDI MIDI IN B Front MIDI IN B Rear MIDI IN A COMPUTER MIDI OUT THRU Part group A GM GS Sound generator Part A1 A16 Part group B GM GS Sound generator Part B1 B16 MIDI IN B Front MIDI IN B Rear MIDI IN...

Страница 139: ...Group B Parts MIDI messages are not sent to Group A Parts so they will not sound A only When using the Roland Super MPU MIDI Processing Unit two MIDI OUTs some software will transmit the same data to...

Страница 140: ...Cross connect Merge A Merge B A only Part group A GM GS Sound generator Part A1 A16 Part group B GM GS Sound generator Part B1 B16 Part group A GM GS Sound generator Part A1 A16 Part group B GM GS Sou...

Страница 141: ...ons 3 Press either u u u u or d d d d to select the parameter you wish to set 4 Use the INSTRUMENT l l l l r r r r buttons to set the value 5 When you finish making settings simultaneously press both...

Страница 142: ...the equalizer settings will be restored to the factory settings initialized If EQ Lock is turned on this will not occur Rx GM On GM System On Receive Switch On Off Rx GS On GS Reset Receive Switch On...

Страница 143: ...via MIDI If Rx NRPN is on these sound parameters can be modified by MIDI messages If Rx NRPN is off this will not be possible When GM System On is received Bank Select Receive Switch and NRPN Receive...

Страница 144: ...combination The value for Controller No 99 is the NRPN MSB and that for Controller No 98 is the NRPN LSB So you would transmit these values Controller No 99 1 Controller No 98 32 The unit has thus be...

Страница 145: ...his case the data will be displayed as the first page of the 10 pages Frame Draw function p 110 The SC 88 Pro has a Frame Draw function This function allows you to create display data for each page us...

Страница 146: ...ler number 94 The Reverb Chorus Delay effects use a portion of the sound from each Part to create a new effect sound reverberance etc which can then be added to the original sound The above three para...

Страница 147: ...appears 148 Computer cable wiring diagrams 149 Parameter list and operations 150 Instrument list 154 Drum set list 163 Effect list 176 Effect data table 183 Preset Patch list 186 MIDI implementation 1...

Страница 148: ...Is the lowest dot in the bar display turned off Turn on the ALL button indicator If all dots are off the All Mute function is on Turn off the All Mute function p 34 Turn off the ALL button indicator I...

Страница 149: ...Exclusive messages are not received Does the Device ID number of the transmitted exclusive message match the Device ID number of this unit p 134 This unit does not transmit MIDI data If you wish to t...

Страница 150: ...a short time MIDI Off Line Cause 1 It is possible that the power has been turned off for the MIDI device connect ed to MIDI IN Action 1 The problem is not with this unit Check the power of the connect...

Страница 151: ...TXD 7 GPi 8 RXD HSKo 1 HSKi 2 TXD 3 GND 4 RXD 5 TXD 6 GPi 7 RXD 8 6 7 8 3 4 5 1 2 mini DIN 8 pin male D sub 9 pin female mini DIN 8 pin male D sub 9 pin female HSKo 1 HSKi 2 TXD 3 GND 4 RXD 5 7 RTS 8...

Страница 152: ...INSTRUMENT l r SELECT u d Parameter jump P 18 P 18 P 20 P 18 P 25 P 50 P 56 P 26 Select a Part Select an Instrument sound Select a Variation sound Select a Drum Set Level Pan Key Shift Mute SC 55 Map...

Страница 153: ...0 64 127 0 127 0 127 ms Chorus1 2 3 4 Feedback Chorus Flanger Short Delay Short Delay FB 0 7 0 64 127 0 8 127 0 80 127 0 3 127 0 19 127 0 127 0 127 Delay1 2 3 4 Pan Delay1 2 3 4 Delay To Reverb Pan R...

Страница 154: ...pace u 0 d PAN r CHORUS r end SELECT EFX TYPE l USER INST SELECT INSTRUMENT l r set Drum Set number INSTRUMENT l r INSTRUMENT l r set key name ALL execute MUTE cancel SELECT EFX TYPE l EFX VALUE l r I...

Страница 155: ...SELECT LEVEL r INSTRUMENT l r select Part ALL execute MUTE cancel ALL dark PART l r select exchanging source Part SELECT PAN l INSTRUMENT l r select exchanging destination Part ALL execute MUTE cance...

Страница 156: ...0 Native Map Voices SC88 Map Voices SC55 Map Voices 016 Barafon 1 Barafon 1 017 Barafon 2 1 Barafon 2 1 024 Log drum 1 Log drum 1 014 000 Xylophone 1 Xylophone 1 Xylophone 1 015 000 Tubular bell 1 Tub...

Страница 157: ...istortionGt 1 Dist Gt 1 001 Dist Gt2 2 Dist Gt2 2 002 Dazed Guitar 2 DazedGuitar 2 003 Distortion 2 004 Dist Fast 2 008 Feedback Gt 2 FeedbackGt 2 Feedback Gt 2 PC CC00 Native Map Voices SC88 Map Voic...

Страница 158: ...oStr 1 Pizz Str 1 Pizzicato 1 001 Vcs Cbs Pizz 2 002 Chamber Pizz 2 003 St Pizzicato 2 008 Solo Pizz 1 016 Solo Spic 1 047 000 Harp 1 Harp 1 Harp 1 016 Synth Harp 1 PC CC00 Native Map Voices SC88 Map...

Страница 159: ...veBrass 2 Analog Brs1 2 017 Hybrid Brass 2 PC CC00 Native Map Voices SC88 Map Voices SC55 Map Voices 064 000 SynthBrass 2 2 Syn Brass 2 2 Syn Brass 2 2 001 Soft Brass 2 Soft Brass 2 002 Warm Brass 2 0...

Страница 160: ...Rhythmic Saw 2 083 000 Syn Calliope 2 SynCalliope 2 SynCalliope 2 001 Vent Synth 2 Vent Synth 2 002 Pure PanLead 2 PurePanLead 2 084 000 Chiffer Lead 2 ChifferLead 2 ChifferLead 2 001 TB Lead 2 008 M...

Страница 161: ...os 2 Warm Atmos 2 002 Nylon Harp 2 Nylon Harp 2 003 Harpvox 2 Harpvox 2 004 HollowReleas 2 HollowRels 2 005 Nylon Rhodes 2 NylonRhodes 2 006 Ambient Pad 2 Ambient Pad 2 007 Invisible 2 008 Pulsey Key...

Страница 162: ...Melo Tom 2 1 009 Rock Tom 2 Rock Tom 2 016 Rash SD 1 017 House SD 1 018 Jungle SD 1 019 909 SD 1 PC CC00 Native Map Voices SC88 Map Voices SC55 Map Voices 119 000 Synth Drum 1 Synth Drum 1 Synth Drum...

Страница 163: ...ane 2 Jetplane 2 008 Starship 2 Starship 2 Starship 2 009 Burst Noise 2 Burst Noise 2 Burst Noise 2 010 Calculating 2 011 Perc Bang 2 127 000 Applause 2 Applause 2 Applause 2 001 Laughing 1 Laughing 1...

Страница 164: ...Syn Brass 2 2 027 127 Syn Brass 3 2 028 127 Syn Brass 4 2 029 127 Syn Bass 1 1 030 127 Syn Bass 2 2 031 127 Syn Bass 3 2 032 127 Syn Bass 4 1 033 127 Fantasy 2 034 127 Harmo Pan 2 035 127 Chorale 1 0...

Страница 165: ...CHESTRA 050 ETHNIC ETHNIC 051 KICK SNARE KICK SNARE 053 ASIA 054 CYMBAL CLAPS 057 SFX SFX SFX 058 RHYTHM FX RHYTHM FX 059 RHYTHM FX 2 128 CM 64 32L Same as the SC 88 map drum sets Sounds in the STANDA...

Страница 166: ...ymbal1 RND Crash Cymbal TR 909 Crash Cymbal High Tom 1 Room High Tom 1 TR 909 High Tom 1 Ride Cymbal 1 RND Ride Cymbal 1 Chinese Cymbal Reverse Cymbal Ride Bell RND Ride Bell 1 Tambourine Shake Tambou...

Страница 167: ...ic High Tom 2 TR 808 High Tom 2 TR 808 Crash Cymbal TR 909 Crash Cymbal TR 808 Crash Cymbal TR 909 High Tom 1 TR 808 High Tom 1 Power High Tom 1 Electric High Tom 1 TR 808 High Tom 1 TR 606 Ride Cymba...

Страница 168: ...707 High Tom 1 TR 606 Ride Cymbal TR 606 Ride Cymbal TR 606 Ride Cymbal TR 909 Ride Cymbal Reverse Cymbal Shake Tambourine CR 78 Tambourine CR 78 Tambourine Tambourine 2 TR 808 Cowbell CR 78 Cowbell...

Страница 169: ...909 High Tom 2 Brush High Tom 2 Timpani c TR 909 Crash Cymbal Brush Crash Cymbal Timpani c TR 909 High Tom 1 Brush High Tom 1 Timpani d TR 909 Ride Cymbal Ride Cymbal Inner Ride Cymbal Inner Timpani d...

Страница 170: ...sh Crash Cymbal Djembe 55 Concert Snare Gengari Mute High EXC2 Hard Crash Cymbal Djembe Rim 88 Jazz Snare 1 Gengari Samll TR 909 Crash Cymbal Timbales Low 88 Jazz Snare 2 Jang Gu Che TR 808 Crash Cymb...

Страница 171: ...rse Shake Tambourine Door Creaking Reverse Bendir Reverse TR 808 Open Hi Hat Door Reverse Gun Shot Reverse TR 707 Open Hi Hat Scratch Reverse Scratch Reverse Open Hi Hat Wind Chimes Reverse Laser Gun...

Страница 172: ...irl 2 55 Timpani A TR 707 Snare 1 88 Room Snare 1 88 Dance Snare 2 88 Brush Long Swirl 55 Timpani B TR 707 Snare 2 88 Room Snare 2 88 Disco Snare 88 Jazz Snare 1 55 Timpani c Standard 3 Snare 2 88 Pow...

Страница 173: ...ower Mid Tom1 Electric Mid Tom1 High Tom2 Room Hi Tom2 Power Hi Tom2 Electric Hi Tom2 Crash Cymbal1 High Tom1 Room Hi Tom1 Power Hi Tom1 Electric Hi Tom1 Ride Cymbal1 Chinese Cymbal Reverse Cymbal Rid...

Страница 174: ...EXC1 Closed Hi hat2 EXC1 Brush Closed Hi hat EXC1 Timpani F 808 Low Tom1 Electric Low Tom1 Brush Low Tom1 Timpani G 808 CHH EXC1 808 CHH EXC1 Timpani G 808 Mid Tom2 Electric Mid Tom2 Brush Mid Tom2 Ti...

Страница 175: ...e Bell Tree Tabla Na 909 Bass Drum Applause Reverse Guiro Tabla Tun Dance Kick Door Creaking Reverse Bendir Tabla Ge Standard 1 Snare 1 Door Reverse Gun Shot Tabla Ge Hi Standard 1 Snare 2 Scratch Rev...

Страница 176: ...Mid Tom2 Elec Mid Tom2 808 Mid Tom2 Timpani A Open Hi hat EXC1 808 OHH EXC1 Timpani A Mid Tom1 Room Mid Tom1 Room Mid Tom1 Elec Mid Tom1 808 Mid Tom1 Timpani B High Tom2 Room Hi Tom2 Room Hi Tom2 Ele...

Страница 177: ...w Conga Car Pass CM High Timbale Car Crash CM Low Timbale Siren CM High Agogo Train CM Low Agogo Jetplane CM Cabasa Helicopter CM Maracas Starship CM Short Whistle Gun Shot CM Long Whistle Machine Gun...

Страница 178: ...Low Gain 12 0 12 34 4C 13 Hi Gain 12 0 12 34 4C 14 Level 0 104 127 00 7F 16 8 Auto Wah 01 21 Fil Type LPF BPF 00 01 03 Sens 0 127 00 7F 04 Manual 0 68 127 00 7F 05 Peak 0 62 127 00 7F 06 Rate 0 05 2...

Страница 179: ...00 7F 12 Low Gain 12 0 12 34 4C 13 Hi Gain 12 0 12 34 4C 14 Level 0 104 127 00 7F 16 Parameter Value Dec Value Hex min max MSB LSB H 19 Space D 01 43 Pre Dly 0 3 2m 100m 1 03 Rate 0 05 0 45 10 0 6 04...

Страница 180: ...r 01 61 P Coarse 24 7 12 28 4C 03 P Fine 100 0 100 0E 72 04 Feedback 98 40 98 0F 71 05 Pre Dly 0 45m 100m 1 06 Mode 1 3 5 00 04 07 EFX Pan L63 0 R63 00 7F 08 Balance D 0E D E D 0 E 00 7F 12 Low Gain 1...

Страница 181: ...0B FL Bal D 0E D 49E D 0 E 00 7F 0C Low Gain 12 0 12 34 4C 13 Hi Gain 12 0 12 34 4C 14 Level 0 72 127 00 7F 16 Parameter Value Dec Value Hex min max MSB LSB H 40 DS Delay 02 05 DS Drive 0 48 127 00 7F...

Страница 182: ...w Off On 00 01 0B EQ L Gain 12 12 34 4C 0C EQ M Fq 200 1k 6 3k 10 0D EQ M Q 0 5 1 0 2 0 4 0 9 0 00 01 02 03 04 0E EQ M Gain 12 5 12 34 4C 0F EQ H Gain 12 10 12 34 4C 10 CF Sel Chorus Flangr 00 01 11 C...

Страница 183: ...7F 03 RM Bal D 0E D 30E D 0 E 00 7F 04 EQ L Gain 12 3 12 34 4C 05 EQ M Fq 200 6 3k 10 06 EQ M Q 0 5 1 0 2 0 4 0 9 0 00 01 02 03 04 07 Parameter Value Dec Value Hex min max MSB LSB H EQ M Gain 12 5 12...

Страница 184: ...R63 00 7F 14 AW Level 0 127 00 7F 15 Level 0 127 00 7F 16 Parameter Value Dec Value Hex min max MSB LSB H 63 PH Rotary 11 07 PH Man 100 620 8k 12 03 PH Rate 0 05 0 85 10 0 6 04 PH Depth 0 64 127 00 7F...

Страница 185: ...5 420 L108 1B 2 7 335 335 2 7 135 1 40 1 40 440 1C 2 8 340 340 2 8 140 1 45 1 45 460 1D 2 9 345 345 2 9 145 1 50 1 50 480 1E 3 0 350 350 3 0 150 1 55 1 55 500 L96 1F 3 1 355 355 3 1 155 1 60 1 60 520...

Страница 186: ...0 40 450 4 55 4 55 4500 R84 5B 41 760 710 50 455 4 60 4 60 4600 5C 42 770 720 60 460 4 65 4 65 4700 5D 43 780 730 70 465 4 70 4 70 4800 5E 44 790 740 80 470 4 75 4 75 4900 R96 5F 45 800 750 90 475 4 8...

Страница 187: ...er 8 Auto Wah 9 Rotary 10 Stereo Flanger 11 Step Flanger 12 Tremolo 13 Auto Pan 16 Hexa Chorus 17 Tremolo Chorus 18 Stereo Chorus 19 Space D 20 3D Chorus 22 Mod Delay 35 OD Chorus 36 OD Flanger 38 DS...

Страница 188: ...07 Phaser 032 HUMAN BASS Native 039 009 TB303 Bass 04 Humanizer 033 PH RHODES Native 005 000 E Piano 1 07 Phaser 034 TREM RHODES Native 005 000 E Piano 1 17 Tremolo Chorus 035 TREM WURLY Native 005 02...

Страница 189: ...UBBLE Native 123 005 Bubble 31 3D Auto 098 3D ROTARY Native 017 000 Organ 1 31 3D Auto 099 3D DIDGERIDO Native 110 008 Didgeridoo 31 3D Auto 100 3D BAG SWEEP Native 096 011 Bag Sweep 20 3D Chorus 101...

Страница 190: ...Bank Select LSB Controller number 32 as a flag for switching between the Native MAP SC 88MAP and the SC 55MAP With a Bank Select LSB of 00H the map selected by the front panel SC 88MAP or SC 55MAP bu...

Страница 191: ...ll not be reset even if Program Change or Reset All Controllers is received NRPN The NRPN Non Registered Parameter Number message allows an extended range of control changes to be used On this unit NR...

Страница 192: ...er than 0 00H Channel Pressure Status 2nd byte DnH vvH n MIDI channel number 0H FH ch 1 ch 16 vv Channel Pressure 00H 7FH 0 127 Not received when Rx CH PRESSURE CAf OFF Initial value is ON The resulti...

Страница 193: ...ID dev 00H 1FH 1 32 Initial value is 10H 17 42H Model ID GS 12H Command ID DT1 40H Address MSB 00H Address 7FH Address LSB 00H Data GS reset 41H Checksum F7H EOX End Of Exclusive When this message is...

Страница 194: ...50 ms System exclusive messages Identity Reply and Data Set 1 DT1 are the only System Exclusive messages transmitted by this unit When an appropriate Identity Request Message and Data Request 1 RQ1 me...

Страница 195: ...42 Dot Data d02 10 0p Dot Data 10 0p 7F Dot Data d63 p Page p 1 Page2 p 2 Page4 p 3 Page6 p 4 Page8 p 5 Page10 When this message is displayed screen data 16 x 16 dot corresponding to the bit pattern...

Страница 196: ...Description Default Value H Descrip tion 40 00 00 00 00 04 0018 07E8 MASTER TUNE 100 0 100 0 cent 00 04 00 00 0 cent 40 00 01 Use nibblized data 40 00 02 40 00 03 Refer to section 5 Supplementary mate...

Страница 197: ...3 00 00 01 01 78 DELAY TIME RATIO LEFT 88 4 500 01 4 40 01 54 00 00 01 01 78 DELAY TIME RATIO RIGHT 88 4 500 01 4 40 01 55 00 00 01 00 7F DELAY LEVEL CENTER 88 0 127 7F 127 40 01 56 00 00 01 00 7F DEL...

Страница 198: ...NEL MSG RX PORT page 194 setting of PORT B Patch Part parameters This unit has 16 Parts in Group A and 16 Parts in Group B Parameters that can be set individually for each Part are called Patch Part p...

Страница 199: ...PITCH OFFSET FINE 12 0 12 0 Hz 08 00 0 Hz 40 1x 18 Use nibblized data PITCH OFFSET FINE allows you to alter by a specified frequency amount the pitch at which notes will sound This parameter differs f...

Страница 200: ...2x 09 00 00 01 00 7F MOD LFO2 TVF DEPTH 0 2400 cent 00 0 cent 40 2x 0A 00 00 01 00 7F MOD LFO2 TVA DEPTH 0 100 0 00 0 40 2x 10 00 00 01 40 58 BEND PITCH CONTROL 0 24 semitones 42 2 semitones 40 2x 11...

Страница 201: ...0 4x 00 00 00 01 00 03 TONE MAP NUMBER Pro MAP 0 3 00 CC 32 Bank number LSB 00 SELECTED 01 SC 55 MAP 02 SC 88 MAP 03 Native MAP When GS Reset is received this will be 00 SELECTED 40 4x 01 00 00 01 01...

Страница 202: ...d0 0B 21 d1 rr 00 00 01 00 7F PLAY NOTE 88 0 127 21 d2 rr 00 00 01 00 7F LEVEL 88 0 127 21 d3 rr 00 00 01 00 7F ASSIGN GROUP 88 0 127 21 d4 rr 00 00 01 00 7F PAN 88 0 127 21 d5 rr 00 00 01 00 7F REVE...

Страница 203: ...00 00 01 00 7F CHORUS DELAY Pro 0 127 23 pp 25 00 00 01 00 7F CHORUS RATE Pro 0 127 23 pp 26 00 00 01 00 7F CHORUS DEPTH Pro 0 127 23 pp 27 00 00 01 00 7F CHORUS SEND LEVEL TO REVERB Pro 0 127 23 pp...

Страница 204: ...00 7F 2a pp 02 00 00 01 00 10 Rx CHANNEL Pro 1 16 OFF 2a pp 03 00 00 01 00 01 Rx PITCH BEND Pro OFF ON 2a pp 04 00 00 01 00 01 Rx CH PRESSURE CAf Pro OFF ON 2a pp 05 00 00 01 00 01 Rx PROGRAM CHANGE...

Страница 205: ...D LFO2 TVF DEPTH Pro 0 2400 cent 2a pp 6A 00 00 01 00 7F BEND LFO2 TVA DEPTH Pro 0 100 0 2a pp 70 00 00 01 28 58 CAf PITCH CONTROL Pro 24 24 semitones 2a pp 71 00 00 01 00 7F CAf TVF CUTOFF CONTROL Pr...

Страница 206: ...0 2400 cent 2b pp 26 00 00 01 00 7F CC2 LFO1 TVA DEPTH Pro 0 100 0 2b pp 27 00 00 01 00 7F CC2 LFO2 RATE CONTROL Pro 10 0 10 0 Hz 2b pp 28 00 00 01 00 7F CC2 LFO2 PITCH DEPTH Pro 0 600 cent 2b pp 29 0...

Страница 207: ...y 25 seconds In order to reduce transmission time and data volume we suggest that you request a dump only of the necessary data Panel button operations allow you to transmit dumps of ALL ALL 1 16 part...

Страница 208: ...P 01 03 01 SC 55 MAP 02 SC 88 MAP 03 Native MAP pp Drum set 00 7F same as PC Drum instrument list dump transmit only Pro When a Drum Instrument List Dump Request is received the Drum Instrument names...

Страница 209: ...15 program number 74 Flute in GS Example 3 EA 00 28 EnH is the Pitch Bend Change status and n is the MIDI channel number The 2nd byte 00H 0 is the LSB and the 3rd byte 28H 40 is the MSB but Pitch Bend...

Страница 210: ...ce Values are in hexadecimal decimal in parentheses Hz at A4 cent RPN 1 Sys Ex 40 00 00 445 0 19 56 4C 43 1603 00 04 0C 04 196 444 0 15 67 4A 03 1283 00 04 09 0D 157 443 0 11 76 47 44 964 00 04 07 06...

Страница 211: ...4 1 Portamento control 91 1 Effect 1 Reverb Send Level 93 1 Effect 3 Chorus Send Level 94 1 Effect 4 Delay Send Level 98 99 1 NRPN LSB MSB 100 101 1 RPN LSB MSB Program 1 Change True 0 127 Program Num...

Страница 212: ...120 Contrast Display 38 Control Change 131 Cutoff Frequency 33 Data Entry 132 Decay Time 33 Delay All Delay 50 Part Delay 13 50 Delay Feedback 54 Delay Level 54 Delay Level Center 54 Delay Level Left...

Страница 213: ...ssure 132 Portamento 132 Portamento Control 132 Portamento Time 132 Power 9 Preview Note Name 37 Preview Velocity 37 Program Change 126 131 R V Release Time 33 Reset All controllers 133 Resonance 33 R...

Страница 214: ...96 715222 MEXICO Casa Veerkamp s a de c v Av Toluca No 323 Col Olivar de los Padres 01780 Mexico D F MEXICO TEL 55 5668 6699 NICARAGUA Bansbach Instrumentos Musicales Nicaragua Altamira D Este Calle P...

Страница 215: ...eption which can be determined by turning the equipment off and on the user is encouraged to try to correct the interference by one or more of the following measures Reorient or relocate the receiving...

Страница 216: ...64type Display 70 6 x 24 5mm backlit LCD Connectors MIDI connectors IN A IN B Front Rear OUT THRU Audio Input jack x 2 L R Input Volume Knob Audio Output jack x 4 OUTPUT 1L 1R 2L 2R Headphones jack Co...

Отзывы: