52
Problem
Cause
Solution
1. Rod linkage came off.
1. Get to eyelid rods and ball links and re-attach.
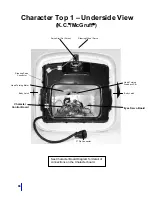
Eyelids and Eyes Left and Right
An eyelid or eyes L/R does not operate
2. Servo wire broken or wire came out of eye
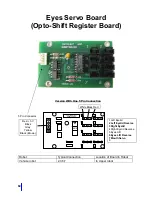
servo board
2. Trace wires from servo motor of the eyelid or
eyes and follow this wire to the eye servo board to
find problem.
One of the eyelids is at a different level
1. Eyelid rod bent or eyelid out of adjustment
1. Straighten bent rod or change eyelid position by
removing the servo arm. Then shorten or
lengthen the rod by twisting the servo arm. You
can also change the position of the servo arm on
the servo shaft.
1. Connection at eye servo board has come off.
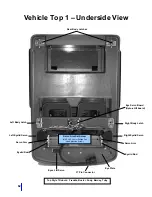
1. Vehicle- located on underside of upper robot.
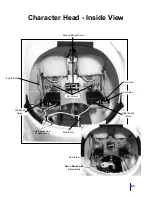
Robots with Character- located in character.
2. Wire(s) bringing 5 Volts and signal to servo
board are not making a connection. Broken
out of 37 pin connector.
2. Vehicles- locate the wires
(red/black/gray/yellow/black) going from the 37 pin
up to the eye servo board. Repair broken wiring.
Robots with Character- Check gray/yellow/black
and red black to eye servo board.
No operation of any eye functions.
3. No 5 Volts going to eye servo board.
3. Find broken wire on red/black or check fuse for
eye servos on fuse block. Check the 5 Volt
Regulator on the main circuit board.
1. In-line fuse blown or fuse blown on the fuse
block-yellow wire.
1. Replace the 5 Amp fuse which is in-line on the
wire. Follow wire from water squirter switch.
Water Squirter
Cannot fill reservoir
2. Broken wire at water squirter switch or
coming from main box
2. Repair break.
1. Water squirter switch is not in on position.
1. On position is not the center position.
Cannot squirt: no pump sound.
2. Broken wire at pump or W.S. switch.
2. Repair/re-solder broken wire.
1. Reservoir empty
1. Fill Reservoir with filler bottle.
2. Water line is not connected to water
connector
2. Connect it.
Cannot squirt: pump sound yes
3. Overflow tube and squirt tube are switched
at the reservoir.
3. Swap them back. Overflow tube is the one that
is in the top of the bottle and the tube runs to an
outlet on the bottom of the frame.
1. Modifier not turned on.
1. Push pedal on modifier. Light should come on.
Voice Modifier
Voice not being modified
2. Audio wires not plugged in correctly
2. Jumper wire goes from Nady Receiver to
Inpu
t
of Modifier. Wire in
Output A
of modifier goes to
the main board.
More detailed troubleshooting by system is included with each subsystem. For additional help or parts
call our service dept. at 801-489-4466.
Содержание Vehicle Robot
Страница 53: ...49 APPENDIX A ...
Страница 57: ...53 Robot Block Diagram ...
Страница 58: ...54 APPENDIX B ROBOT PARTS IDENTIFICATION ...
Страница 77: ...73 APPENDIX C CHECKLIST AND MAINTENANCE FORMS ...
Страница 79: ...75 ...
Страница 80: ...76 Notes ...
Страница 81: ...77 Technical Tips ...


