


4. Setting the Printer Driver
52
2
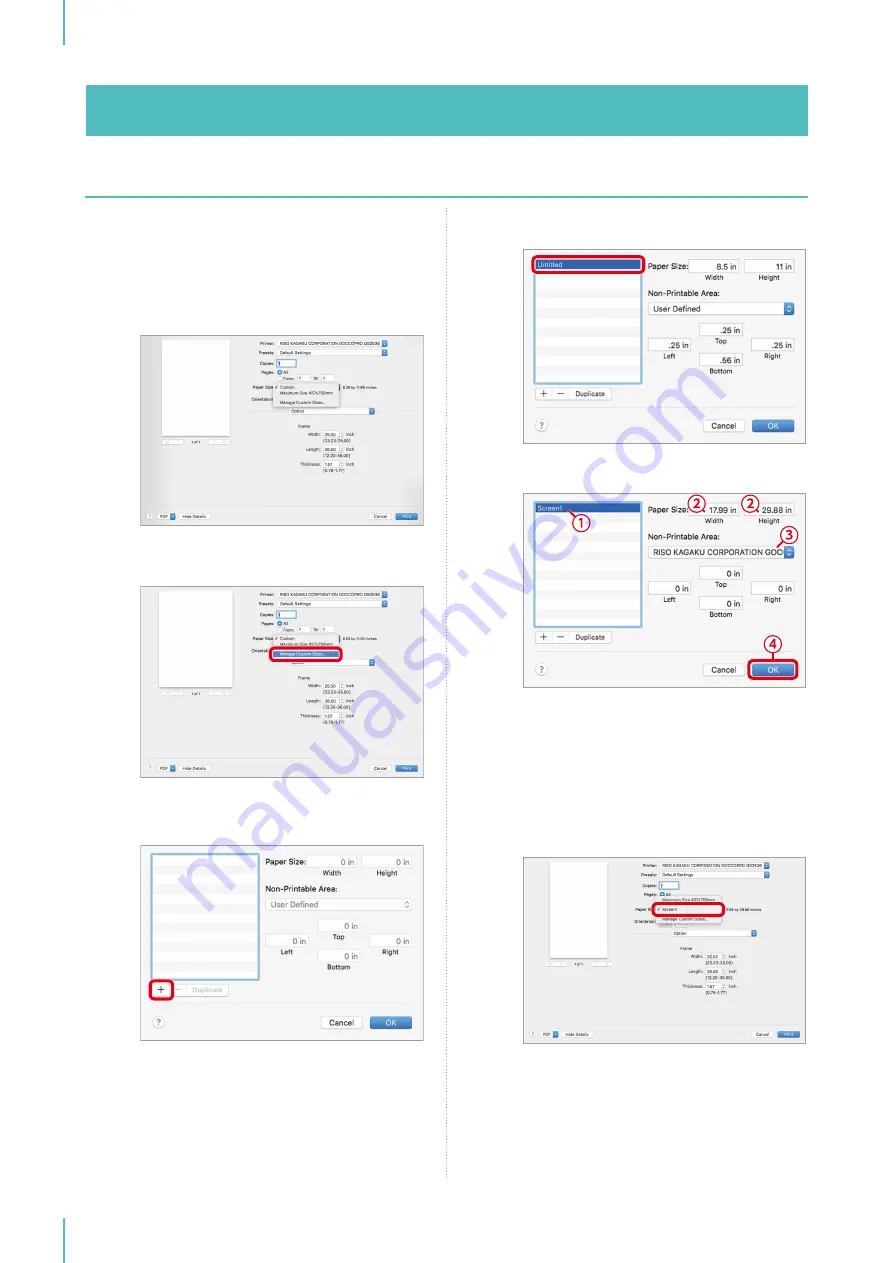
Click the [Paper Size] drop-down list on
the [Print] dialog box to display the list of
registered paper sizes (image areas).
The default value is [Maximum Size 457 mm x
759 mm] (17.99" x 29.88").
3
Click [Manage Custom Sizes] from the list.
4
When the [Custom Size] dialog box
appears, click [+].
5
Double-click the [Untitled] line.
6
Configure the settings.
①
Enter the name.
②
Enter the image area size in [Width] (landscape)
and [Height] (portrait) for [Paper Size].
③
Select [GOCCOPRO QS2536] in [Non-Printable
Area] (this causes all margins to be set to [0]).
④
Click [OK].
7
The paper size set in the [Print] dialog box
is displayed.
Содержание GOCCOPRO QS2536
Страница 1: ......
Страница 2: ......
Страница 12: ...10...
Страница 22: ...MEMO...
Страница 58: ...MEMO...
Страница 65: ...63 Cleaning the Machine 64 Thermal Print Head 64 Main Unit Exterior 65 6 Maintenance...
Страница 68: ...MEMO...
Страница 82: ...MEMO...
Страница 85: ...83...
Страница 99: ...97...
Страница 113: ...111...
Страница 127: ......
Страница 128: ......


