background image

Introduction 

 
Thank you for purchasing our electric hydraulic pump. This instruction manual explains operation 
procedures, warnings and cautions, and trouble shootings for RIKEN electric Hydraulic Pump 
Model EMP-5 series. 
Before operation, both first-time users and experienced users are requested to read this manual 
carefully, and understand the contents thoroughly. This manual should be in a safe place but 
accessible for reference during operation. 


  WARNINGS


  Do not use this pump at the place where personal injury or property damage might happen 

when the hydraulic working oil scatters by any faults. Also do not use this pump close to 
flammable materials to minimize the risk of injury and fire. 


  Before applying pressure, the blind plug of the oil output port should be taken off. Apply 

pressure after the high pressure fittings and accessories (Hydraulic hose, Coupler) are 
mounted. 


  The maximum output pressure of these pumps is 70 MPa. For safety, each pump is factory 

fitted with a high pressure safety valve adjusted to 73 MPa. Do not allow the safety valve to be 
adjusted to a level higher than 73 MPa. Where the pump is fitted with a pressure switch, set 
this at 70 MPa or less. 


  When using this pump with hydraulic equipment of which working pressure is less than 70


MPa, lower the setting of the high pressure safety valve and adjust the pressure switch to 
match the working pressure of the equipment. Failure to lower settings could result in the 
equipment damage. For the method of adjustment, refer to page 18 “Adjusting the High 
Pressure Safety Valve". 


  Ensure power is switched off before conducting electrically related maintenance or inspection. 


  Ensure to use oil at temperatures between 5° and 60° Celsius. The use of oil that exceeds 60° 

Celsius will shorten the lifespan of the hydraulic equipment and might cause personal injury if 
the heated oil is touched. Install an oil cooler to lower oil temperature for safety. 


  Do not hang the oil tank with ropes hooked on the side handles of the tank. It may cause 

serious injury if the pump drops or falls. 


SAFETY INSTRUCTIONS 

 
To use this pump safely, correct operations and periodical checking are required. Do not operate 
this pump before reading and understanding safety instructions thoroughly shown in this manual. 
And follow 

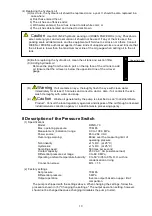
  “WARNING” this mark is used to prevent accidents leading to personal injury. 

  “CAUTION” this mark is used to prevent accidents leading to property losses or damages. 

 
As both marks provide important instructions, that must follow them. Ensure to switch the power 
off if abnormal condition happens, and contact the sales agent. 

Содержание EMP-5 Series

Страница 1: ...ELECTRIC HYDRAULIC PUMP EMP 5 Series Form C INSTRUCTION MANUAL RIKEN KIKI CO LTD ...

Страница 2: ......

Страница 3: ...pump with hydraulic equipment of which working pressure is less than 70 MPa lower the setting of the high pressure safety valve and adjust the pressure switch to match the working pressure of the equipment Failure to lower settings could result in the equipment damage For the method of adjustment refer to page 18 Adjusting the High Pressure Safety Valve Ensure power is switched off before conducti...

Страница 4: ...e may be damaged if a self sealed quick coupler is clogged resulting in a bodily injury Do not grip a pressurized high pressure hose with a hand If it breaks while being gripped high pressure hydraulic oil spouts out instantaneously and may penetrate the skin causing serious injury The high pressure hose is a consumable item Even if the hose appears to be in good condition it is possible internal ...

Страница 5: ...he high and low pressure pumps operate and when the pressure is 5 MPa or higher the oil from the low pressure pump returns through the low pressure safety valve to the tank and only the high pressure pump pumps out oil This pump is designed for indoor use Do not use it in any place that may be exposed to rainwater The ambient temperature should be between 0 and 40 C For peripheral hydraulic equipm...

Страница 6: ...epth 25 36 Discharge port Rc 3 8 35 Return port Rc 3 8 34 Oil drain port Rc 3 8 29 Oil level gauge 27 Air breather 22 Directional control valve EHV 3 18 Pressure switch DPGS 70 6 Activation switch 5 Magnet switch 4 Motor 1 Oil tank No Name Remarks ...

Страница 7: ...l tank it is factory set to 7 5 MPa Do not readjust this setting 18 Pressure switch DPGS 70 This switch stops the motor when the pressure rises to the set pressure and restarts it automatically when the pressure drops to the set differential pressure which is factory set to 5 MPa 22 Directional control valve EHV 3 This is a manual three way poppet valve The hydraulic oil is discharged when the lev...

Страница 8: ... by turning the lever to the right or left When the lever is at the center position the oil returns to the tank 4 M10 depth 25 36 Discharge port Rc 3 8 35 Return port Rc 3 8 34 Oil drain port Rc 3 8 29 Oil level gauge 27 Air breather 22 Directional control valve EHV 4B 18 Pressure switch DPGS 70 6 Activation switch 5 Magnetic switch 4 Motor 1 Oil tank No Name Remarks ...

Страница 9: ...il by exciting the solenoid When it is at the normal position when the solenoid is not magnetized the oil is discharged to Port A 4 M10 depth 25 36 Discharge port Rc 3 8 35 Return port Rc 3 8 34 Oil drain port Rc 3 8 29 Oil level gauge 27 Air breather 22 Directional control valve ESL 4S 2 18 Pressure switch DPGS 70 6 Activation switch 5 Magnet switch 4 Motor 1 Oil tank No Name Remarks ...

Страница 10: ...n check valve ECH 4 This valve is opened and closed by pilot pressure to maintain the pressure in the circuit When the directional control valve is at the center position it prevents the cylinder piston from moving 4 M10 depth 25 36 Discharge port Rc 3 8 35 Return port Rc 3 8 34 Oil drain port Rc 3 8 29 Oil level gauge 27 Air breather 25 Pilot operation check valve ECH 4 22 Directional control val...

Страница 11: ...rt A left is the discharge port and Port B right is the return port 4 M10 depth 25 36 Discharge port Rc 3 8 35 Return port Rc 3 8 34 Oil drain port Rc 3 8 29 Oil level gauge 27 Air breather 23 Manifold ETK 1 18 Pressure switch DPGS 70 6 Activation switch 5 Magnet switch 4 Motor 1 Oil tank No Name Remarks ...

Страница 12: ...W 3 phases 200 V AC for 50 60Hz 220 V AC for 60Hz Voltage allowable From 5 to 10 of the rated voltage Ambient temperature From 0 C to 40 C Reservoir capacity 9 L Usable oil amount 6 L Approximate dimensions 230 W x 500 D x 481 H Approximate weight 50 kg Working oil ISO VG32 hydraulic fluid categorized as a hazardous material of Class 4 type 4 petroleum RIKEN POWER OIL Life time Some parts need rep...

Страница 13: ...re used Ensure that the oil level is lower than the maximum level line of the oil gauge when adding oil to the oil tank Caution Do not use the high pressure safety valve as a relief valve Install a separate relief valve if it is necessary to perform continuous relief Most prevalent reason of hydraulic pump failures is caused by dirt entry Keep the pump and other ancillary equipment clean to preven...

Страница 14: ... screwed into the pump side and connected to the cylinder using a coupler Before screwing the hose into the pump make sure to wrap sealing tape around the taper pipe thread of the hose How to wrap sealing tape Wrap tape one or two turns in the direction shown in the figure with one or two threads left uncovered at the tip The screwing torque is as follows R3 8 79 to 98 N m R1 2 118 to 142N m Befor...

Страница 15: ...the motor shown on the side of the motor At no load turn the activation switch to ON for a moment to inch the pump and check the rotation direction with the fan in upper part of the motor If it rotates in a wrong direction change two phases of the three phases of the motor and check the rotation direction again The cylinder does not operate smoothly if air is contained in the piping Bleed air from...

Страница 16: ...unning for longer than 5 minutes to check if it makes no unusual sound or produce no abnormal vibration D Actuate the cylinder by operating the directional control valve Increase the pressure if possible to check that no abnormality is observed E Check that no oil is leaking from the piping or machine If oil leakage is found investigate the cause of it and repair it F Follow the other instructions...

Страница 17: ... pressure 70 MPa Measurement indication range 0 0 to 100 0 MPa Power source 85 to 264 V AC Over range warning Blinks over the measuring limit of operating pressure Non linearity 1 R C at 25 C Hysteresis 1 R C at 25 C Sampling speed 50 times per second Contact capacity 250 V AC 3A resistance load Differential pressure set range 0 to 69 9 MPa Operating ambient temperature humidity 0 to 50 C 35 to 85...

Страница 18: ... Differential pressure When M is pressed again after the set pressure is displayed is displayed for a moment then the current differential pressure is displayed Press and keys to change the setting C Output operation When M is pressed again after the differential pressure is displayed is displayed for a moment then the current output operation is displayed Upper limit comparison Lower limit compar...

Страница 19: ...r is at the left side seen from the front of the pump or to Port B when the lever at the right side Example of use with a double acting cylinder There is no differentiation between Ports A and B Assume that Port A is connected to the push side and Port B to the pull side A Set the lever of the directional control valve to the center position B Turn the activation switch SW ON to activate the motor...

Страница 20: ...et a required pressure for the pressure switch PS B Press the push control button PB1 C The motor is activated At the same time the solenoid is magnetized and the cylinder piston comes out D The solenoid is demagnetized when the pressure has increased to the set pressure for the pressure switch and the piston retracts E The return end limit switch outputs a signal that stops the motor causing the ...

Страница 21: ...al millimeters to remove the residual pressure Then turn the activation switch SW OFF to stop the motor If a malfunction occurs immediately set the lever of the directional control valve to the center position and turn the activation switch SW OFF to stop the motor 5 EMP 5TK This model is used when the directional control valve is installed externally from the pump It has a manifold ETK 1 as an ou...

Страница 22: ...Repeat shifting of the lever of the directional control valve a few times to increase the pressure and check that the set pressure is achieved 10 Reset the set pressure for the pressure switch to the operating pressure 11 Remove the plug from the discharge port and connect the high pressure hose or the fitting 12 Set a hexagon socket head cap screw 92 Do not readjust the pressure to a value higher...

Страница 23: ...Then press the reset button of the over load relay The pressure switch is incorrectly set or damaged Check the setting for the pressure switch If it is correctly set replace it The motor does not rotate enough or normally The voltage has dropped The voltage may drop during pump operation even though it is normal when the pump is at rest This malfunction often occurs when the cable between the powe...

Страница 24: ... because of a flaw or hydraulic locking Ask the sales agent for repair The coil is damaged because of wrong voltage Replace the coil with one appropriate for the voltage The coil is broken or improperly connected Check continuity of the coil and connection If the coil is broken replace it The diode is damaged A rectifier is used for AC DC conversion Replace the rectifier terminal parts The cylinde...

Страница 25: ...21 12 Internal Structural Drawing and Parts List EMP 5B A A B B C 1 1 Y ...

Страница 26: ...re safety valve body 1 21 Ball strike plate 1 22 Spring adjustment screw 1 23 Pilot valve body 1 24 Pilot piston 1 25 Oil less bearing 1 26 Spring case 1 27 Ball retainer for unloading valve 1 28 Spring retainer 1 29 φ9 R1 4 connector 1 30 φ9 R3 8 connector 1 31 φ9 nut 2 32 High pressure steel pipe 1 33 Spring 2 High pressure discharge check 34 Spring 1 Low pressure check 35 Spring 1 Unloading val...

Страница 27: ... head bolt 4 M10 25 87 Copper washer 4 φ10 2 φ15 1 88 Hexagon head bolt 2 M6 12 89 Hexagon socket head cap screw 4 M8 20 90 Hexagon socket head cap screw 2 M8 45 92 Hexagon socket head cap screw 10 M6 22 93 Hexagon socket head cap screw 4 M8 30 94 Hexagon socket head cap screw 4 M6 45 95 Hexagon socket head plug 9 R1 8 96 Hexagon socket head plug 2 R3 8 97 Square head iron plug 3 R3 8 99 Cross rec...

Страница 28: ... dropped to the set differential pressure which is factory set to 5 MPa For the standard models of EMP 5SL and EMP 5SW the directional control valve is not wired Refer to the section Operation Method on pages 15 to 17 to wire the valve according to the purpose To prevent electric shock ensure that the grounding electrode of the power plug is connected to the ground Magnet switch Green Red White Bl...

Страница 29: ...from the frictional damage caused by the expansion contraction or vibration that occurs when the hose internal pressure applied Protect the hose with a support or cushion Do not pull the high pressure hose to move the pump Do not run over the hose with a cart or other vehicle Do not also drop any heavy object onto the hose Protect the hose from all conceivable dangers Type of high pressure hose Mi...

Страница 30: ... with new one Replace the hose immediately if oil is leaking from the cap or outer surface of the hose or if any hollow flaw or bulge is found on the surface of the hose Warning The high pressure hose is a consumable item Even if the hose appears to be in good condition it is possible internal damage such as pin holes or scar has occurred Riken recommends periodic replacement based upon how freque...

Страница 31: ...r repair the pump without careful consideration If you need outline drawings of each pumps or other detailed information such as the weight please consult your sales agent Manufactured by RIKEN SEIKI Company Ltd Sales agent RIKEN KIKI Company Ltd URL http www rikenkiki co jp Head Office 4 24 50 Takanawa Minato ku Tokyo 108 0074 TEL 81 3 3447 1151 FAX 81 3 5488 7022 Shanghai Office Room 713 715 No ...

Отзывы: