background image

WARNING

Read and understand these instructions, the electrical tool in-
structions, and the warnings and instructions for all equipment
and material being used before operating this tool to reduce the
risk of serious personal injury.

SAVE THESE INSTRUCTIONS!

Keep your fingers and hands away from the punch head during
the punch cycle.

Your fingers or hands can be crushed, fractured

or amputated if they are caught between the punch dies or the com-
ponents and any other object.

This head is not insulated for use on or near energized con-
ductors. 

Use of this head on or near energized conductors may

lead to electrical shock, causing severe injury or death.

Large forces are generated during product use that can break
or throw parts and cause injury.

Stand clear during use and wear

appropriate protective equipment, including eye protection.

Never repair a damaged head.

A head that has been welded,

ground, drilled or modified in any manner can break during use.
Only replace components as indicated in these instructions. Discard
damaged heads to reduce the risk of injury.

Only use a RIDGID

®

or ILSCO

®

Electrical Tool with this RIDGID

®

PH-60B Punch Head. 

Use of other tools with this head may dam-

age the head, tool, draw bolt, punch dies, or result in serious injury.

If you have any questions concerning this RIDGID

®

product:

• Contact your local RIDGID distributor.
• Visit www.RIDGID.com or www.RIDGID.eu to find your local RIDGID

contact point.

• Contact RIDGID Technical Services Department at 

[email protected], or in the U.S. and Canada call
(800) 519-3456.

Description

The RIDGID

®

PH-60B Punch Head is designed to accept 

3

/

4

" -16 UNF

threaded draw bolt for use with punches and dies (such as knockout
punches) to punch holes through sheet materials such as mild or stain-
less steel. 
The Punch Head attaches to the RIDGID or ILSCO Electrical Tool and
can rotate 360 degrees with the RIDGID QuickChange System™
(QCS™) for better access in tight areas.

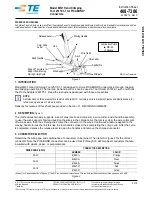
Figure 1 – PH-60B Punch Head  

Specification

Material Thickness ............Mild Steel - Up to 10 gauge 

(0.135", 3.4 mm)
Stainless Steel – Up to 16 gauge 
(0.06", 1.5 mm)

Max. Punch Diameter .........2.5" (63.5 mm) in 10 gauge mild steel
Draw Bolt Thread ................

3

/

4

" – 16 UNF (19.0 mm)

Compatible QCS Types.....6T QCS

60kN QCS

Maximum Force ................13,500 lbf (60 kN) 
Weight................................3.4 lb (1.5 kg)
Punching capacity depends on a variety of factors including material
thickness, type and hardness, punch size/configuration. Holes may not
be able to be completed in all cases based on these and other vari-
ables. 

Inspection/Maintenance

Inspect the Punch Head before each use for issues that could affect
safe use.

1. With the battery removed from the tool, depress the QCS sleeve

and remove the head.

2. Clean the head and remove all dirt, oil, grease, and debris to aid

in inspection and improve control. Pay close attention to the QCS
coupling to ensure there is no debris to damage the coupling. En-
sure that the threaded hole is free of debris.

3. Inspect the head for:

• Proper assembly and completeness.
• Wear, corrosion or other damage. Dimples in the grooves of the

QCS coupling are normal with use and are not considered
damage. 

• Presence and readability of head markings.
If any issues are found, do not use head until corrected.

4. Inspect the electrical tool and any other equipment being used as

directed in their instructions. Make sure Punch parts are in good
working condition.

5. The QCS coupling is lubricated for life at the factory and does not

require any further lubrication. Do not disassemble the Punch
Head. Unit contains compressed spring.

Set Up/Operation

These instructions are generalized for many types of hole punches.
Follow the specific instructions for the set up and operation of the hole
punch being used.

1. Determine the thickness and type of material to be punched.

Make sure there is only a single thickness of material to be
punched. Determine the hole size you wish to punch. Select the
appropriate matched set per its specifications.

2. Make sure all equipment is inspected and set up per its instructions.
3. Mark the hole location and if needed drill a pilot hole just larger

than the draw bolt.

4. With the Punch Head removed from the tool, thread the appro-

priate draw bolt into the Punch Head unit hand tight. The thread
must be fully engaged to ensure proper operation.

5. Place any needed spacers over the draw bolt, followed by the punch

die. Place the cupped half of the die facing away from the tool.

6. Insert the draw bolt through the pilot hole in the material to be

punched.

Figure 2 – Setting Up The Punch Head 

7. Thread the matching punch half of the die onto the draw bolt with

the cutting edges toward the material. Tighten by hand until there
are no gaps between the head, spacer(s), die, material and punch.
If there are gaps between the parts, the dies will not be square to
the material and could damage the equipment or cause injury.
Make sure that the punch is fully threaded onto the draw bolt. Do
not operate with the punch partially threaded onto the draw bolt,
this could damage the stud. If the punch will not fully thread onto
the draw bolt, a spacer may need to be removed.

PH-60B Punch Head Instructions

RIDGID

®

© RIDGID, Inc. 3/14

EC40341

999-999-471.09

REV. D

Punch

Draw Bolt

Punch Die

Spacers

QCS Coupling

Punch Head

Punch

Die

Punch

Spacer

Material 

Punch

Die

Spacer

Material To 

Be Punched  

Содержание PH-60B

Страница 1: ...issues that could affect safe use 1 With the battery removed from the tool depress the QCS sleeve and remove the head 2 Clean the head and remove all dirt oil grease and debris to aid in inspection a...

Страница 2: ...vente RIDGID le plus proche Vous rendre sur le site www RIDGID com ou www RIDGID eu pour obtenir les coordonn es du point de vente RIDGID le plus proche Consulter les services techniques de Ridge Tool...

Страница 3: ...in onnage de la t le Faites attention aux bavures tranchantes Accessoires Instrucciones del cabezal punzonador PH 60B ADVERTENCIA Antes de hacer funcionar esta herramienta lea y entienda estas instruc...

Страница 4: ...spesor del material Acero dulce De calibre hasta 10 0 135 3 5 mm Acero inoxidable De calibre hasta 16 0 06 1 5 mm Di metro m ximo del punz n 2 5 63 5 mm para acero dulce de calibre 10 Rosca del perno...

Страница 5: ...ist ausgelegt f r Zugschrauben mit 3 4 19 0mm 16UNFGewindef rdieVerwendungmitStanzvorrichtungen und Backen etwa Aussto stanzvorrichtungen zum Stanzen von L chern durch Blechmaterialien wieWeich oder...

Страница 6: ...n Sie den Betriebsschalter nicht fest bis das Werkzeug au tomatisch zur ckgezogen wird Dadurch k nnte die Stanzvorrichtung in der Stanzbacke gestaucht werden sodass beide Teile besch digt werden k nnt...

Страница 7: ...Bepaal de grootte van het gat dat moet worden geponst Selecteer de juiste op elkaar afgestemde set op basis van diens specificaties 2 Zorg ervoor dat alle apparatuur werd ge nspecteerd en ingesteld vo...

Страница 8: ...scrizione La Testa punzonatrice PH 60B RIDGID stata progettata per accogliere il perno di accoppiamento filettato da 19 0 mm 16 UNF per l uso con i punzoni e le matrici come i punzoni di espulsione pe...

Страница 9: ...ensione AVVISO Trattenere l interruttore di accensione soltanto sino a quando l utensile si ritrae automaticamente Altrimenti il punzone potrebbe arrivare finoinfondoallamatriceedanneggiareilpunzone m...

Страница 10: ...ssura do material a perfurar Determi ne o tamanho do orif cio que pretende perfurar Seleccione o con junto correspondente conforme as respectivas especifica es 2 Certifique se de que todo o equipament...

Страница 11: ...www RIDGID eu f r att lokalisera n rmaste RIDGID representant Kontakta RIDGID Technical Services Department p rtctechservices emerson com Om du befinner dig i USA eller Kanada ringer du 800 519 3456...

Страница 12: ...verktygets frig ringsknapp 10 St ng av elverktyget och ta ut stansen ur h let Se upp f r vassa kan ter Tillbeh r Katalognr Beskrivning 23478 Stansbacksats 1 2 3 4 1 11 4 11 2 2 samt v ska 23492 Stansb...

Страница 13: ...S rg for at alt udstyr er efterset og opsat i henhold til anvisningerne 3 Afm rk hullets placering og bor om n dvendigt et styrehul der er en smule st rre end tr kbolten 4 Stansehovedet skal v re afm...

Страница 14: ...tst l opptilkaliber10 0 135 3 4mm Rustfritt st l opp til kaliber 16 0 06 1 5 mm Maks stempeldiameter 2 5 63 5 mm i kaliber 10 mildt st l Trekkbolt gjenge 3 4 19 0 mm 16 UNF Kompatible QCS typer 6T QCS...

Страница 15: ...T N M OHJEET Pid sormet ja k det et ll l vistysp st l vistyksen aikana Sor met ja k det saattavat murskautua murtua tai amputoitua jos ne tart tuvat l vistysterien tai komponenttien ja muiden esineide...

Страница 16: ...oja ter t eiv t ole tasaisesti materiaalia vasten mik voi aihe uttaa laite tai henkil vahinkoja Varmista ett l vistin on kierretty kokonaan vetopulttiin l k yt ty kalua jos l vistin on vain osittain k...

Страница 17: ...zczenia olej smar i pozosta o ci materia u Szczeg ln uwag po wi ci na usuni cie ze sprz g a z czki QCS wszelkich pozosta o ci materia u kt re mog uszkodzi sprz g o Upewni si e w gwintowanym otworze ni...

Страница 18: ...elektrick m proudem v en m zran n m i dokonce k usmrcen B hem pou it tohoto n stroje doch z k vyv jen velk ch sil kter mohou odlomit nebo odmr tit r zn sti a zp sobit tak zran n B hem provozu st jte m...

Страница 19: ...lava nezapadne do rychlospojky ujist te se e je p st pln zasunut stisknut m uvol ovac ho tla tka Such ma rukama vlo te baterii do n stroje 9 S rukama mimo hlavu a dal pohybliv sti spus te elektrick n...

Страница 20: ...prev dzka Tieto pokyny s zov eobecnen pre mnoho typov dierovac ch zariaden Pri nastavovan a prev dzke dodr iavajte pecifick pokyny pre pou va n dierovacie zariadenie 1 Zistite ve kos a typ materi lu k...

Страница 21: ...www RIDGID eu pentru a g si punctul dvs local de contact RIDGID Contacta i Departamentul ServiciilorTehnice RIDGID la rtctechservices emerson com sau telefona i n S U A i Canada la 800 519 3456 Descr...

Страница 22: ...rea poansonului n matri i dete riorarea poansonului matri ei Ap sa i butonul de eliberare a presiunii din ma ina unealt electric pentru a retrage pistonul 10 Opri i OFF ma ina unealt electric i ndep r...

Страница 23: ...g vastags g nak v gig azonosnak kell lennie Hat rozza meg az elk sz tend lyuk m ret t A m szaki adatai alapj n v lassza ki a megfelel egym shoz ill lyukaszt k szletet 2 Gy z dj n meg arr l hogy minden...

Страница 24: ...16 20 25 32 40 m retben 2 h z csavar 3 t vtart s f r EL PH 60B RIDGID ILSCO PH 60B RIDGID 890 011 320 10 RIDGID RIDGID www RIDGID com www RIDGID eu RIDGID RIDGID rtctechservices emerson com 800 519 3...

Страница 25: ...ekomradaproizvodastvarajusevelikesilekojemogudovestido pucanjaililetadijelovaiuzrokovanjaozljede Odmaknitesedovoljno tijekom kori tenja i koristite za titnu opremu uklju uju i za titu za o i Nikad ne...

Страница 26: ...erijala koji ete probijati Provjerite da po stoji jedinstvena debljina materijala koji e se bu iti Utvrdite veli inu rupe koju elite probu iti Odaberite odgovaraju e set po njegovim specifikacijama 2...

Страница 27: ...ni podatki Debelinamateriala Plavljenojeklo debelinado10 0 135 3 4mm Nerjavno jeklo debelina do 16 0 06 1 5 mm Maks Premer ila 2 5 63 5 mm plavljeno jeklo debelina 10 Navoj izvle nega vijaka 3 4 19 0...

Страница 28: ...OVA UPUTSTVA Tokom radnog ciklusa uvajte svoje prste i ruke dalje od glave probojca Prsti ili ake vam mogu biti zgnje eni polomljeni ili odse eni ako se na u izme u kalupa probojca ili komponenti i n...

Страница 29: ...robojcasaalata navijterukomodgovaraju i pomi ni zavrtanj u glavu probojca Da bi rad bio ispravan navoj mora biti potpuno obuhva en 5 Postavite potrebne podlo ke preko pomi nog zavrtnja a zatim kalup p...

Страница 30: ...RIDGID com www RIDGID ru RIDGID RIDGID rtctechservices emerson com 800 519 3456 RIDGID PH 60B 3 4 19 0 16 UNF RIDGID ILSCO 360 RIDGID QuickChange System QCS QCS 1 PH 60B 10 0 135 3 4 16 0 06 1 5 2 5 6...

Страница 31: ...opraklanan delinen veya ba ka herhangi bir ekilde uyarlanan bir kafa kullan m s ras nda k r labilir Sadece bu talimatlarda belirtilen bile enleri de i tirin Yaralanma riskini azaltmak i in hasarl kafa...

Страница 32: ...du undan emin olun 3 Delik konumunu i aretleyin ve gerekirse ekme c vatas ndan biraz daha b y k bir pilot delik delin 4 Z mba Kafas aletten kar lm ekilde uygun ekme c vatas n elle s karak Z mba Kafas...

Страница 33: ...GID RIDGID www RIDGID com www RIDGID eu RIDGID rtctechservices emerson com 800 519 3456 RIDGID PH 60B 3 4 19 0 16 UNF RIDGID ILSCO RIDGID QuickChange System QCS 360 QCS 1 PH 60B 10 0 135 3 4 16 0 06 1...

Страница 34: ...PH 60B Punch Head Instructions 34 1 2 3 4 5 6 2 7 8 QCS QCS 9 10 23478 w 1 2 3 4 1 11 4 11 2 2 23492 w 21 2 3 31 2 4 44133 w M 16 20 25 32 40 2 3...

Страница 35: ...erisamsvarmedEuropar detsdirektivomelektromagnetiskkompatibilitet2004 108 EC somret tersegetterf lgendestandarder EN61326 1 2006 EN61326 2 1 2006 CE vastaavuus T m laite on s hk magneettista yhteensop...

Страница 36: ...PH 60B Punch Head Instructions...

Отзывы: