TABLE OF CONTENTS
Lead-Free Solder............................................................................................................................................1
Prevention of Physical Injury..........................................................................................................................1
Observance of Electrical Safety Standards................................................................................................. 1
Safety and Ecological Notes for Disposal................................................................................................... 2
General Specifications...................................................................................................................................5
Compatible Mode..........................................................................................................................................7
VGA Analog- Analog RGB Compatible..............................................................................................7
Input Signal for HDMI/DVI-D.............................................................................................................. 9
Equipment Needed..........................................................................................................................................11
Part Replacement..............................................................................................................................................12
Lamp Cover and Lamp Module..................................................................................................................12
Top Cover (with Zoom Lever and Keypad Rubber)..................................................................................14
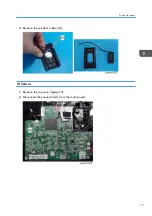
Speaker........................................................................................................................................................ 15
IR Sensor.......................................................................................................................................................17
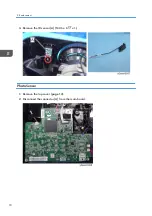
Photo Sensor.................................................................................................................................................18
Main Board Unit (with RS-232C Connector and Shielding Bracket)......................................................19
Lamp Housing Unit (with Thermal Switch, Fan and Interlock Switch)......................................................22
Engine module (with Color Wheel Modules, Focus Ring and Lens)....................................................... 27
PSU (with Insulating Sheet and Bottom Shield Plate)................................................................................30
I/O Cover.................................................................................................................................................... 34
Adjustable Feet.............................................................................................................................................35
Required Action after Replacing Parts............................................................................................................37
Test Conditions................................................................................................................................................. 38
Waveform Download and Fan RPM Calibration..........................................................................................39
ADC Calibration...............................................................................................................................................40
3
Содержание Mira-PJ1
Страница 2: ......
Страница 15: ...3 Loosen a screw on the lamp module A M3 5 x8 5 x1 4 Disconnect the plug A x1 Part Replacement 13 ...
Страница 18: ...2 Disconnect the connector A from the main board 3 Remove the speaker A 2 Replacement 16 ...
Страница 26: ...6 Remove the lamp housing A 2 Replacement 24 ...
Страница 30: ...5 Remove screws M2 6 x8 x4 M2 6 x6 x2 6 Remove engine module A 2 Replacement 28 ...
Страница 37: ...Adjustable Feet 1 Remove the adjustable feet Part Replacement 35 ...
Страница 38: ...2 Replacement 36 ...
Страница 46: ...7 Choose Exit and then press Enter to exit 3 Adjustment 44 ...
Страница 48: ...3 Adjustment 46 ...
Страница 57: ...4 Click Next 5 Click Next System Firmware Update 55 ...
Страница 58: ...6 Click Next 7 The program is in installing status 8 Click Finish 5 Firmware Update 56 ...
Страница 60: ...2 Select Jungo WinDriver WinXP then click install 3 Click Next 5 Firmware Update 58 ...
Страница 67: ...System Firmware Update 65 ...
Страница 68: ...MEMO 66 ...
Страница 69: ...MEMO 67 ...
Страница 70: ...MEMO 68 EN ...


