

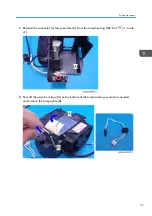


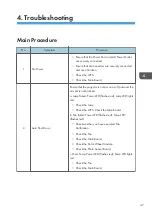

11.
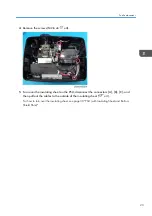
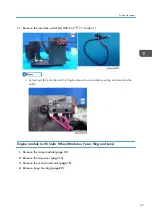
Peel off the insulating sheet, which is fixed with an adhesive, from the bottom shield
plate.
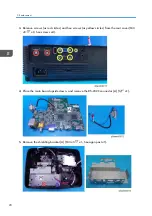
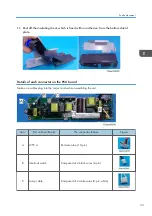
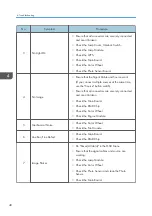
Details of each connector on the PSU board
Make sure cables plug into the correct ports when assembling the unit.
Item
Port on Main Board
The connector feature
Figure
A
LVPS A
Red wire tube (10-pin)
B
Interlock switch
Composed of 2 black wires (2-pin)
C
Lamp cable
Composed of 2 white wires (2-pin, white)
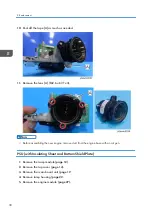
Part Replacement
33
Содержание Mira-PJ1
Страница 2: ......
Страница 15: ...3 Loosen a screw on the lamp module A M3 5 x8 5 x1 4 Disconnect the plug A x1 Part Replacement 13 ...
Страница 18: ...2 Disconnect the connector A from the main board 3 Remove the speaker A 2 Replacement 16 ...
Страница 26: ...6 Remove the lamp housing A 2 Replacement 24 ...
Страница 30: ...5 Remove screws M2 6 x8 x4 M2 6 x6 x2 6 Remove engine module A 2 Replacement 28 ...
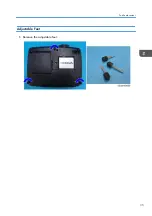
Страница 37: ...Adjustable Feet 1 Remove the adjustable feet Part Replacement 35 ...
Страница 38: ...2 Replacement 36 ...
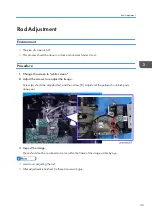
Страница 46: ...7 Choose Exit and then press Enter to exit 3 Adjustment 44 ...
Страница 48: ...3 Adjustment 46 ...
Страница 57: ...4 Click Next 5 Click Next System Firmware Update 55 ...
Страница 58: ...6 Click Next 7 The program is in installing status 8 Click Finish 5 Firmware Update 56 ...
Страница 60: ...2 Select Jungo WinDriver WinXP then click install 3 Click Next 5 Firmware Update 58 ...
Страница 67: ...System Firmware Update 65 ...
Страница 68: ...MEMO 66 ...
Страница 69: ...MEMO 67 ...
Страница 70: ...MEMO 68 EN ...


