Part Replacement
• Before you start: This process is protective level II. Operators should wear electrostatic chains.
• If you need to replace the main board, you have to get into service mode and record the LED
usage hours (page 43 "Re-write Lamp Hours Usage").
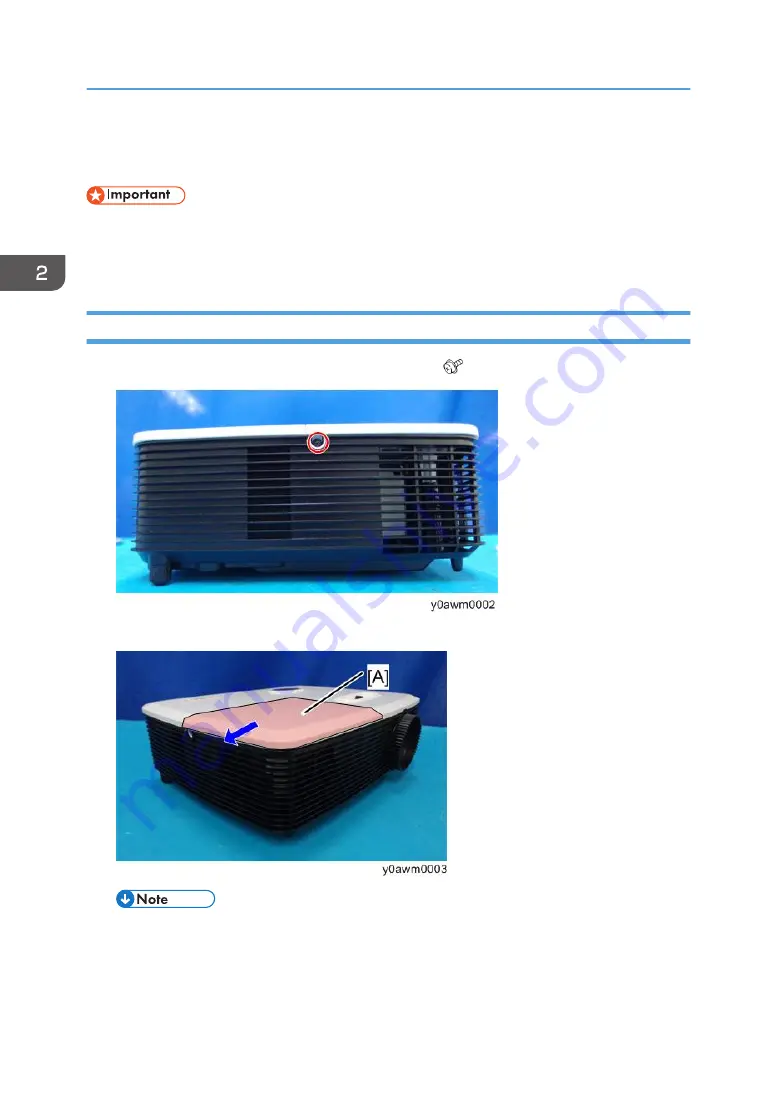
Lamp Cover and Lamp Module
1.
Loosen a screw on the left side of the unit (M3 x8.5 x1).
2.
Slide and remove the lamp cover [A].
• If the lamp cover is difficult to slide, insert a flathead precision screwdriver into the gap to slide
the cover.
2. Replacement
12
Содержание Mira-PJ1
Страница 2: ......
Страница 15: ...3 Loosen a screw on the lamp module A M3 5 x8 5 x1 4 Disconnect the plug A x1 Part Replacement 13 ...
Страница 18: ...2 Disconnect the connector A from the main board 3 Remove the speaker A 2 Replacement 16 ...
Страница 26: ...6 Remove the lamp housing A 2 Replacement 24 ...
Страница 30: ...5 Remove screws M2 6 x8 x4 M2 6 x6 x2 6 Remove engine module A 2 Replacement 28 ...
Страница 37: ...Adjustable Feet 1 Remove the adjustable feet Part Replacement 35 ...
Страница 38: ...2 Replacement 36 ...
Страница 46: ...7 Choose Exit and then press Enter to exit 3 Adjustment 44 ...
Страница 48: ...3 Adjustment 46 ...
Страница 57: ...4 Click Next 5 Click Next System Firmware Update 55 ...
Страница 58: ...6 Click Next 7 The program is in installing status 8 Click Finish 5 Firmware Update 56 ...
Страница 60: ...2 Select Jungo WinDriver WinXP then click install 3 Click Next 5 Firmware Update 58 ...
Страница 67: ...System Firmware Update 65 ...
Страница 68: ...MEMO 66 ...
Страница 69: ...MEMO 67 ...
Страница 70: ...MEMO 68 EN ...


