


3. Adjustment
Required Action after Replacing Parts
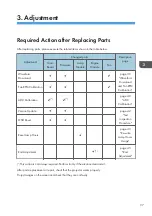
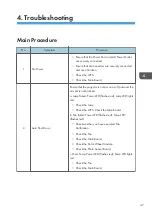
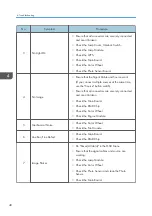
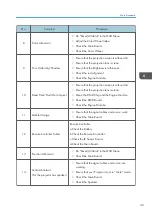
After replacing parts, please execute the related items shown in the table below.
Adjustment
Changed parts
Description
page
Main
Board
Firmware
Lamp
Module
Engine
Module
Fan
Waveform
Download
Fan RPM Calibration
ADC Calibration
(*)
(*)
Version Update
OSD Reset
Reset Lamp Hours
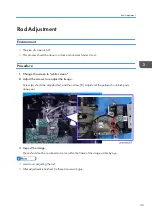
Rod Adjustment
(*)
(*)
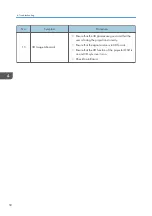
This action is not always required. Perform it only if the situation demands it.
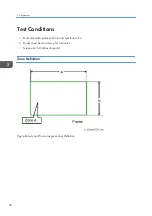
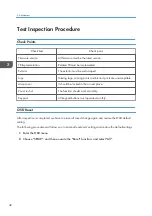
After parts replacement or repair, check that the projector works properly.
Project images on the screen and check that they are not faulty.
37
Содержание Mira-PJ1
Страница 2: ......
Страница 15: ...3 Loosen a screw on the lamp module A M3 5 x8 5 x1 4 Disconnect the plug A x1 Part Replacement 13 ...
Страница 18: ...2 Disconnect the connector A from the main board 3 Remove the speaker A 2 Replacement 16 ...
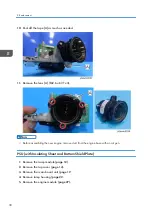
Страница 26: ...6 Remove the lamp housing A 2 Replacement 24 ...
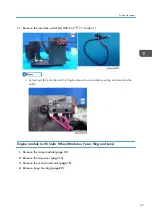
Страница 30: ...5 Remove screws M2 6 x8 x4 M2 6 x6 x2 6 Remove engine module A 2 Replacement 28 ...
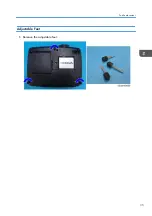
Страница 37: ...Adjustable Feet 1 Remove the adjustable feet Part Replacement 35 ...
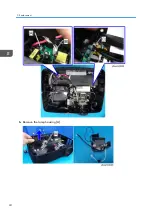
Страница 38: ...2 Replacement 36 ...
Страница 46: ...7 Choose Exit and then press Enter to exit 3 Adjustment 44 ...
Страница 48: ...3 Adjustment 46 ...
Страница 57: ...4 Click Next 5 Click Next System Firmware Update 55 ...
Страница 58: ...6 Click Next 7 The program is in installing status 8 Click Finish 5 Firmware Update 56 ...
Страница 60: ...2 Select Jungo WinDriver WinXP then click install 3 Click Next 5 Firmware Update 58 ...
Страница 67: ...System Firmware Update 65 ...
Страница 68: ...MEMO 66 ...
Страница 69: ...MEMO 67 ...
Страница 70: ...MEMO 68 EN ...


