2 SafeCom Go Ricoh
D60703-16
41
2.8.12
Enable Send to Fax
SafeCom Go Ricoh comes with its own intuitive
Send to Fax
function (3.1.6).
Note:
The SafeCom Go Send to Fax function is a LAN Fax-server solution. If you
want to use the built-in phone line solution, then you must disable
Counting
control
for the
Facsimile
function (2.8.10).
1.
Open the
Configuration
web page (2.7.3).
2.
Check
Send to Fax
in
MFP authentication
.
3.
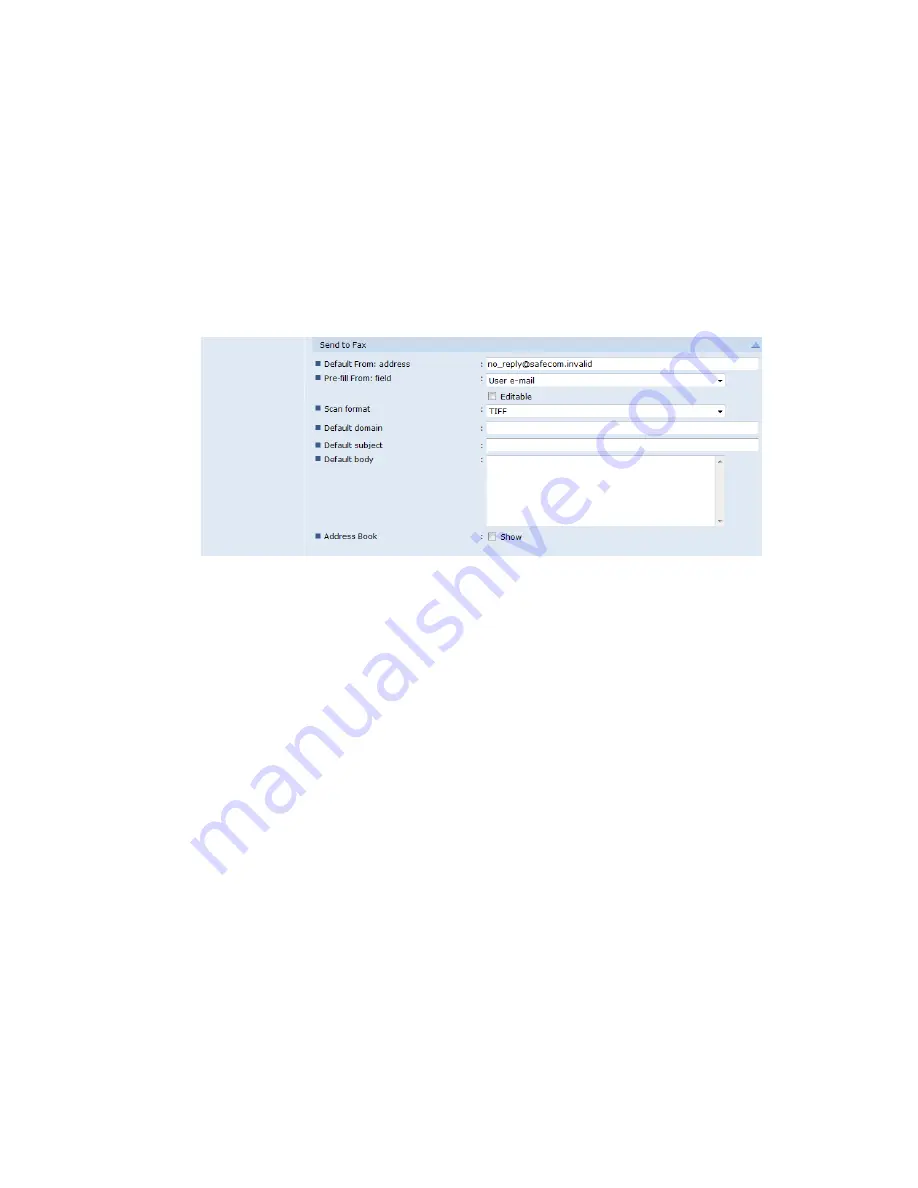
Make your selections in the
Send to Fax
section.
4.
Click
Apply
.
By default the
From:
field is not
Editable
and can be pre-filled with
User e-
,
Device name
,
Blank
or
Default From: address
.
A fax sent with pre-filled
User e-mail
of the user John Smith with the e-mail
address [email protected] will appear as:
From: [email protected]
Default From: address:
Use if the user does not have an e-mail address. If this
is not configured then [email protected] is used. A fax sent from pre-
filled
Device name
MP 2550 will appear as:
From: MP 2550 <[email protected]>
where [email protected] is replaced with the what is specified in
Default From: address
.
Scan format
should
specify whether scanning is in
TIFF
or
format.
Default domain
is the optional fax domain that is appended if no @ character is
found in the text entered in the
To:
field. For example, the software will
automatically expand the phone number ‗12345667‘ to ‗[email protected]‘
if the specified default domain is safecom.eu.
Default subject
is for
optional fax subject text.
Default body
is for optional text for the body of the fax.


