FM
MW
SW
Loop
Time
Band
FM
SW
MW
KHz
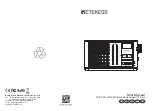
FM/MW/SW 3-Band Radio Support TF Card TR613
Tune
VOL
OFF
Thank you for purchasing Retekess TR613 3-band radio. Please read the manual thoroughly
before operating and keep it in a safe place for future reference.
Precautions
1. Please remove the battery when the radio is not to be used for a long time, store it
separately, and remember to charge it once a month
2. Do not use this product near water and moisture, for example: near a bathtub, washbowl,
kitchen sink or laundry tub; in a wet basement; or near a swimming pool.
3. Do not use the radio near any heat sources such as radiators, heat registers, stoves, or
other apparatus (including amplifiers) that produce heat.
4. Do not put the product on a bed, sofa, rug, or other similar surfaces to prevent the vents
from being blocked.
5. Do not spill or spray any type of liquid on the product. Do not allow any solid or liquid enter
the radio from the vents.
6. Do not disassemble, repair, remodel or drop the radio arbitrarily.
7. Do not expose the battery to excessive heat environments (such as direct sunlight, open
flames or similar environments)
Location of parts and controls
1
7
8
14
18
3
4
5
6
17
15
16
9 10
12
11
13
2
1. Telescopic antenna
2. Battery compartment
3. Hand strap hole
4. Headphone jack
5. TF card slot
6. DC 5V power port
7. Frequency indicator
8. LCD display
9. Play/Pause/Loop (long press)
10. Previous song (long press and hold -10 song)
11. Band
12. Next song (long press and hold +10 song)
13. Menu (function selector, long press to set the time)
14. SW indicator
15. MW indicator
16. FM indicator
17. Tuning Knob
18. Volume/Power on/off
Precautions
Power Supply
Operating on battery:
Slide and open the battery compartment lid (2). Insert the battery with
correct polarity in the battery compartment. Close the battery compartment lid.
Charging:
You need to charge the battery when the battery icon flashes. Using the USB
cable that included in the package, connect the AC power adaptor securely to the DC 5V jack to
start charging, the battery icon will flashes while charging, and the flashes will be stopped
and stay at after the battery is fully charged.
When you need to read the data from TF card on computer, please turn on the radio, insert the
TF card to the TF card slot and connect the radio to the PC with a date line.
NOTE:
1. Improper replacement of the battery will cause explosion hazard. Only the same type or
equivalent type can be used.
2. Do not bend or twist the power cord forcibly. Do not place heavy objects on the power cord.
3. Always hold the plug when disconnecting the power cord. Do not pull the cord itself.
4. Disconnect the AC power adaptor from the wall outlet and radio when the unit is not to be
used for a long period of time.
Operations
1. Slide the Power on/off button (18) to ON position to turn on the radio
2. Press the M button (13) repeatedly to select Radio function
3. Slide the Band button (11) to FM, MW or SW band position as desire
4. Tuning the Tune knob (17) to select desired station.
5. Slide the Volume Control Knob (18) to adjust volume level as desired.
To improve reception
FM reception:
Extend the telescopic antenna (1), and adjust the direction and angle.
MW reception:
Retract the telescopic antenna and rotate the unit to reorient the built-in
ferrite bar antenna
SW reception:
Fully extend the telescopic antenna vertically.
For SW reception, you can enjoy even better reception by using an external
antenna
TF Card Operation
1. Slide the Power on/off button (18) to ON position to turn on the radio
2. Press the M button (13) repeatedly to select TF Card function
3. Insert the TF card which with MP3 or WMA format audios into the TF card slot (5), the audio
will be played automatically in few seconds. And the tracks will appear on the LCD display.
4. Press (10) or (12) buttons to select desired track. Long press and hold the or
buttons could fast select desired track by -10 or +10 tracks.
1
2
3
5
4
1. Play/Pause indicator
2. TF card indicator
3. flashes when on the single loop mode
always on when on the all loop mode
4. Battery indicator
5. Time display when playing track
Tracking number display before playing track (last 2s)
1
2


