Revision 2.6
Page 18 of 53
Intuitive Mercury 6-5M Controller with TDB
www.resourcedm.com
Warning
Please Note
The specifications of the product detailed on this
Set-Up Guide may change without notice. RDM
Ltd. shall not be liable for errors or for incidental
or consequential damages, directly and indirectly,
in connection with the furnishing, performance or
misuse of this product or document.
Ensure that all power is
switched off before
installing or maintaining
this product
Communicating with the controller and gaining access to the
controller’s web page can be done in three ways;
1.
Setting up a WiFi access point with SSID and passcode
‘RDMInstall’ / RDMInstall’ and using the default settings of
the controller.
2.
Temporarily using an Ethernet board in the intuitive
controller to first connect to a wired IP network.
3.
Temporarily using an RS232 communication board to
connect serially to a PC running the Communicator software
The
addressing mode, the ID and the IP address can also be viewed or configured through the ‘
net
’ menu of the controller via the controller
display, but only when the WiFi comms board is plugged in.
Note:
The WiFi key ca
n only be entered through the controller’s web pages.
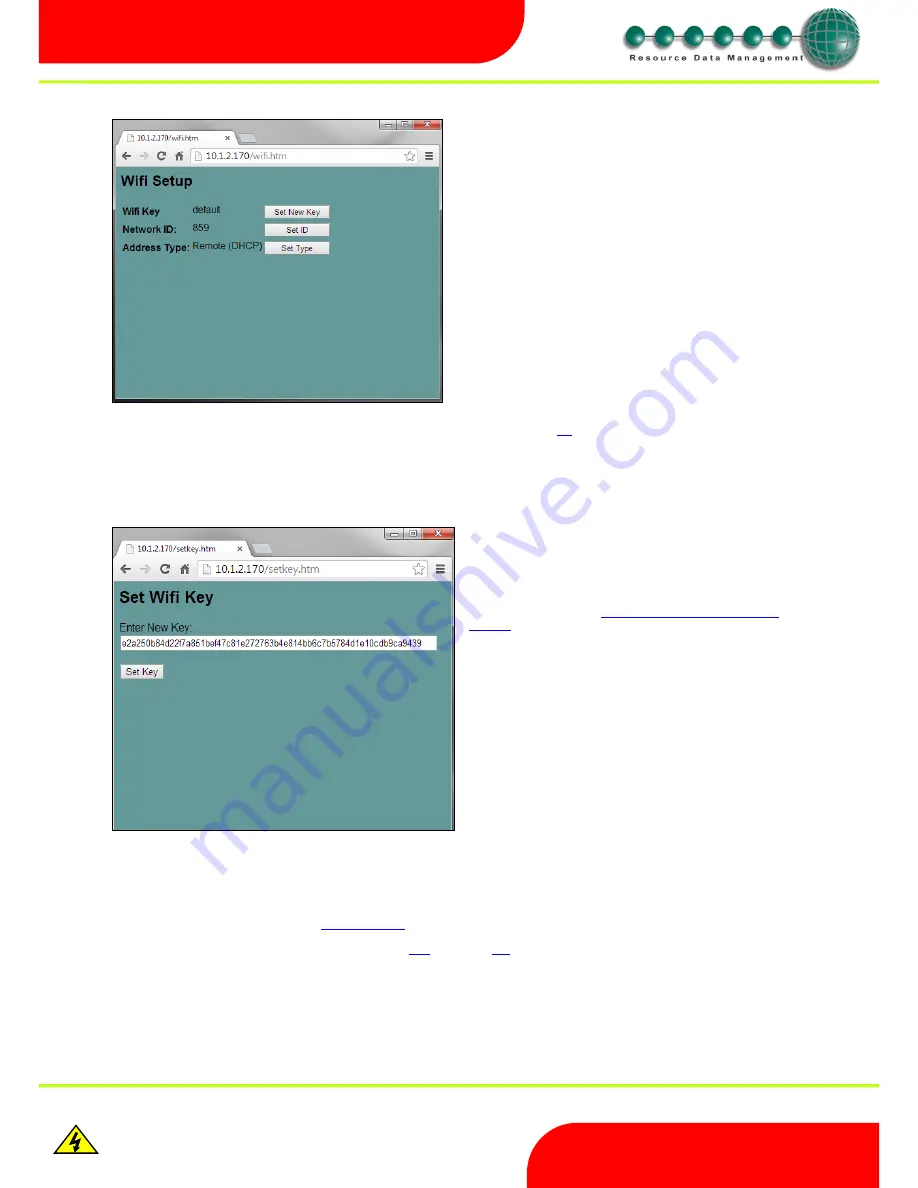
WiFi Key
The Wifi key that is set into the intuitive controller is a single 64
digit hex key. This key is a coded combination of the WifFi
network SSID and the passphrase. The key can be calculated/
generated using a specific WPA PSK generator. One such
generator can be found at
http://www.wireshark.org/tools/wpa-
psk.html
although there are other such sites. This type of
generator uses the SSID and passphrase to generate the required
64 digit key by the controller. The key should be copied and
pasted into the Intuitive controller’s settings.
Once the WiFi key is set, it is no longer visible for security
reasons. The WiFi field within the
setup page will show ‘set’ rather
than ‘default’ when the key has been set.
Wireless Net menu
When a WiFi communications board is connected to the Intuitive controller, the ‘Net’ menu on the display is extended to allow configuration. The
net menu options will now be;
IP-r (or IP-L)
Same as existing
IP network menu
. Allowing to view and set (if local) of IP address
Id
3 digit setting
– replacing the three rotary switches on the Ethernet board.
AtYP
Set the address type
– either local (
IP-L
) or remote (
IP-r
).
Stat
Shows the status of the WiFi key
– either default (dFLt) or set (Set)
dFLt
Allows the WiFi key to be set back to default (RDMInstall / RDMInstall)
Wireless Network Card LED operation
The LED within the card is capable of showing red or green.
Blinking green:
Healthy with data transfer
Red / green:
Attempting to log on to a network


