Chapter 4
360
Plus
Option
41
T
AKING YOUR
360
X
360
IMAGES
•
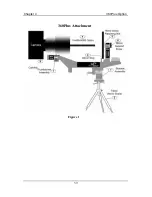
Use the bubble level (3) to set the lens mount to a level
position.
•
Make sure the spring plunger (11) is engaged in a hole in
the cylinder (12) of the 360
Plus
bracket assembly (1).
•
Use the camera timer and take your first picture. Use the
timer delay to remove yourself from the shot.
•
Pull the spring plunger (11) back, using the Thumb Rest
(10) to make this action smooth and gentle.
Be very
careful that you do not move the tripod during this
process.
•
With the spring plunger withdrawn, rotate the 360
Plus
bracket assembly (1) clockwise, release the trigger and
rotate until the trigger snaps into place in the second
hole of the cylinder. Repeat this process until you have
all four images. See figure below.
Содержание OneShot360
Страница 2: ......
Страница 45: ...Chapter 4 360Plus Option 39 360Plus Attachment Figure 1 ...
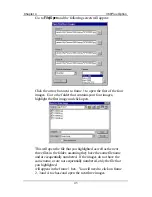
Страница 50: ...Chapter 4 360Plus Option 44 Start by clicking on the OneShot360 Plus mode option in the screen below ...
Страница 60: ......


