D5
Lamp house 10
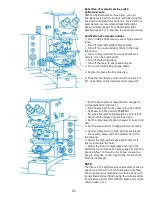
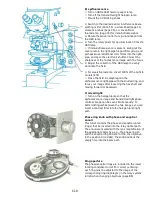
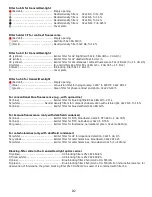
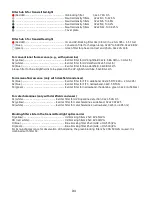
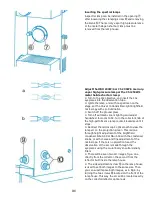
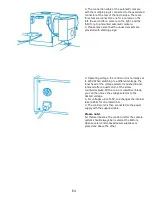
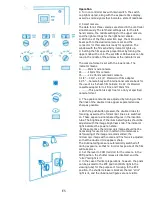
The lamp house 10 houses the 100W low-voltage halogen
bulb.
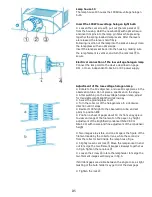
Insert the 100W low voltage halogen light bulb
⚫ Loosen the cam screw
➂
, pull out the lamp socket
➀
from the housing. Hold the new bulb
➃
with optical tissue,
and insert its pins into the lamp pin holes while pressing
together the spring-loaded clamp levers. After the levers
are released, the lamp is held firmly.
Following insertion of the lamp into the socket, always clean
the lamp glass with an optical wipe.
Insert the lamp socket back into the housing, making sure
the lamp filament is vertical, and turn the cam lock
➂
to
secure.
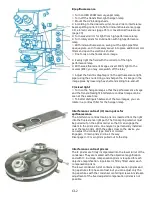
Electrical connection of the low voltage halogen lamp
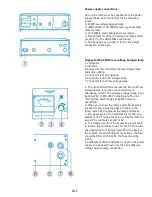
Connect the lamp cord to the device described on page
D11, or to an independent 0-12v AC or DC power supply.
Adjustment of the low-voltage halogen lamp
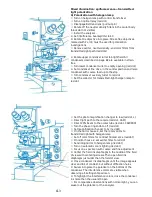
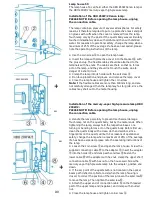
⚫ Rotate to the 10x objective, and use 10x eyepieces in the
observation tube. Do not place a specimen on the stage
⚫ After switching on the low-voltage halogen lamp, adjust
for transmitted-light brightfield microscopy
⚫ Swivel the ground-glass to off
⚫ Turn the collector of the halogen lamp In a clockwise
direction until it stops.
⚫ Redirect 100% light to the observation tube, and set
prism to position EYE
⚫ Position a sheet of paper about 10 cm from an eyepiece
to view an image of the filament on the paper, by height
adjustment of the brightfield condenser (NA=0.90 or
NA=1.30) with coarse and fine adjustment of the condenser
height
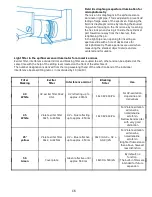
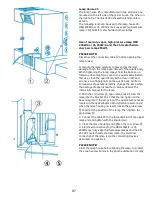
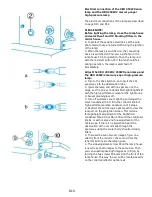
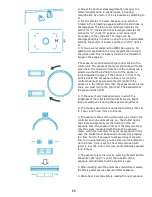
⚫ Two images are visible, and one image is the figure of the
filament made by the collector lens, while the second is
from the reflector built inside the lamp house, Fig.a
⚫ Slightly loosen cam lock
➂
. Move the lamp socket in and
out to merge the two filament images sideways together as
in Fig.b. Tighten the cam-lock
➂
⚫ Loosen the screw
➁
, rotate the lampholder to merge the
two filament images vertically as in Fig.b.
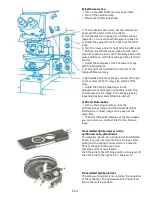
If still dark gaps are visible between the single coils, a slight
twisting of the bulb holder may get rid of the dark gaps
⚫ Tighten the lock
➁
Содержание Univar
Страница 1: ...Reichert Univar Manual...
Страница 2: ......
Страница 48: ...D6 blank no content...
Страница 58: ...E2 blank no content...

