


Series 1780 Dynamometer User Manual V1.1
Document ID: Q2D4F5
Publish date: 2020-03-06
4.3.1 What’s included
When you purchased the Series 1780 75kgf (SKU#: KURKE), you will receive one motor mount
plate and one optical RPM probe:
Item name
Item SKU
Qty
Located in (SKU# if exist)
Heavy Load Motor mount
XSWU
1
Main Carton Box
Optical RPM Probe V2.2: A
ZZJB
1
Mono Main Board Box (#RHGQ)
Optical Probe Fasteners and
Spacers Kit
JRXA
1
Mono Main Board Box (#RHGQ)
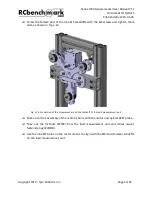
4.3.2 Install your motor onto the motor mount
You will have to prepare your own motor to be tested. Also, you will also need to prepare
your own fasteners to fix the motor with the motor mount.
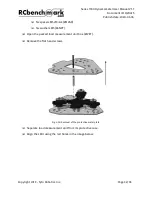
The motor mount plate shown in Fig. 4.25 features several widths of slots for M5, M6, M8 and
M10 screws at a 0, 90, 120, 180, 240 and 270 degrees in a circular pattern:
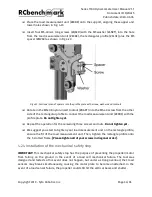
If your motor supports more than one type of mounting points, we always recommend using
the largest possible. For example, your motor has M5 holes at diameter 40mm and M6 holes
at diameter 50mm, it is suggested to use the M6 features at diameter 50mm.
We highly recommend adding washers between the motor plate and the screw heads used to
install your motor.
IMPORTANT!
Tighten all screws for your motor at the time you mount it on the metal plate. You CANNOT
reach these screws while the motor plate is mounted on the load measurement unit.
Copyright 2019 - Tyto Robotics Inc.
Page 38/65


