background image


i

Important Safety Instructions

Important Safety Instructions

1.   Read these instructions.

2.   Keep these instructions.

3.   Heed all warnings.

4.   Follow all instructions.

5.   Do not use this apparatus near water.

6.   Clean only with dry cloth.

7.   Do not block any ventilation openings. Install in accordance with the manufacturer’s instructions.

8.   Do not install near any heat sources such as radiators, heat registers, stoves, or other apparatus (including 

amplifi ers) that produce heat.

9.  Do not defeat the safety purpose of the polarized or grounding-type plug. A polarized plug has two blades with 

one wider than the other. A grounding type plug has two blades and a third grounding prong. The wide blade or 
the third prong is provided for your safety. If the provided plug does not fi t into your outlet, consult an electrician 
for replacement of the obsolete outlet.

10.  Protect the power cord from being walked on or pinched particularly at plugs, convenience receptacles, and the 

point where they exit from the apparatus.

11.  Only use attachments/accessories specifi ed by the manufacturer.

12.  Use only with the cart, stand, tripod, bracket, or table specifi ed by the manufacturer, or sold with the 

apparatus. When a cart is used, use caution when moving the cart/apparatus combination to avoid 
injury from tip-over.

13.  Unplug this apparatus during lightning storms or when unused for long periods of time.

14.  Refer all servicing to qualifi ed service personnel. 


Servicing is required when the apparatus has been damaged in any way, such as power-supply cord or plug is 
damaged, liquid has been spilled or objects have fallen into the apparatus, the apparatus has been exposed to rain 
or moisture, does not operate normally, or has been dropped.

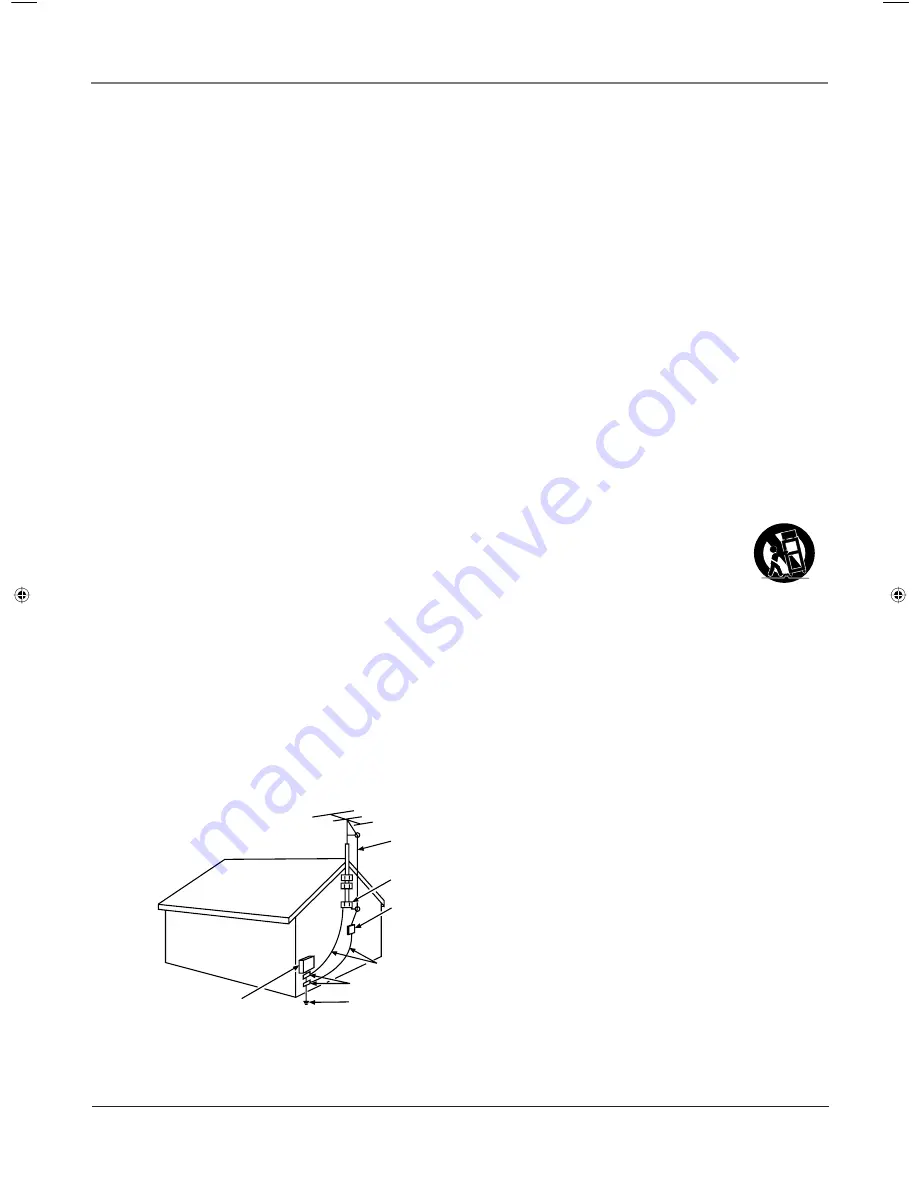
15.  If an outside antenna or cable system is connected to the product, be sure the antenna or cable system is grounded 

so as to provide some protection against voltage surges and built-up static charges. Section 810 of the National 
Electrical Code, ANSI/NFPA No. 70-1984 (Section 54 of Canadian Electrical Code, Part 1) provides information 
with respect to proper grounding of the mast and supporting structure, grounding of the lead-in wire to an 
antenna-discharge unit, size of grounding conductors, location of antenna-discharge unit, connection to grounding 
electrodes, and requirements for the grounding electrode. See following example.

Important Information

A N T E N N A
L E A D   I N
W I R E

G R O U N D   C L A M P

G R O U N D I N G   C O N D U C T O R S
( N E C   S E C T I O N   8 1 0 - 2 1 )

G R O U N D   C L A M P S

P O W E R   S E R V I C E   G R O U N D I N G
E L E C T R O D E   S Y S T E M
( N E C   A R T   2 5 0 ,   P A R T   H )

E L E C T R I C   S E R V I C E
E Q U I P M E N T

A N T E N N A
D I S C H A R G E   U N I T
( N E C   S E C T I O N   8 1 0 - 2 0 )

1652880A.indb   3

1652880A.indb   3

8/22/05   4:15:43 PM

8/22/05   4:15:43 PM

Содержание L26W11

Страница 1: ...rca com Find Inside Connections page 5 MultiTask Audio page 17 Menus page 18 Troubleshooting page 24 LCD User s Guide LCD User s Guide Changing Entertainment Again Changing Entertainment Again ...

Страница 2: ...educed lifetime from overheating To assure adequate ventilation for this product maintain a spacing of 4 inches from the top and sides of the TV receiver and 2 inches from the rear of the TV receiver and other surfaces Also make sure the stand or base you use is of adequate size and strength to prevent the TV from being accidentally tipped over pushed off or pulled off This could cause personal in...

Страница 3: ...rt is used use caution when moving the cart apparatus combination to avoid injury from tip over 13 Unplug this apparatus during lightning storms or when unused for long periods of time 14 Refer all servicing to qualified service personnel Servicing is required when the apparatus has been damaged in any way such as power supply cord or plug is damaged liquid has been spilled or objects have fallen ...

Страница 4: ...This page intentionally left blank ...

Страница 5: ... the Remote 8 Turn on the TV 8 Completing the On Screen Setup 9 Choose the Menu Language 9 Choose the Signal Type 9 Complete Channel Search 9 What to Expect 9 Explanation of Jacks 10 The Buttons on the Remote Control 12 Chapter 2 Using the TV s Features About the Channel Banner 13 Parental Controls 13 US TV Ratings 14 Blocking Specific Content Themes 15 V Chip Movie Rating Limit 15 Blocking Canadi...

Страница 6: ...formation Troubleshooting 24 Care and Cleaning 25 Mounting Your TV to the Wall 26 V Chip Rating Explanations 27 US V Chip Rating System 27 Canadian English V Chip Rating System 27 Canadian French V Chip Rating System 28 Limited Warranty 29 ...

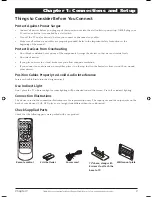
Страница 7: ... sure you allow adequate ventilation If you connect an audio receiver or amplifier place it on the top shelf so the heated air from it won t flow around other devices Position Cables Properly to Avoid Audio Interference Insert each cable firmly into the designated jack Use Indirect Light Don t place the TV where sunlight or room lighting will be directed toward the screen Use soft or indirect ligh...

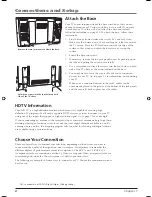
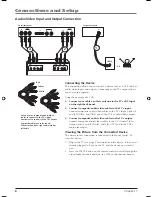
Страница 8: ...at the bottom of the jack panels and the covers fit back in place over the cables HDTV Information Your LCD TV is a high definition monitor which means it is capable of receiving high definition TV programs You ll need a separate HDTV receiver or tuner to connect to your TV using one of the inputs that supports a high resolution signal Go to page 7 for an example If you re connecting an antenna to...

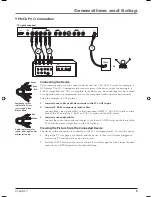
Страница 9: ... composite video we recommend you use the component video input for better quality Using the example of a DVD player 1 Connect your cable or off air antenna to the TV s ANT input 2 Connect Y Pb Pr component video cables Connect three video grade cables to the Component CMPT Y Pb Cb Pr Cr jacks on the back of the TV and to the Y Pb Pr or Y Cb Cr outputs on the DVD player 3 Connect your audio cables...

Страница 10: ...Output jacks L and R AUDIO and VID OUT and to the VCR s audio video input Viewing the Picture from the Connected Device The device in this connection is connected to the Input 3 jacks To view this device 1 Plug in the TV see page 8 for details and the device if they aren t already plugged in Turn on the TV and the device you want to view 2 Press the INPUT button on the remote control to scroll thr...

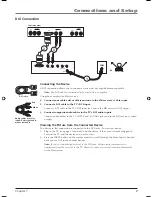
Страница 11: ...tputs Viewing the Picture from the Connected Device The device in this connection is connected to the DVI jacks To view this device 1 Plug in the TV see page 8 for details and the device if they aren t already plugged in Turn on the TV and the device you want to view 2 Press the INPUT button on the remote control to scroll through the Video Input Channels until you see DVI in the channel banner No...

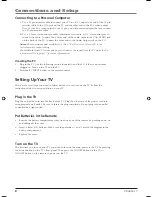
Страница 12: ...e PC 1 Plug in the TV see the following section for details and the PC if they re not already plugged in Turn on the TV and the PC 2 Press the PC INPUT button on the remote control Setting Up Your TV There are several steps you need to follow before you can turn on the TV Follow the instructions below to setup and turn on your TV Plug in the TV Plug the end of the cord into the back of the TV Plug...

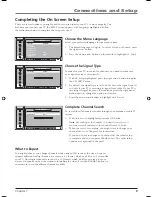
Страница 13: ...CH SETUP menu 2 By default the signal type is set to Cable Leave the signal type set to Cable if your TV is receiving its signal from cable If your TV is receiving its signal from an off air antenna press the right arrow button again to change the option to Antenna 3 Press the down arrow button to highlight Auto Search Complete Channel Search To search for all channels viewable through your antenn...

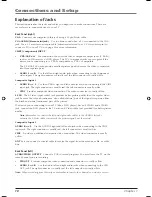
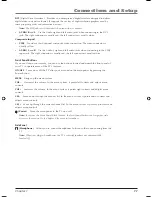
Страница 14: ...deo connection The video connector is usually yellow S VID The S Video super video jack provides better picture quality than the regular video jack because the color chrominance also called chroma part of the signal is separated from the black and white luminance part of the picture If a device you re connecting to your TV like a DVD player has an S VIDEO and a VIDEO jack connect the DVD player to...

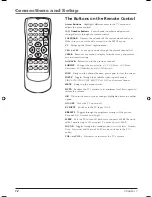
Страница 15: ...you can use the buttons located underneath the front panel of your TV to operate many of the TV s features ON OFF Turns on or off the TV after you ve turned on the main power by pressing the Power button MENU Brings up the menu system VOL Decreases the volume In the menu system it points left to items and adjusts menu controls VOL Increases the volume In the menu system it points right to items an...

Страница 16: ...l banner press again to clear the screen INPUT Toggles through the available video input channels VID1 S VID VID2 VID3 CMPT VGA DVI and current channel MENU Brings up the menu system MUTE Reduces the TV s volume to its minimum level Press again to restore the volume OK When in the menu system changes highlighted items to another option ON OFF Turns the TV on and off PC INPUT Switches to the PC Inp...

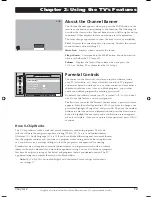
Страница 17: ...rst time you enter the Parental Control menu a password screen appears Enter the default password 1111 If you want to change your password highlight Change Pwd and press OK Then use the number buttons to enter the on screen information and press the down arrow button to highlight the next entry and a confirmation screen appears when it s complete Once you ve entered your password press OK to conti...

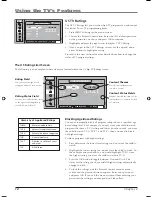
Страница 18: ...Press the OK button to toggle between View and Block The status for the rating you chose and all higher ratings automatically change to Block 4 To lock the settings exit the Parental Control menu or menu system and the password screen appears Enter your password and press OK If you exit the menu system without entering your password the settings you changed won t take effect NAVIGATE VIEW BLOCK OK...

Страница 19: ...arrow button to highlight a particular content theme 4 Press the OK button to change its status to the lock icon or block In the example to the left you block the language L corresponding with TV 14 Notes Broadcasters are not required to provide content themes or age based ratings 5 Lock the settings as described above or the changes won t take effect To view content themes after you ve locked the...

Страница 20: ...sh and French V Chip by ratings only When you block a particular rating you automatically block the higher rated programs as well To block Canadian English and French program ratings 1 Press the MENU button and select the Parental Control icon 2 Highlight CA English Ratings or CA French Ratings and press OK 3 Determine the rating you want to block 4 Press the down arrow button to scroll to the rat...

Страница 21: ...lable by using the remote control MultiTask Audio The MultiTask Audio feature allows you to listen to the sound from the TV while the PC is connected Tune to the program on the TV you want to listen to Switch to the PC input by pressing the PC INPUT button on the remote Press the SOUND button to hear the program s audio Press SOUND again to turn off the program s audio To listen to a different pro...

Страница 22: ...fferent icon Descriptions of each menu are discussed in the order the icons appear If a PC is connected to the TV press the PC INPUT button on the remote to display the VGA Input Then press the MENU button to display the specific PC menus Exiting a menu There are two ways to exit a menu Press MENU until on screen menus disappear Press CLEAR The on screen displays are cleared from the screen and yo...

Страница 23: ... of the picture Contrast Adjusts the difference between the light and dark areas of the picture Saturation Adjusts the richness of color Sharpness Adjusts the crispness of the edges in the picture Tint Adjusts the balance between the red and green levels Backlight Press the right arrow button to adjust the level of light depending on room lighting Color Warmth Automatically adjusts the color tempe...

Страница 24: ...Equalizer SOUND MAIN MENU NAVIGATE ADJUST MAIN MENU MENU Brightness 50 Contrast 50 Backlight 50 Color Warmth Cool Picture Preset Soft PICTURE MAIN MENU WOW SRS and symbol are trademarks of SRS Labs Inc WOW technology is incorporated under license from the SRS Labs Inc Sound Mode Press the right arrow button to scroll through the available audio types which control the way the sound comes through y...

Страница 25: ...o set the TV to turn off at a specific time Time Lets you set the time If it is 8 25 for example you must first press the number 0 on the remote then number 8 then 2 and then 5 Press the OK button to choose between am and pm To reset the time press the left or right arrow Wake Up Timer Lets you set the TV to turn itself on Choose Once Daily or None Wake Up Time Lets you set the time you want the T...

Страница 26: ...st Labels Allows you to enter channels you want to delete or add to your channel list Ch No Channel number Use the number or arrow buttons to enter the channel number To enter a one digit channel enter two zeros first To enter a two digit channel enter one zero first For example if you want to add channel 7 to your list press the number 0 0 then press 7 Ch Label Allows you to add a six character l...

Страница 27: ... area CC Displays information at any position on the screen It overlays the text on top of the picture as it is received Text Displays information at one particular position such as the bottom third on the screen You cannot see the picture underneath the text Choose between these closed caption modes or sources CC1 and Text1 are the primary caption and text services The captioning or text is displ...

Страница 28: ...ait 30 seconds and then turn on again If this happens frequently the voltage in your house may be abnormally high or low Unplug TV Wait five minutes Plug it in again Blank screen Make sure the device connected to the TV is turned on Try another channel You might be tuned to another video input channel Press INPUT until you tune to the TV input Sound problems picture okay Maybe the sound is muted T...

Страница 29: ... Parental Controls menu The V Chip won t let me watch a program even though it s not rated as violent Maybe the movie was given an NR Not Rated status After you block movie ratings you must unlock NR separately in order to view movies with an NR rating Care and Cleaning CAUTION Turn OFF your TV before cleaning You can clean the TV as required using a soft lint free cloth Be sure to occasionally du...

Страница 30: ... to hold the TV B Remove the two jack panel covers by pushing up on the tabs and pulling the covers out carefully C Use a screwdriver to remove the screws from the four holes on each side of the TV s base as the arrows indicate on the base 2 Make sure all devices are already connected then put the covers back into place over the jack panels 3 Locate the wall mount plate 4 Hold the plate so the pri...

Страница 31: ...ence Guidelines May contain violence integral to the development of the plot character or theme intended for adult audiences Other Content Guidelines May contain graphic language and explicit portrayals of nudity and or sex 14 Viewers 14 and over Programming contains themes or content which may not be suitable for viewers under the age of 14 Parents are strongly cautioned to exercise discretion in...

Страница 32: ...tains frequent scenes of violence or intensely violent scenes 13 ans Viewers 13 and over Programming may not be suitable for children under the age of 13 This program either contains several violent scenes or one or more scenes that are violent enough to affect them Viewing in the company of an adult is therefore strongly recommended for children under the age of 13 8 ans Viewers 8 and over Not re...

Страница 33: ...ed outside the U S A Shipping damage if the unit was not packed and shipped in the manner prescribed by TTE Technology Inc Customer Instruction Your Owner s Manual describes how to install adjust and operate your unit Any additional information should be obtained from your dealer Product Registration Please complete and mail the Product Registration Card packed with your TV or register on line at ...

Страница 34: ...t apply to you This warranty gives you specific legal rights and you also may have other rights that vary from state to state If you purchased your product outside the United States This warranty does not apply See your dealer for warranty information Service calls which do not involve defective materials or workmanship are not covered by this warranty Costs of such service calls are the sole resp...

Страница 35: ...This page intentionally left blank ...

Страница 36: ...allation This equipment generates uses and can radiate radio frequency energy and if not installed and used in accordance with the instructions may cause harmful interference to radio communications However there is no guarantee that interference will not occur in a particular installation If this equipment does cause harmful interference to radio or television reception which can be determined by...

Отзывы: