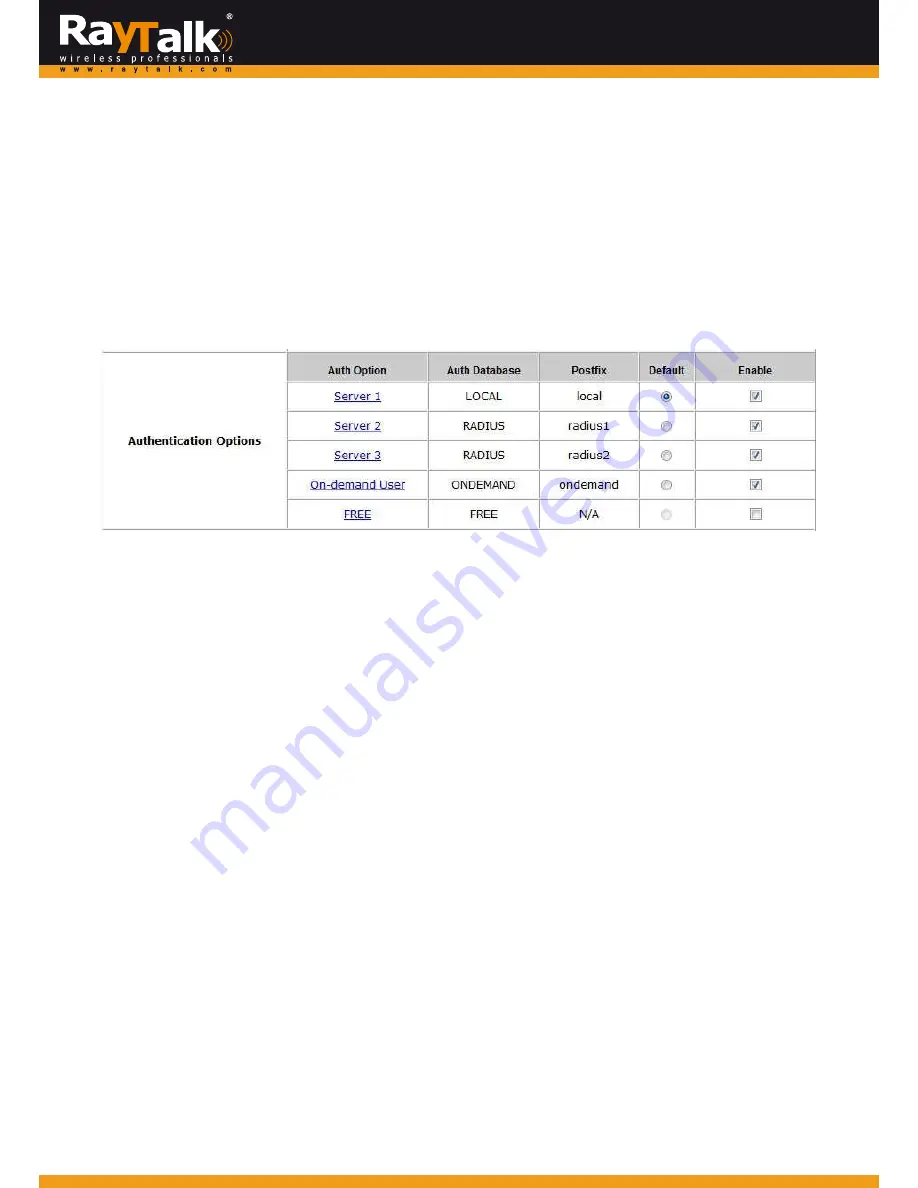
5.2
User
Login
5.2.1
Default
Authentication
There
are
different
types
of
authentication
databases
(LOCAL,
RADIUS
and
ONDEMAND)
that
are
supported
by
the
system.
But
authentication
can
only
be
set
in
the
Public
Zone.
A
postfix
is
used
to
inform
the
system
which
authentication
option
is
to
be
used
for
authenticating
an
account
(e.g.
Bob@local
or
Tim@radius1
etc.)
when
multiple
options
are
concurrently
in
use.
One
of
the
authentication
options
can
be
assigned
as
default.
For
authentication
assigned
as
default,
the
postfix
can
be
omitted.
For
example,
if
"local"
is
the
postfix
of
the
default
option,
then
user
with
username
Bob
can
login
as
"Bob"
without
the
need
to
type
in
"Bob@local”.
5.2.2
Login
with
Postfix
For
each
authentication
option,
set
a
postfix
that
is
easy
to
distinguish
(e.g.
Local)
users
according
to
different
authentication
servers.
The
acceptable
characters
are
numbers
(0~9),
alphabet
(a~z
or
A~Z),
dash
(
‐
),
underline
(_)
and
dot
(.)
within
a
maximum
of
40
characters.
All
other
characters
are
not
allowed.
Beside
the
users
managed
by
Default
Authentication,
all
the
other
ones
with
different
servers
should
log
into
the
system
with
usernames
containing
postfixes
to
identify
which
authentication
option
they
belong
to.
The
postfix
can
be
set
for
each
Authentication
database
by
clicking
the
Auth
Option.
5.2.3
An
Example
of
User
Login
Normally,
users
will
be
authenticated
before
they
get
network
access
through
MiMo
Hot
Spot
Access
Point
Wi
‐
Fi
RayTalk
RA
‐
696.
This
section
presents
the
basic
authentication
process
of
end
users.
Please
make
sure
that
the
MiMo
Hot
Spot
Access
Point
Wi
‐
Fi
RayTalk
RA
‐
696
is
configured
properly
and
the
network
related
settings
are
done.
1.
Connect
a
client
PC
to
Public
Zone
of
MiMo
Hot
Spot
Access
Point
Wi
‐
Fi
RayTalk
RA
‐
696.
Open
an
Internet
browser
and
try
to
connect
to
any
website
(in
this
example,
we
try
to
connect
to
www.google.com).
a)
The
default
user
login
page
will
appear
in
the
browser.
2.
Enter
the
username
and
password
(for
example,
we
use
a
local
user
account:
test@local
here)
and
then
click
Login.
If
the
Remember
Me
checkbox
is
checked,
the
browser
will
store
the
username
and
the
password
on
the
current
computer
in
order
to
automatically
login
to
the
system
at
the
next
login.
Then,
click
the
Login
button.
The
Remaining
button
on
the
User
Login
Page
is
for
on
‐
demand
users
only;
this
is
where
they
can
check
their
Remaining
quota.
3.
Successful!
The
Login
Success
Page
indicates
that
you
are
connected
to
the
network
and
the
Internet
now!
48


