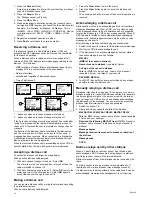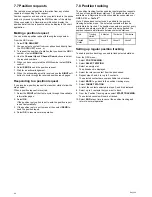
6.12 Changing the transmit power
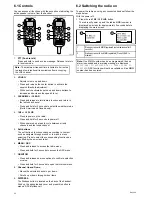
You can change the power level at which the radio transmits at
by following the steps below.
1. Press and release the
MENU / DSC
button to display the
main menu.
2. Select
VHF OPERATION
.
3. Select
HI/LO POWER
.
4. Select the
HI/LO
soft button to switch between high and low
power.
6.13 GPS setup
When connected to a GPS receiver over NMEA 0183 or
SeaTalk
ng
, the radio can display relevant GPS information.
The information that can be displayed is as follows:
• latitude
• longitude
• UTC time
• COG and SOG
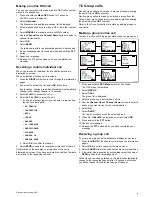
When GPS data is available the GPS satellite icon is displayed
on-screen.
If no GPS data is available then the latitude, longitude and time
can be entered manually so that it can be included in DSC
distress transmissions.
Position data received from other vessels can be sent to and
displayed on a connected Raymarine multifunction display.
No GPS position
If no GPS data is available, after 10 minutes of no data the
GPS icon flashes,
NO POS DATA
and
NO GPS
is displayed on
screen and an audible warning is sounded.
Once the warning has been acknowledged the GPS icon will
continue to flash and
NO GPS
will remain on screen. The
warning will be repeated every 4 hours as long as position data
is still unavailable or has not been entered manually.
If position data has been entered manually but has not been
updated during the previous 4 hours the GPS icon flashes,
POS
DATA OLD
is displayed on screen and an audible warning is
sounded. This warning will be repeated every 4 hours until
position is manually updated or GPS position data becomes
available.
Where no position data is available or has not been manually
updated for 23.5 hours then position data will change to ‘9’s and
time data will change to ‘8’s.
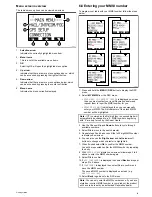
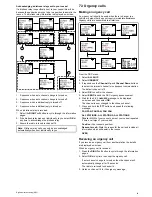
Entering position details manually
If no GPS receiver is present you can manually enter your
position details.
From the main menu:
1. Select
GPS SETUP
.
2. Select
MANUAL POS
.
The Manual position screen requires you to input latitude,
longitude and UTC time.
3. Use the
Channel Up
and
Channel Down
buttons to cycle
through the available characters.
4. Select
OK
to move to the next character.
5. Use the
Right Arrow
and
Left Arrow
soft buttons to highlight
the next or previous character.
6. When the relevant information has been entered select
DONE
to confirm the details.
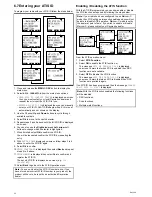
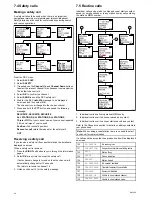
Selecting GPS information to display
on-screen
You can select which GPS information is displayed on-screen.
From the GPS setup menu (
Main menu > GPS SETUP
):
1. Select
SETTING
.
The list of GPS information is displayed:
•
LAT/LON DISPLAY
•
TIME DISPLAY
•
TIME OFFSET
•
TIME FORMAT
•
COG/SOG
2. Select the relevant option.
3. Select
ON
to display this information on-screen and
OFF
to
hide the information
Getting started
39
Содержание Ray260
Страница 2: ......
Страница 4: ......
Страница 18: ...18 Ray260 ...
Страница 30: ...30 Ray260 ...
Страница 52: ...52 Ray260 ...
Страница 60: ...60 Ray260 ...
Страница 64: ...64 Ray260 ...
Страница 68: ...68 Ray260 ...
Страница 72: ...72 Ray260 ...
Страница 73: ...Chapter 12 Technical support Chapter contents 12 1 Raymarine customer support on page 74 Technical support 73 ...
Страница 80: ...80 Ray260 ...
Страница 92: ...92 Ray260 ...
Страница 93: ......
Страница 94: ...www raymarine com ...


