L750 Fishfinder: Installation and Operation Handbook
14
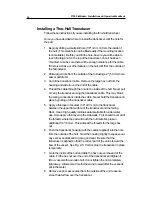
6. Attach the bracket to the hull using the panhead screws with flat
washers. Before you tighten the screws, apply a good-quality
marine sealant to the pilot holes. This will protect the hull from water
penetration. Do not tighten the screws completely yet.
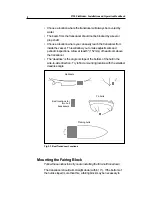
7. Move the bracket up or down so that the leading edge of the
transducer has the clearance shown in Fig. 2-9.
8. Once the bracket is in the correct position, you can tighten the
screws.
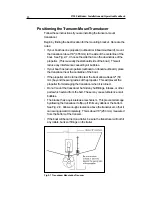
Fig. 2-9 Correct Mounting Position
Vertical transom –
place wedge this way
Average transom angle–
no wedge necessary
Sloping transom–
place wedge this way
For fiberglass hull – 1/8" to 1/4" (3.2 to 6 mm)
For aluminum hull – 1/4" to 3/8" (6 to 9 mm)
Rivets on the hull are
creating bubbles.
Lower the transducer
a bit.
The bow of the transducer
is above the bottom of the
transom, creating
cavitation.
The rear of the transducer
is too high, creating
cavitation.
2 to 5
2 to 5
2 to 5
No!
No!
No!
Содержание L750
Страница 2: ...L750 Fishfinder Operation Handbook Raymarine...
Страница 3: ......
Страница 9: ...L750Fishfinder InstallationandOperationHandbook vi...


