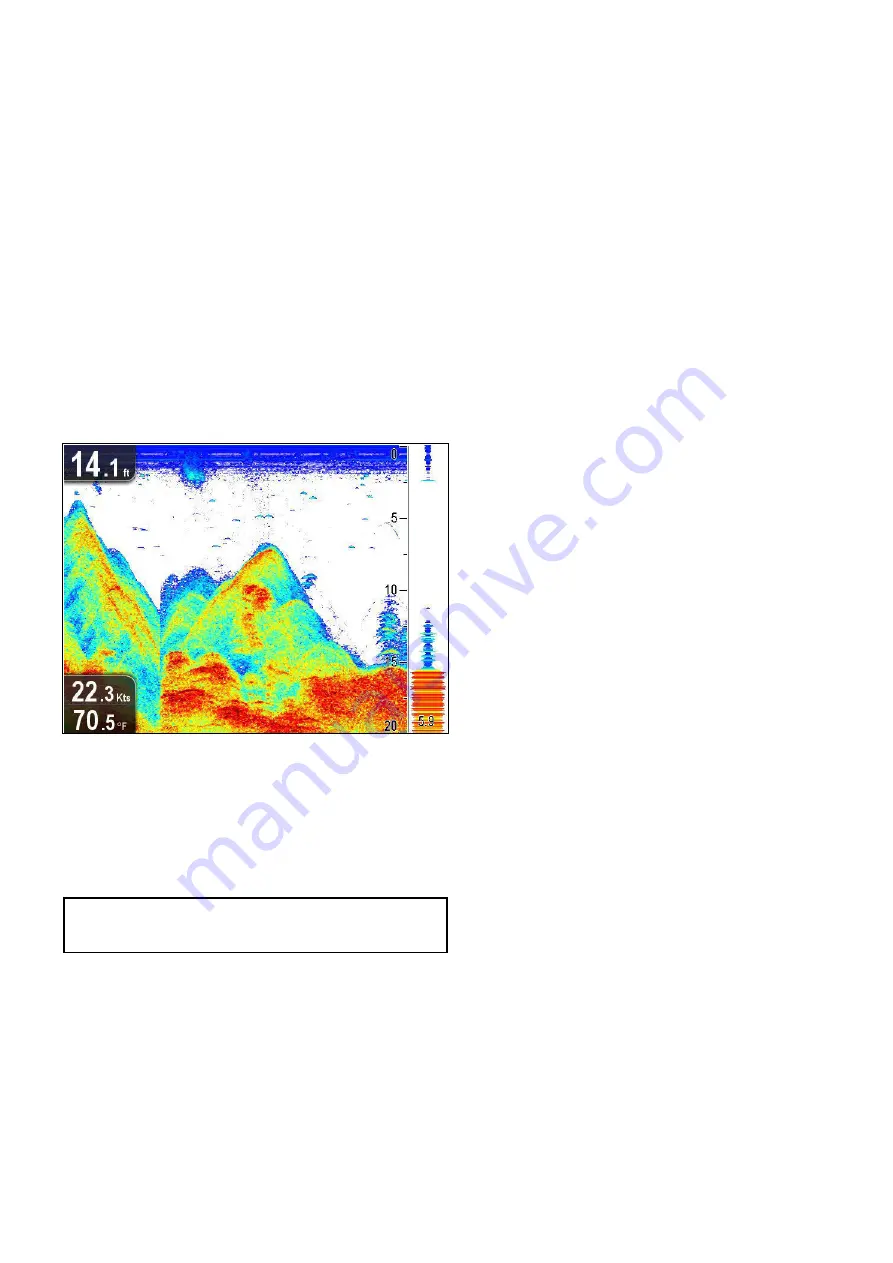
Adjusting the position of the zoomed area
In Zoom mode the system automatically selects the zoom
position so that the bottom is always in the lower half of the
display. If required you can reposition the portion of the image
that is zoomed so that an alternative area is displayed.
In Zoom mode, from the application menu:
1. Select
Display Options
.
2. Select
Zoom Position
so that Man is highlighted.
The Manual Zoom Pos: menu item is now displayed in the
Display Options menu.
3. Select
Manual Zoom Pos:
.
Selecting the zoom position displays the zoom position
control dialog.
4. Adjust the setting to the required value.
5. Press the
Back
button or the
OK
button to confirm the
settings and return to the Display Options menu.
A-Scope mode
The standard image shows a historical record of target echoes.
If required, you can display a live image of the bottom structure
and the fish directly below the transducer by using A-Scope
mode. The width of the bottom covered by the A-Scope is
indicated at the bottom of the window. A-Scope provides a more
precise and easier to interpret indication of the target strength.
Enabling / Disabling Target Depth ID
You can display the depth of targets on-screen.
From the application menu:
1. Select
Display Options
.
2. Select
Target Depth ID
.
Selecting Target Depth ID will switch the target depth
indicator On and Off.
Note:
The strength of targets which display a depth ID is
related to the Fish sensitivity setting, accessible from the
Alarms menu.
Enabling / Disabling Depth Lines
You can display horizontal depth lines on-screen.
From the application menu:
1. Select
Display Options
.
2. Select
Depth Lines
.
Selecting Depth Lines will switch the horizontal depth lines
On and Off.
Enabling / Disabling the White Line
You can display a thick line on-screen to represent the bottom,
this line is primarily white in color (depending upon color palette
chosen).
From the application menu:
1. Select
Display Options
.
2. Select
White Line
.
Selecting White Line will switch the bottom line On and Off.
Scrolling
The image scrolls from right to left. You can pause the scrolling
or adjust the scroll speed, to ease placing of waypoints and
target identification.
Scroll speed
You can adjust the speed at which the image scrolls. A faster
speed provides more detail which may be useful when you are
looking for fish. If you select a slower speed the information
remains on the display for longer.
Scroll pause
You can pause the display to see a ‘snapshot’ of the image.
When the image is paused scrolling stops but the depth
indication continues to be updated.
Adjusting the scroll speed
From the application menu:
1. Select
Display Options
.
2. Select
Scroll Speed
.
The Scroll speed numeric adjust control is displayed.
3. Use the
Rotary control
to adjust the scroll speed between
0% to 100%.
4. Press the
Ok
or
Back
button to confirm and close the
numeric adjust control.
Pausing the scrolling image
With the display scrolling from right to left:
1. Move the
Joystick
directional controls in any direction.
The Scrolling will pause.
2. Press the
Back
button to resume scrolling.
Sonar application
63
Содержание E70085 Dragonfly
Страница 2: ......
Страница 4: ......
Страница 6: ...16 1 Technical specification 92 Chapter 17 Spares and accessories 93 17 1 Accessories 94 6 Dragonfly ...
Страница 10: ...10 Dragonfly ...
Страница 14: ...14 Dragonfly ...
Страница 18: ...18 Dragonfly ...
Страница 28: ...28 Dragonfly ...
Страница 32: ...32 Dragonfly ...
Страница 52: ...52 Dragonfly ...
Страница 70: ...70 Dragonfly ...
Страница 78: ...78 Dragonfly ...
Страница 82: ...82 Dragonfly ...
Страница 89: ...Chapter 15 Technical support Chapter contents 15 1 Raymarine customer support on page 90 Technical support 89 ...
Страница 93: ...Chapter 17 Spares and accessories Chapter contents 17 1 Accessories on page 94 Spares and accessories 93 ...
Страница 95: ......
Страница 96: ...www raymarine com ...


