


20
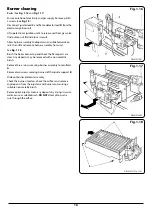
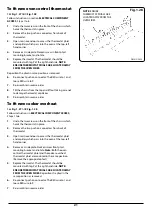
Electrical component access
BEFORE REMOVING SERVICE ACCESS COVERS ENSURE
THAT ALL ELECTRICAL ACCESS TO THE APPLIANCE HAS
BEEN SWITCHED OFF (SWITCH OFF AND REMOVE PLUG).
SEE
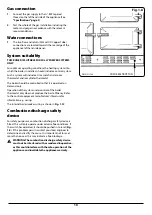
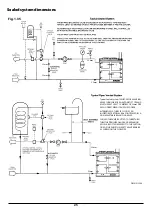
Fig. 1.25
1.
Remove the controls door and place in a safe position.
2.
Remove both thermostat control knobs.
3.
Remove the 2 cover panel fixing screws.
4.
Remove cover panel.
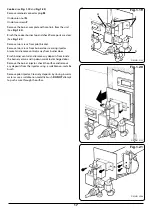
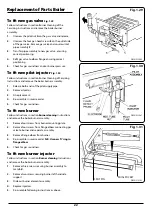
SEE
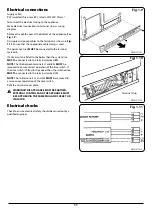
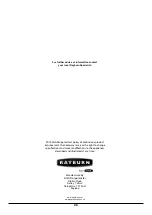
Fig. 1.26
5.
Remove the two control panel fixing screws.
6.
Tilt the chassis from the top and lift out taking care not
to damage thermostat capillaries.
7.
Re-assemble in reverse order.
DESN 512150
DESN 512131
Fig. 1.25
Fig. 1.26
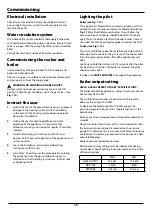
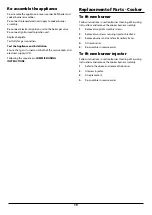
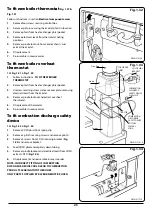
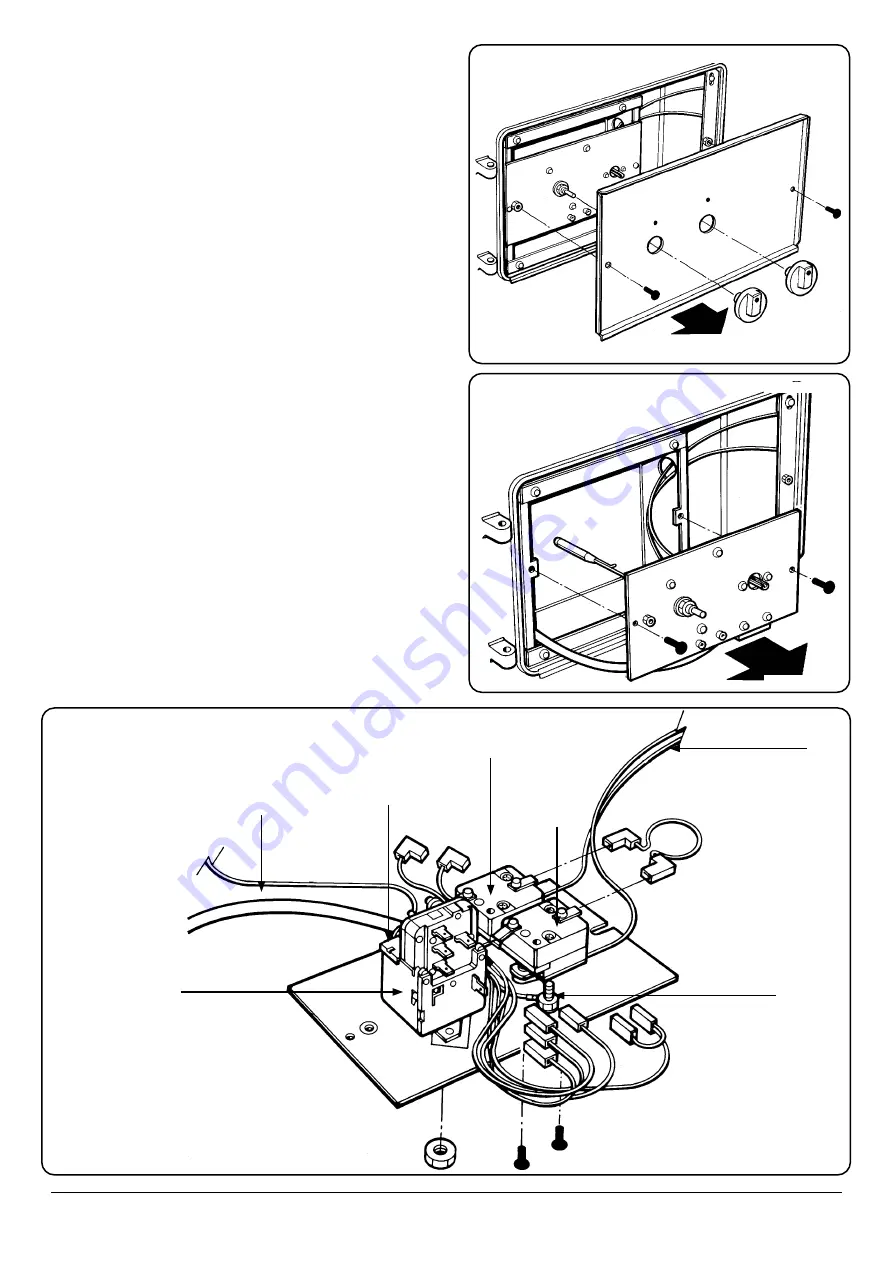
Fig. 1.27
BOILER
THERMOSTAT
CAPILLARY
BOILER
THERMOSTAT
CABLE CLAMP
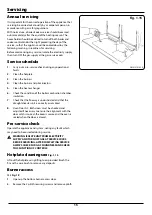
COOKER OVERHEAT
THERMOSTAT
THERMOSTAT
CAPILLARIES
EARTH POST
COOKER
THERMOSTAT


